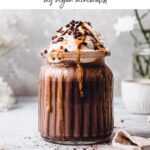
My delicious vegan chocolate milkshake recipe is easy, fail-proof and super thick. With a hint of vanilla, banana, and peanut butter, it’s the perfect pick-me-up drink.
Why make this shake
- Super easy recipe.
- No prep work needed, just blend and drink!
- Super bubbly and deliciously creamy
- Kids love it! A great way to get them interested in vegan food
- Based on sweet vanilla ice cream (but works with others too!)
- Enriched with peanut butter
- Easy to customise
- Bubbly, thick and chocolatey.
I’ve been perfecting this recipe for years so I could bring you the best non-dairy milkshake out there. Let's see what goes into it.
What goes into this recipe
These are the ingredients you’ll need to make my milkshake.
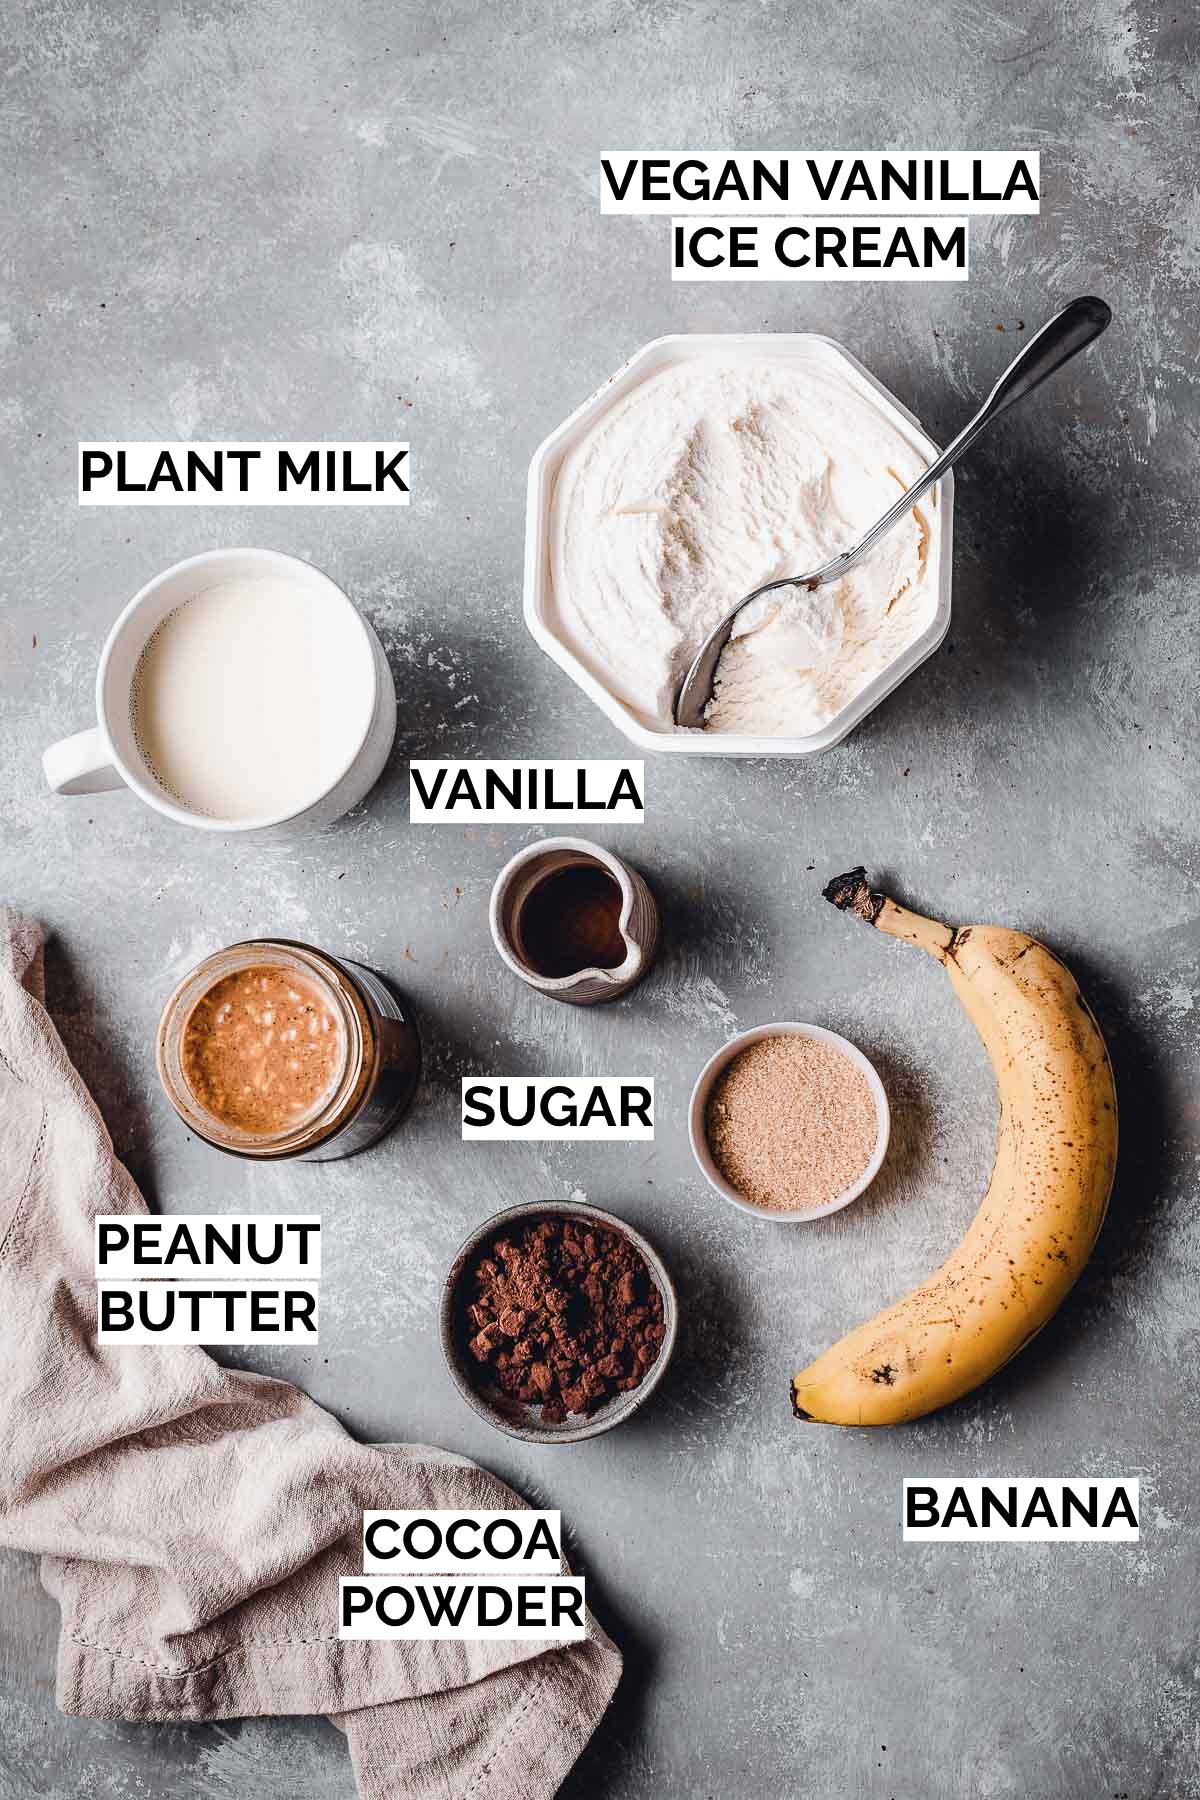
Sugar: completely optional. I used brown sugar.
Banana: use ripe, frozen banana. You might not think bananas belong in milkshakes, but it’s a great way to make it thicker and add a whole new flavour dimension.
Plant milk: any plant milk (such as almond, coconut, soya, etc.) can be used here. I recommend using barista versions of plant milk as they are much thicker and will make your milkshake a lot creamier.
Vegan vanilla ice cream: can be substituted for any other vegan ice cream.
You will also need the following equipment:
- Blender
- Optional: ice cream scoop for topping
Step-by-step Photos
Milkshakes can be so expensive when ordered in a restaurant. The best thing about this one is that you can make several portions for the price of one restaurant shake (or less!)
And what’s more, you can even customise it according to taste.
Looking for the full recipe with exact ingredients? Scroll down to the bottom of this page!
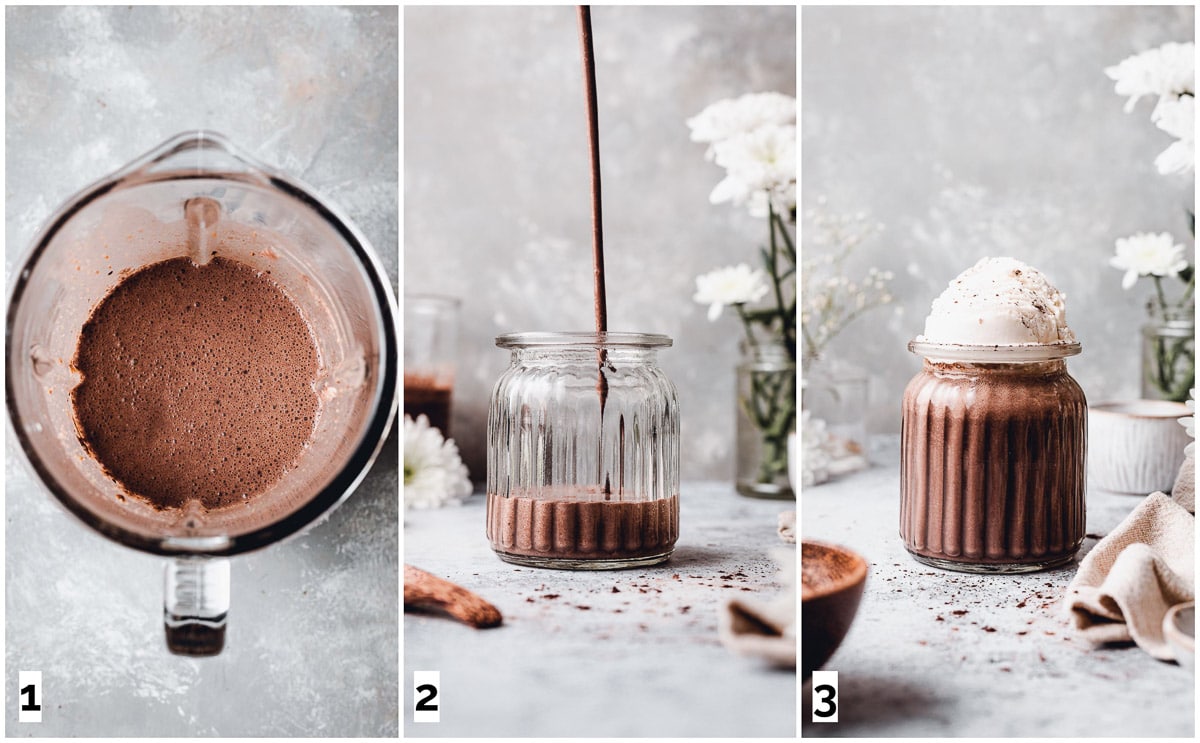
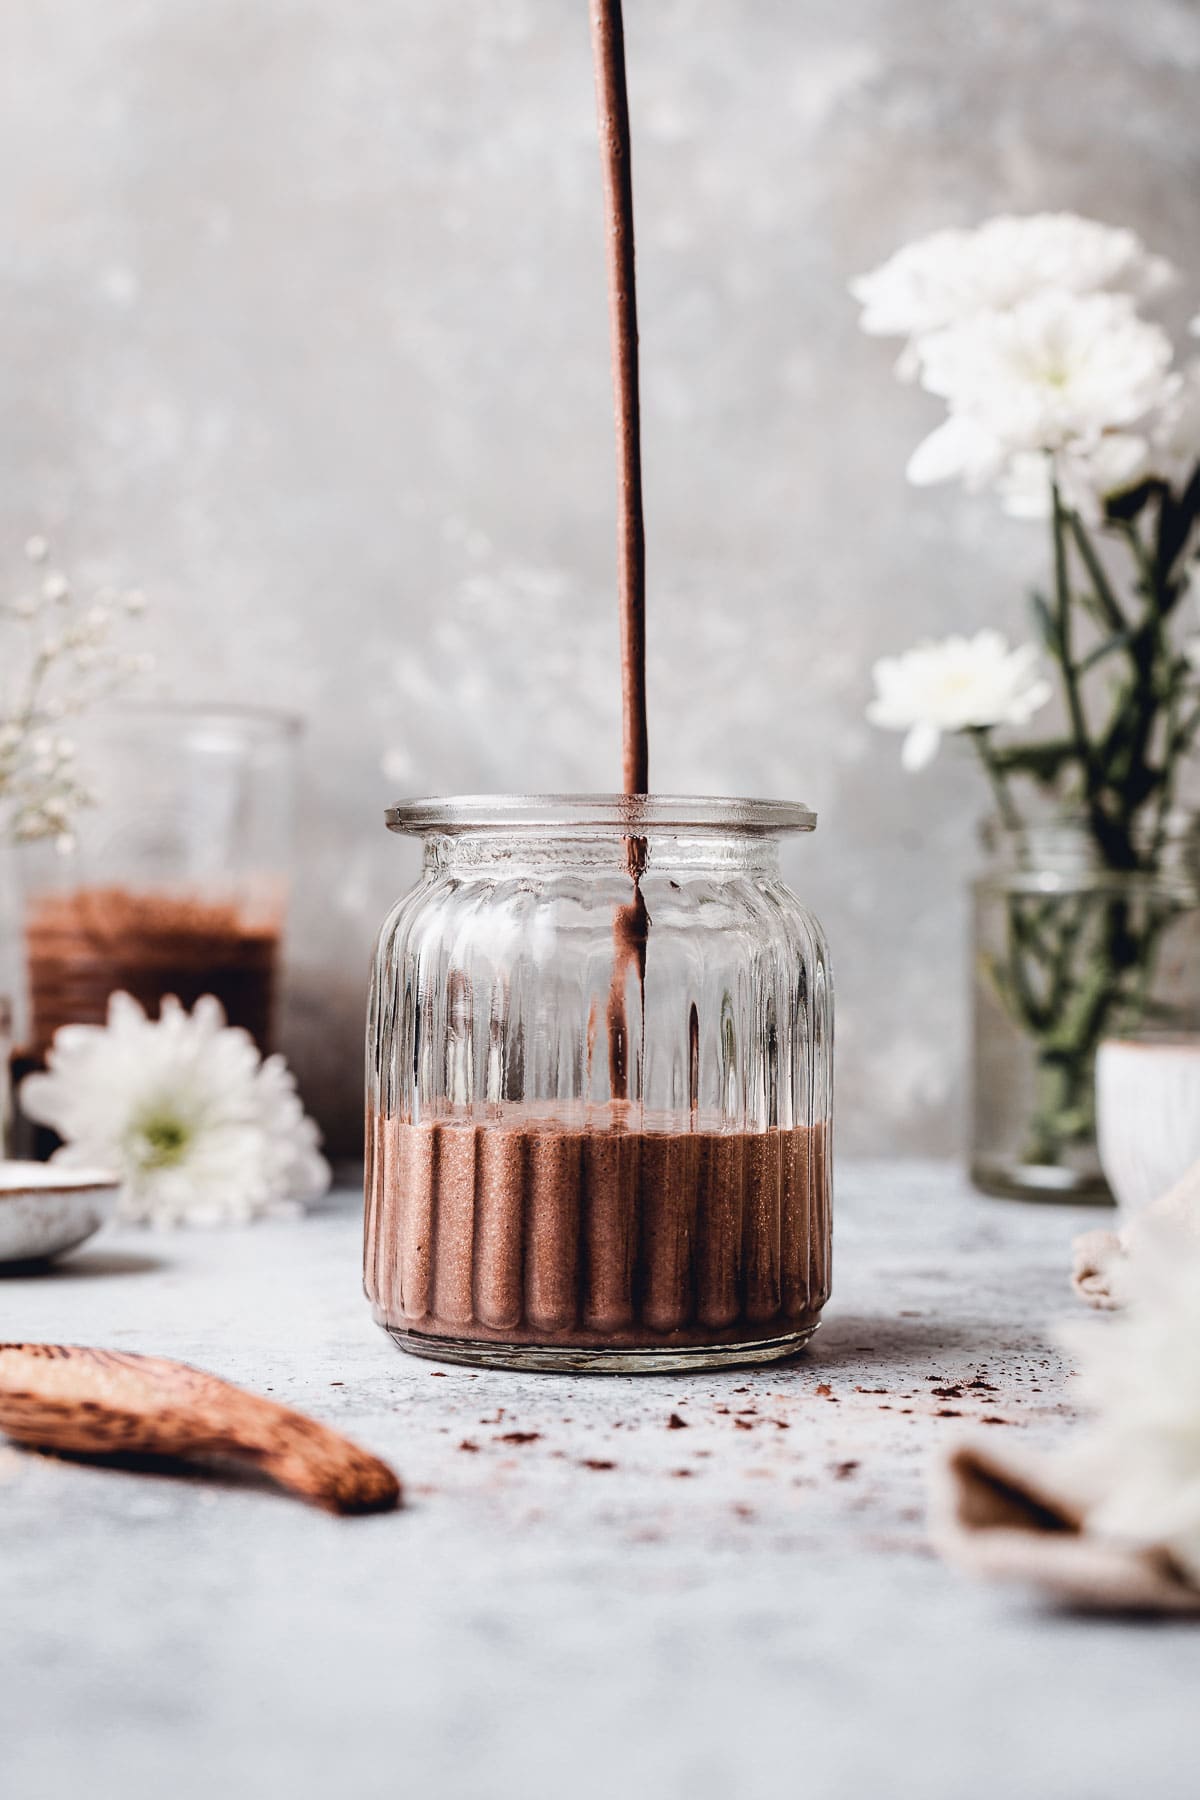
- Add all your ingredients to the blender. Blend at high-speed for approx. 2 minutes until completely smooth and runny. If needed, stop from time to time and scrape off the sides of the blender with a silicone spatula.
- Pour into a glass.
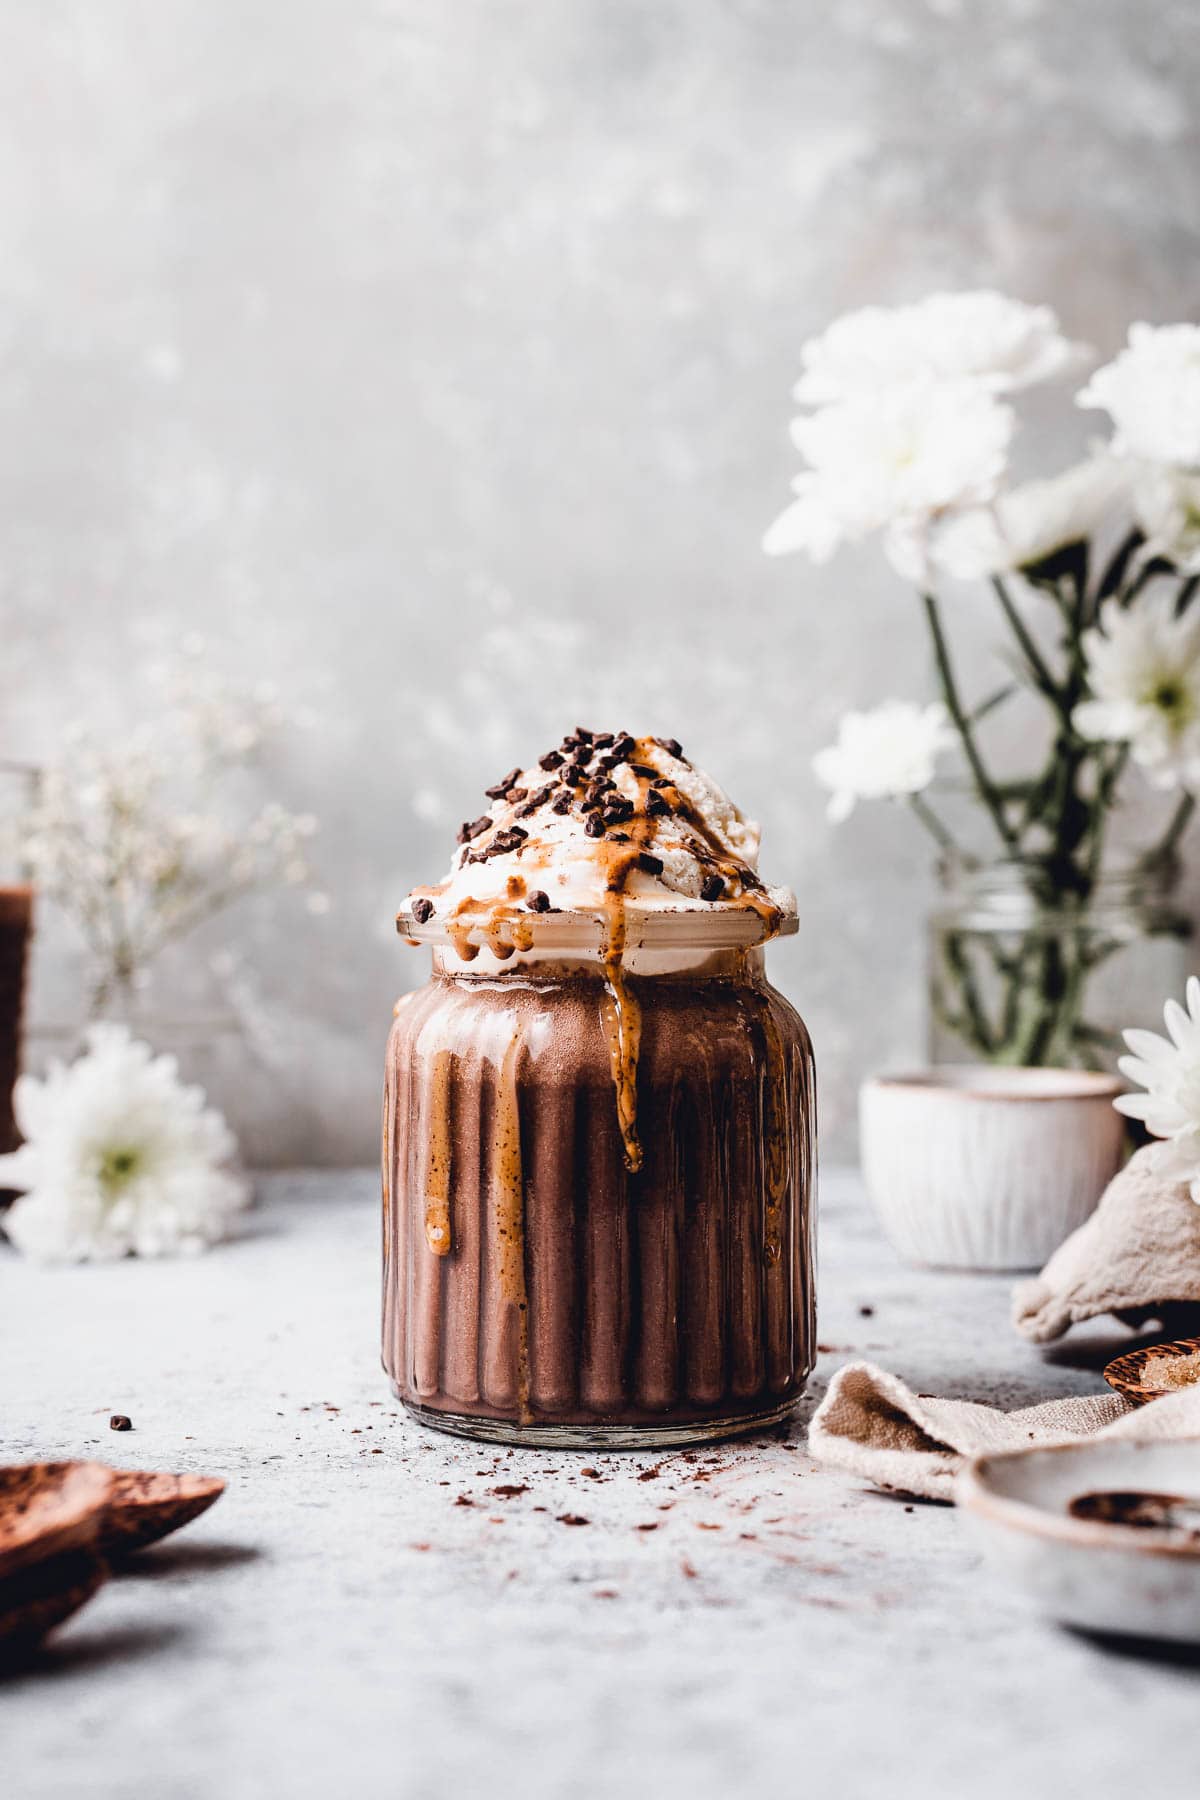
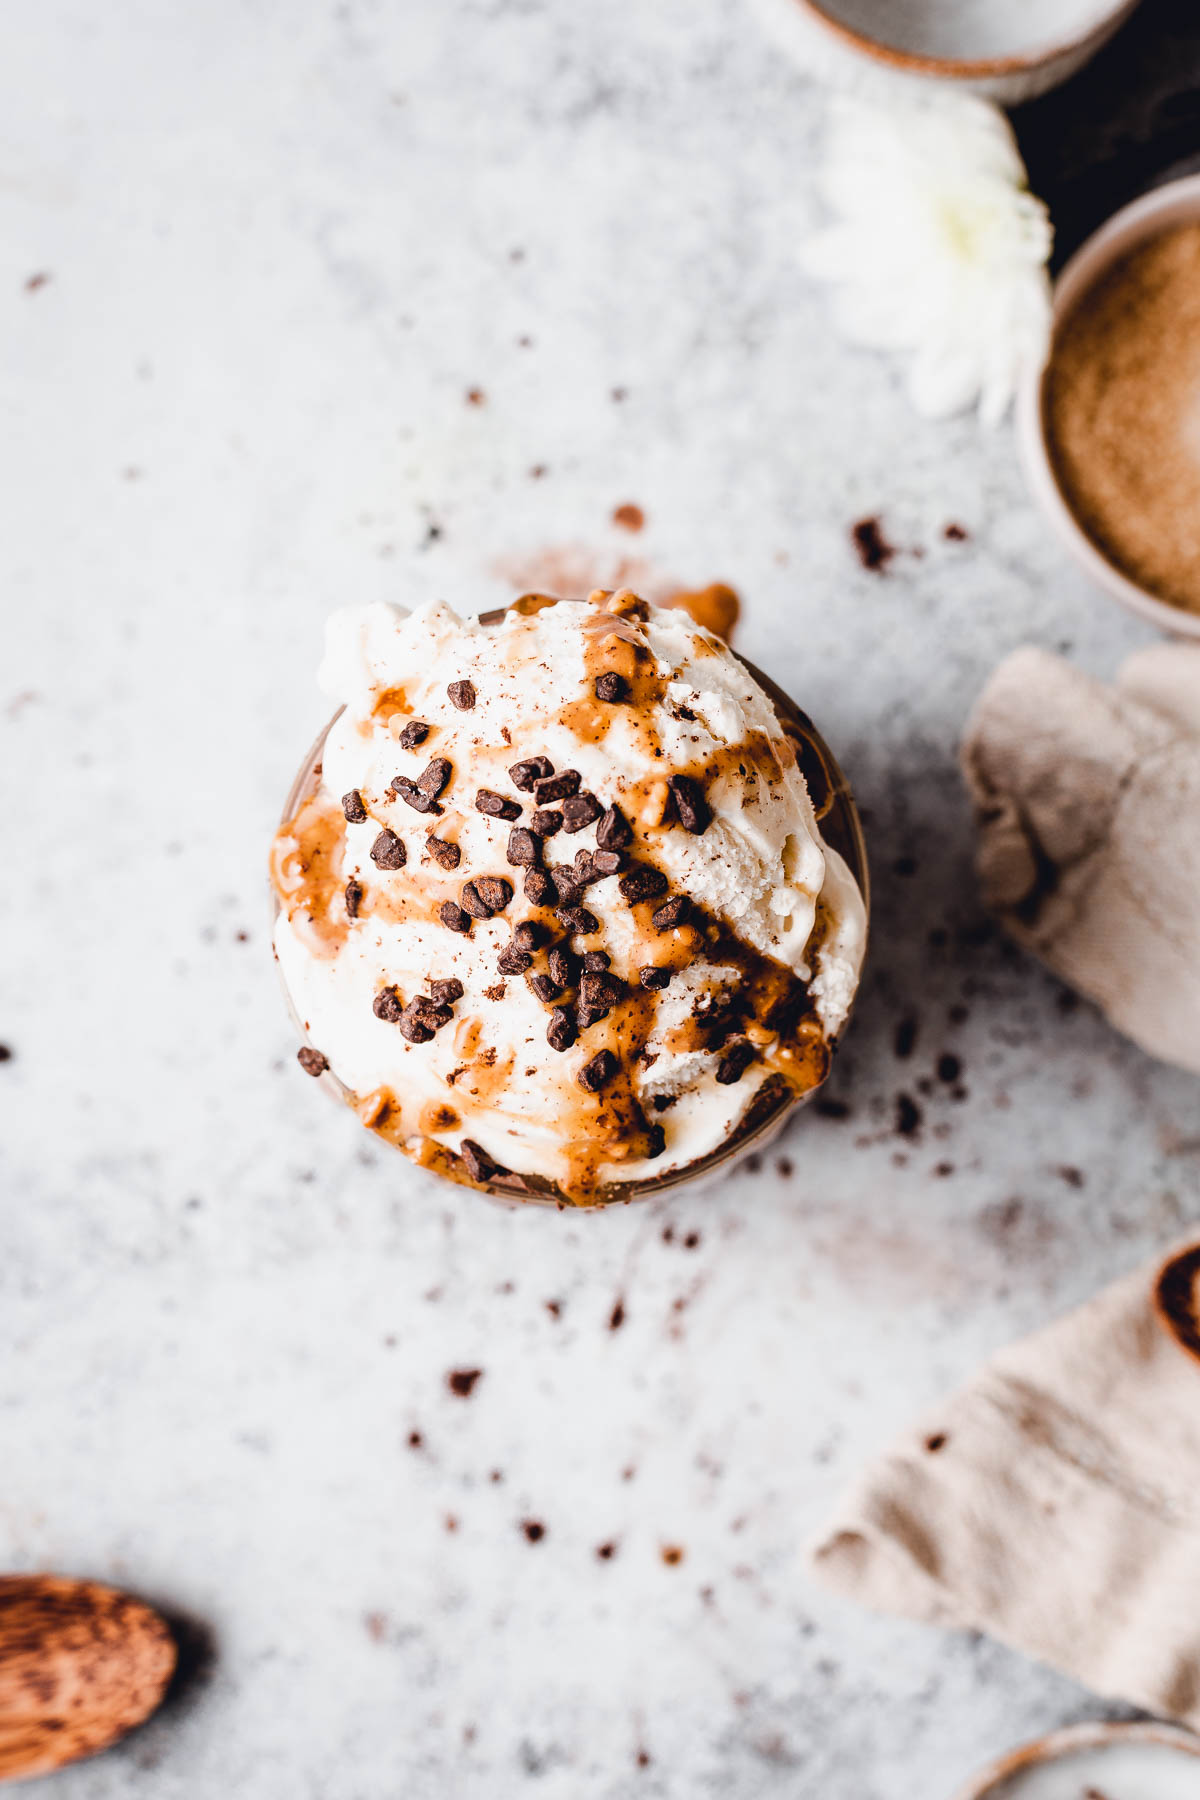
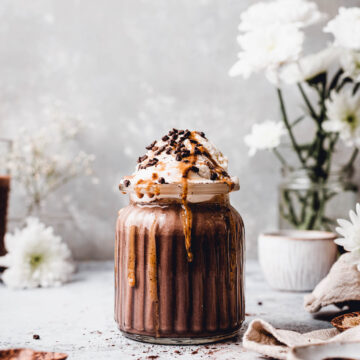
- Time to add toppings and serve. I love topping it off with an extra spoon of vanilla ice cream. If you’ve got chocolate sauce on hand, that’s a fantastic topping too.
My Top Tips
Don’t miss out on these expert tips if you want to make the best ever vegan chocolate milkshake.
1. Use natural peanut butter
Make sure to use peanut butter that contains peanuts only. Check the ingredients list and make sure there is no added salt, sugar or oil. This will give you the richest peanut taste.
2. Pick good quality cocoa
This recipe only requires a few ingredients so make sure you pick good quality ones for the best results. If you’re in a position to do so I recommend splashing out just a little on good quality cocoa powder! Trust me it will be worth it.
3. Don’t be shy with toppings
If you’re going to make a chocolate milkshake, you might as well make it into an ultimate treat. This is why I urge you to never skip the toppings as they will really take the milkshake to a whole new dimension. Topping recommendations can be found in the FAQ section below.
4. Don’t let it melt
Make sure your ice cream is still frozen when adding to your blender. Of course, you can let it thaw gently before adding to the blender, but don’t wait too long. If your ice cream is too melted by the time you add it to the milkshake, your shake will end up being too thin and runny.
Optional tip: Use barista plant milk
This isn't at all necessary, but wil add that extra thickness to your shake. If you're not able to find barista versions of plant milk, don't worry at all. You will still get a delicious, thick and creamy shake if you follow this recipe.
Leading plant milk brands such as Alpro, Oatly, Good Hemp all make their barista (sometimes called professional) plant milks.
FAQ
I would highly recommend drinking this milkshake as soon as you’ve made it. Seeing that it’s made from a ripe banana, its quality will start to deteriorate quickly.
If you’d still like to store it anyway, I recommend popping it into an airtight container in the fridge and eating it wihin 24 hours.
Serving a milkshake is super easy and mess-free. Simply pour it into a glass, leaving some space on top. Then add your optional toppings.
I like to top mine with a scoop of vanilla ice cream, dairy free chocolate sauce and chocolate sprinkles.
You could top yours with chopped peanuts to really emphasize that rich peanut flavour. Or you could top it off with whipped coconut cream, caramel sauce or maple syrup.
Frozen bananas are great! You could try adding some more frozen banana or even another tablespoon or two of ice cream.
If your shake is too runny, you’ve added too much liquids. Find out more suggestions on how to thicken your milkshake here.
It's easy! You will need your milk and ice cream base, but cocoa powder is what gives this shake its chocolatey taste.
Make sure to pick high quality cocoa and not go overboard as adding too much cocoa can result in a bitter flavour.
Enjoyed my vegan choc vanilla milkshake? Come along, I have plenty more vegan chocolate delights for you. Why not try out my chocolate banana bread, aquafaba mousse, chocolate shortbread or oat milk hot chocolate. Or check out my whole vegan desserts section.
If you’ve made my simple chocolate shake I’d so love to hear your feedback and see your creations.
Seeing your recreations of my recipe never fails to make my day! Or if you have any comments and suggestions, get in touch via the comments section below.
PS - I often get asked about how I improved my food photography. Find out all about the online course that helped me become a full-time food photographer!
🍴Recipe
Vegan Peanut Butter Chocolate Milkshake
Equipment
- Blender
Ingredients
- ⅔ cup (100 ml) almond milk or other unsweetened plant milk
- ½ teaspoon vanilla extract
- 2 tablespoon peanut butter use natural peanut butter
- 3 tablespoon cocoa powder
- 1,5 cups dairy-free vanilla ice cream
- 1 banana frozen
- 1 teaspoon brown sugar optional
- TOPPINGS: a scoop of dairy-free vanilla ice cream, 1 teaspoon desiccated coconut, 1 teaspoon cocoa nibs, 1 teaspoon peanut butter sauce or chocolate sauce optional
Instructions
- Add all your ingredients (except toppings) to your blender.
- Blend at high speed for 2 minutes until completely smooth.
- Pour into 2 glasses. Add a scoop of ice cream to each glass and top off with toppings of choice.
Video
Notes
- Make sure to always add liquid ingredients to your blender first.
- Then add all the lighter ingredients (such as powders, sugar). On the very top, add all your heaviest ingredients (ice cream, banana, etc).
- If you can, use peanut butter that contains peanuts only (no added salt, sugar or oil).
- If you’re in a position to do so I recommend splashing out just a little on good quality cocoa powder!
- I urge you not to skip the toppings as they will really take the milkshake to a whole new dimension. Enjoy!
Nutrition
Disclaimer: The nutritional information above is calculated automatically. The author of this post cannot guarantee 100% accuracy of this data.
Rachel
This one is going straight to my BOOKMARKS! Had no idea it was this easy to make a vegan milkshake, but i'm definitely trying it out!
My Vegan Minimalist
Yessss, it's my go-to dessert on lazy days! Hope you love it! ♡
Gary
No honestly I'm not stalking you.
I just thought you might like to know people are reading nad making these recipies.
It was another success, tasted fab.
We shared the one drink between the two of us.
Thanks
Tajda Ferko
Haha thank you so much Gary, this honestly means the world. Glad you are making and enjoying the recipes from this blog so much - really happy to hear that!
Susie
Even though I didn't have enough ice cream left to follow this recipe exactly, I substituted extra frozen bananas, and it came out great. Will definitely make again.
How come in the tips section, in says to use frozen bananas, but the Ingredients, it says to use chilled, not frozen bananas? Wouldn't frozen make it thicker and creamier?
Tajda Ferko
Hi Susie! Thank you for the lovely review, I really appreciate it. That was definitely a typo - I just corrected it. It should have said frozen bananas everywhere 🙂 Thank you for noticing and letting me know! x