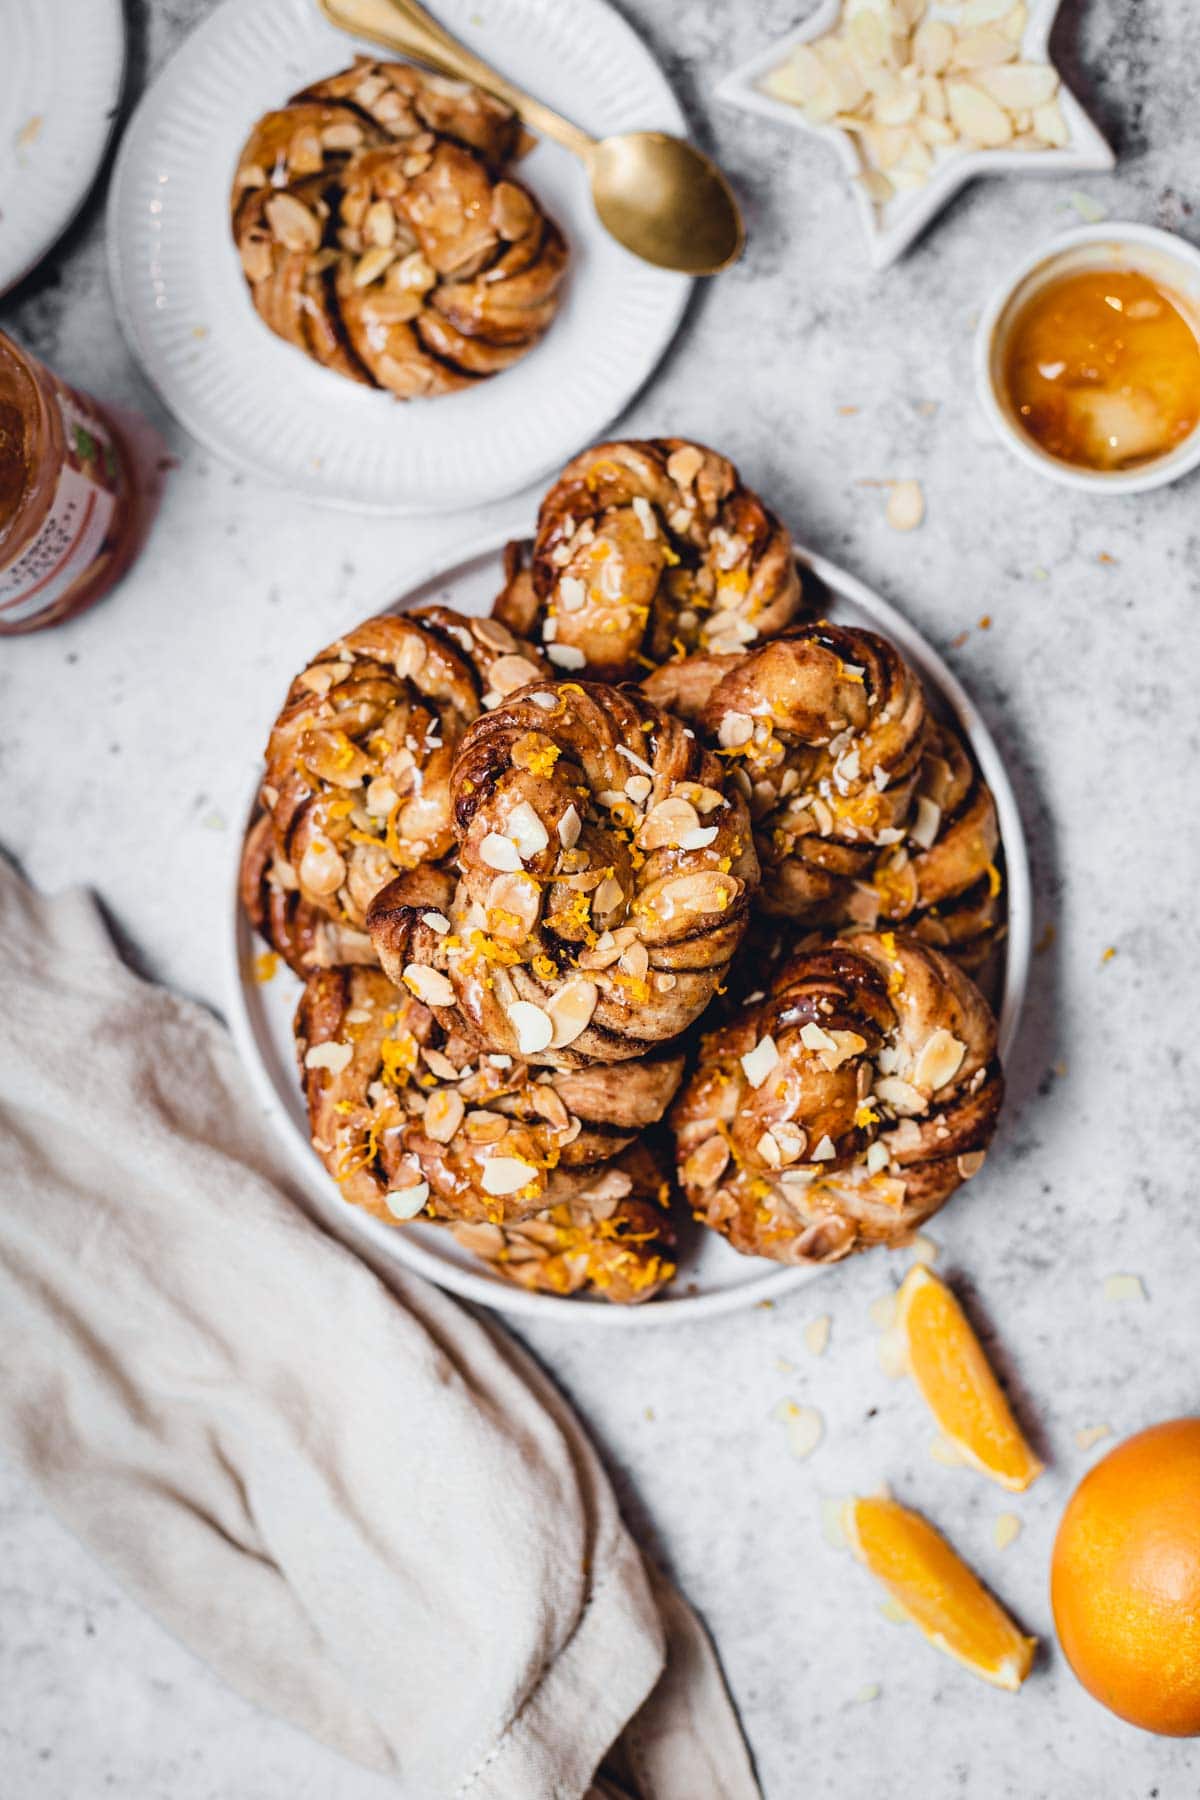
Pillowy and perfect vegan orange cardamom buns. Soft in the middle but crunchy and golden on the outside, these will instantly turn your kitchen into a bakery! Topped off with golden almond flakes and apricot jam.
Why Choose This Recipe?
- The best flavour combination - orange, cardamom and shaved almonds.
- So good you won't want to share them.
- Includes a recipe for a homemade apricot glaze.
- Crunchy on the outside, airy on the inside.
- A hint of zingy orange flavour
The Ingredients
To make your buns, you will need the ingredients in the photo below.
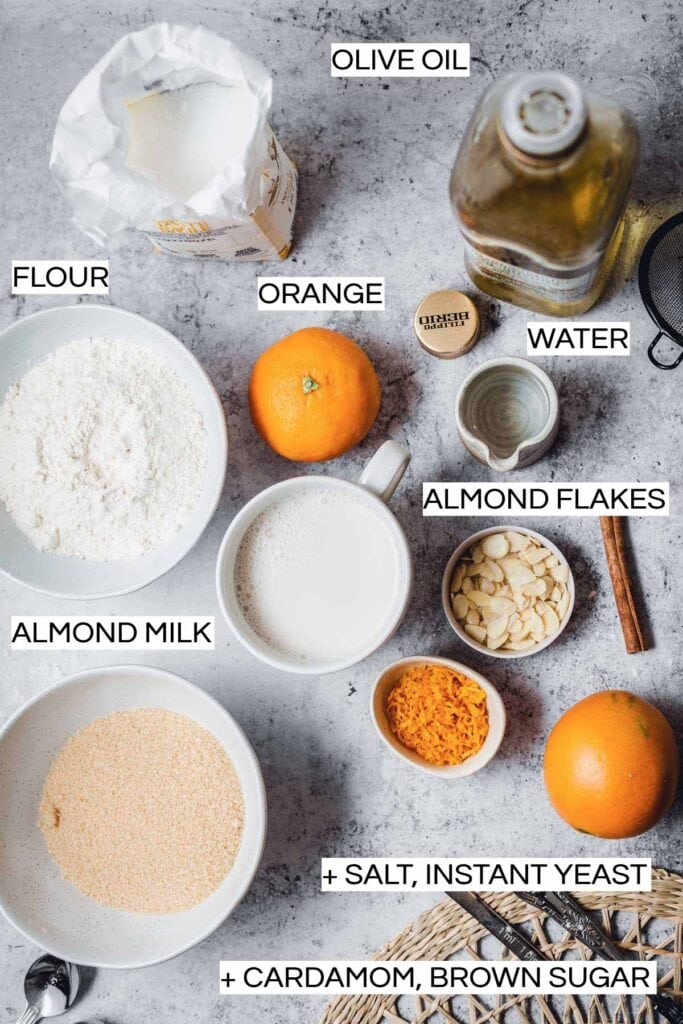
You will also need the following ingredients to make your filling and glaze:
- brown sugar
- dairy-free butter
- cinnamon
- cardamom
- oranges
- apricot jam (or other jam of choice)
In terms of the equipment, it might come in handy to have a breadmaker, but that's entirely optional!
If you don't have one, there's no need to worry. Whilst having a breadmaker makes the kneading process a tad easier, it's far from necessary.
Recipe Outline
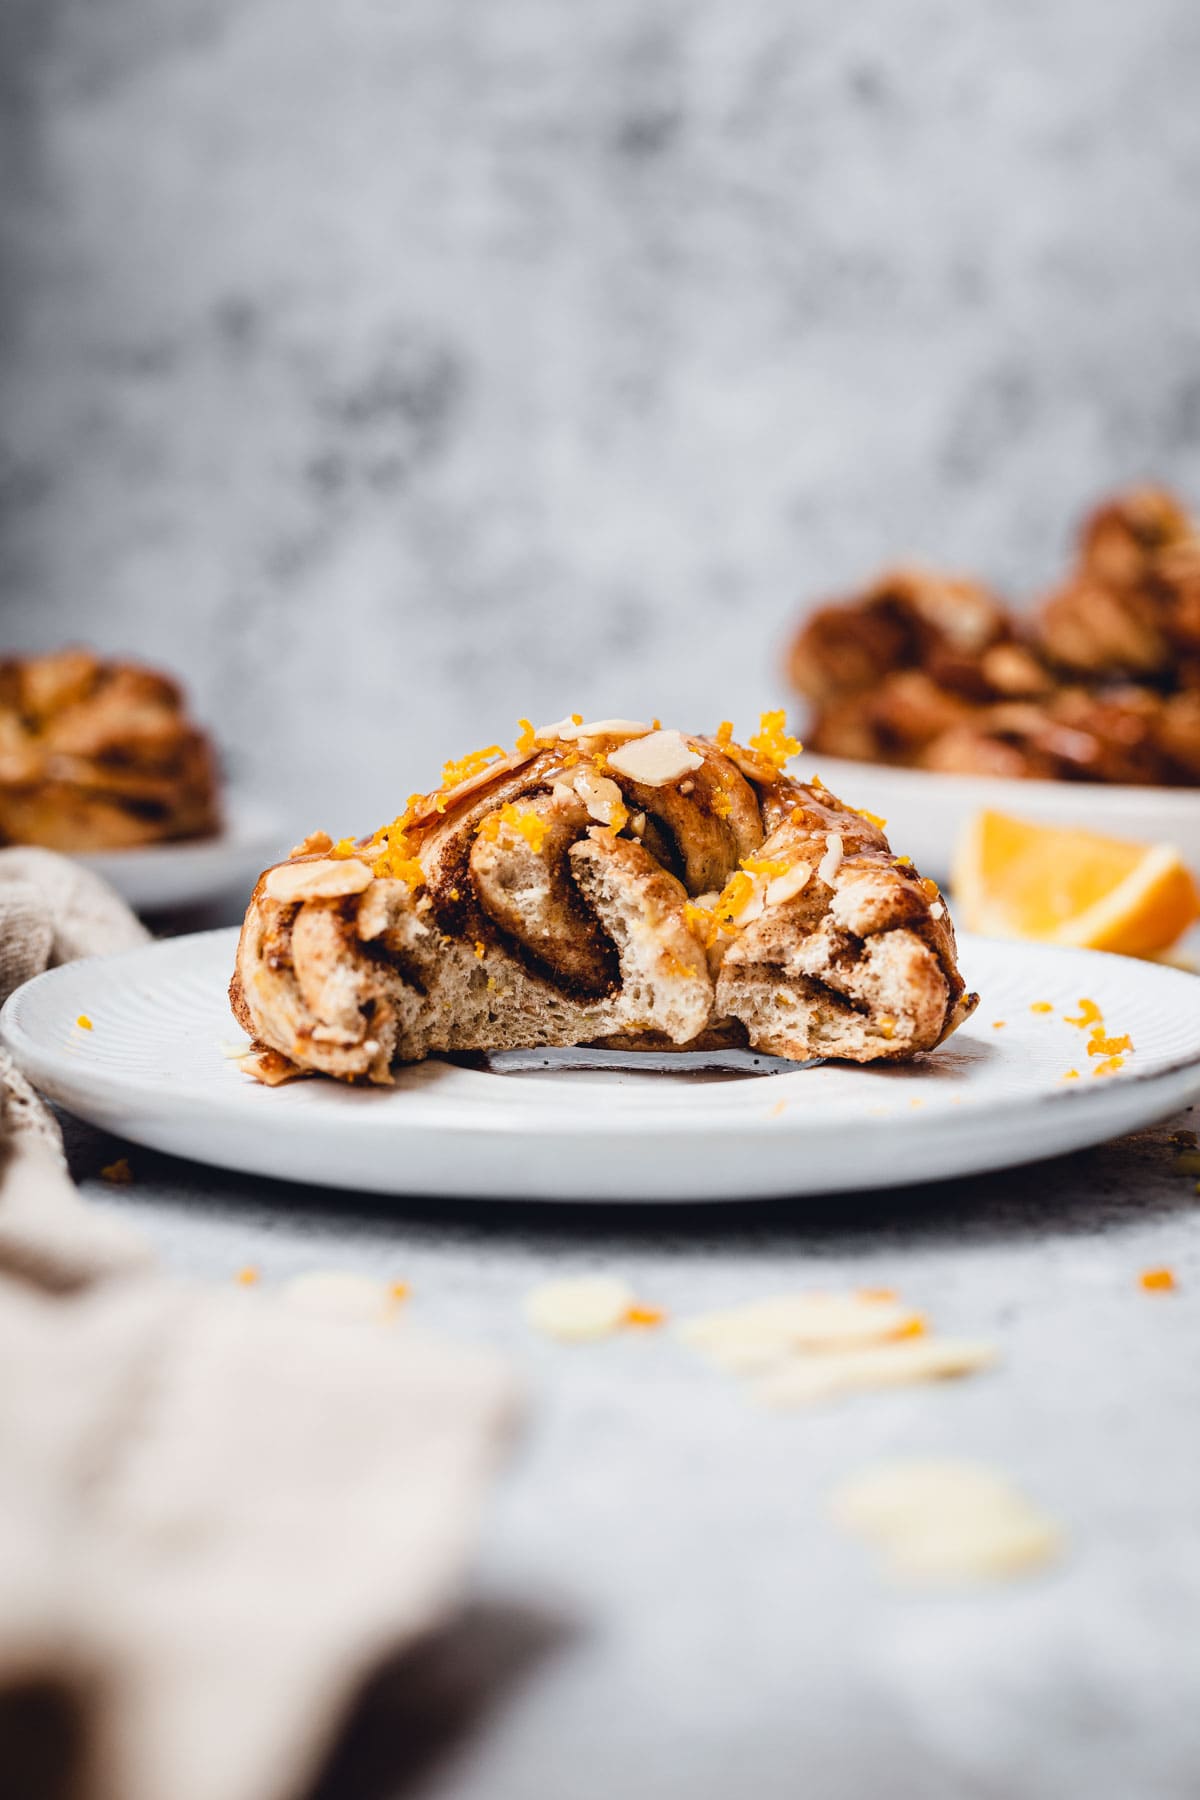
If you have any previous experience in making knot buns, you will know it's a surprisingly easy job.
Every single step is shown in the photos below and thorough instructions are available for those wanting that extra bit of guidance.
The process of making these vegan orange cardamom buns goes as follows:
- 1 - Combine the ingredients into a dough and knead.
- 2 - Let rise.
- 3- In the meantime, make the simple filling.
- 4 - Roll out the dough, cover with filling and form into knot shapes.
- 5 - Let rise again.
- 6 - Pop into the oven and bake!
- 7 - Glaze with homemade jam glaze and enjoy!
Step-by-Step Guide
Got all your ingredients? Let's dive straight in!
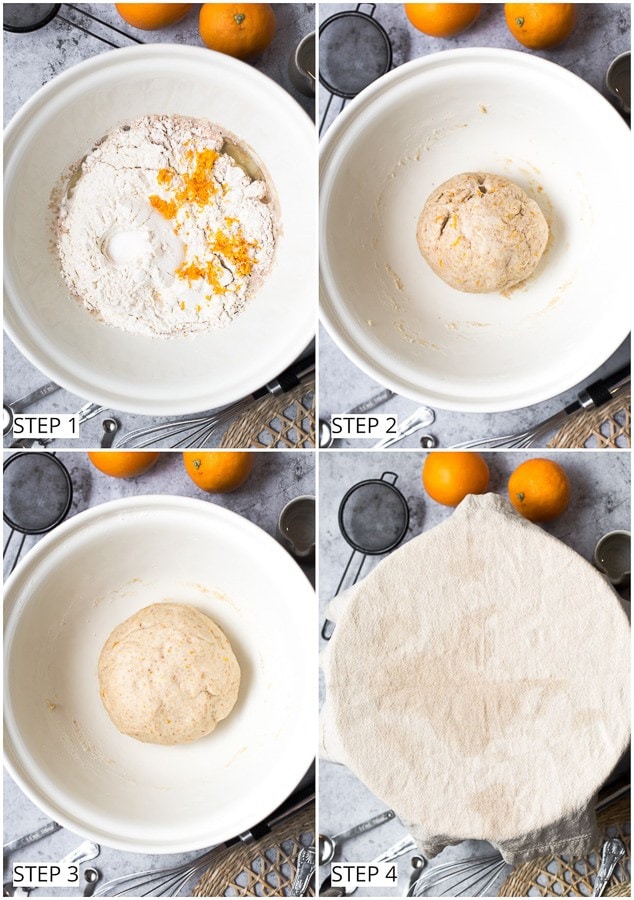
- First, add warm almond milk and water to a large mixing bowl. Then add the rest of the dough ingredients in the following order: yeast, olive oil, flour, cardamom, orange zest, and finally, salt. Please do ensure you follow this order. It's particularly important that the salt and yeast do not touch. If you look carefully at Image 1 you will find that I made a little well in the dough and filled it with salt. This ensures the salt doesn't touch and subsequently kill the yeast.
- Bring all the ingredients together to form a small dough ball. If you're having any trouble forming the dough, please refer to the troubleshooting section below.
- Knead for approx. 10 minutes (either in a breadmaker or by hand). By this point, your dough should be elastic and shaped into a loose ball. Image 3 shows how your dough should look after a 10-minute knead period.
- Finally, cover your dough with a large damp cloth and let rise at room temperature for at least 1 hour until doubled in size. Make sure the cloth doesn't touch your dough.
Whilst your dough is rising, prepare your filling simply by mixing sugar, cardamom, cinnamon, dairy-free butter and orange zest in a small bowl.
Once your dough has doubled in size, it's time to roll it out and get creative. This is the fun part! Wondering how to make your perfect vegan know buns? Let's have a detailed look below!
Filling & Cutting
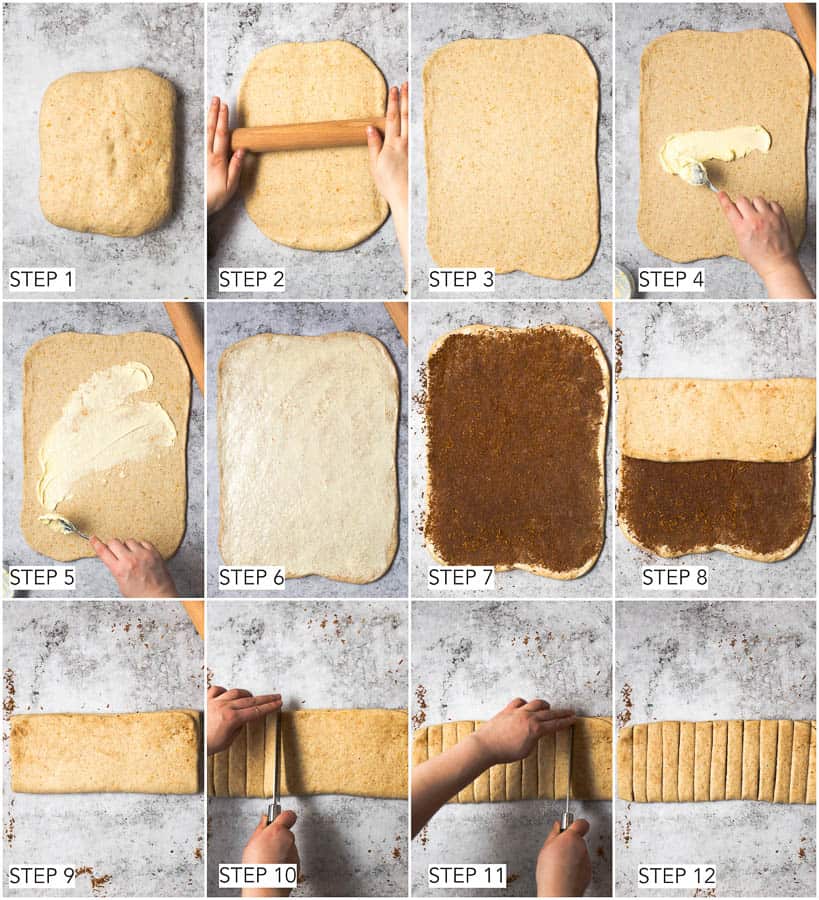
- Take your dough out of your mixing bowl and place it on a smooth, floured surface.
- Start rolling out your dough using a wooden or marble rolling pin.
- Roll out your dough until it measures approx. 0,5 cm in thickness (this is the equivalent of 0,2 inches).
- Use a spoon to spread out dairy-free butter equally across the surface.
- Keep spreading out your butter across the surface.
- The dairy-free butter is now equally spread across the dough.
- It’s time to add your filling. Spread it out equally across the surface.
- You will now need to fold your dough. Take the top third of your dough and carefully place it over the second third.
- Place the lower third of your dough over the second third to create a dough ‘pocket’. Press down the top side gently.
- Start cutting your dough.
- Cut it into 12 to 13 equally-sized rectangles.
- You’ve cut your dough into equal (more or less) shapes and you're close to the final steps now.
Well done! Now it's time to shape our pillowy dough into beautiful knots. You can follow the tutorial below or form them into any other knot shape of choice.
There are absolutely tons of ways of creating the knot, so feel free to go wild and let your creativity flow.
Shaping Your Buns
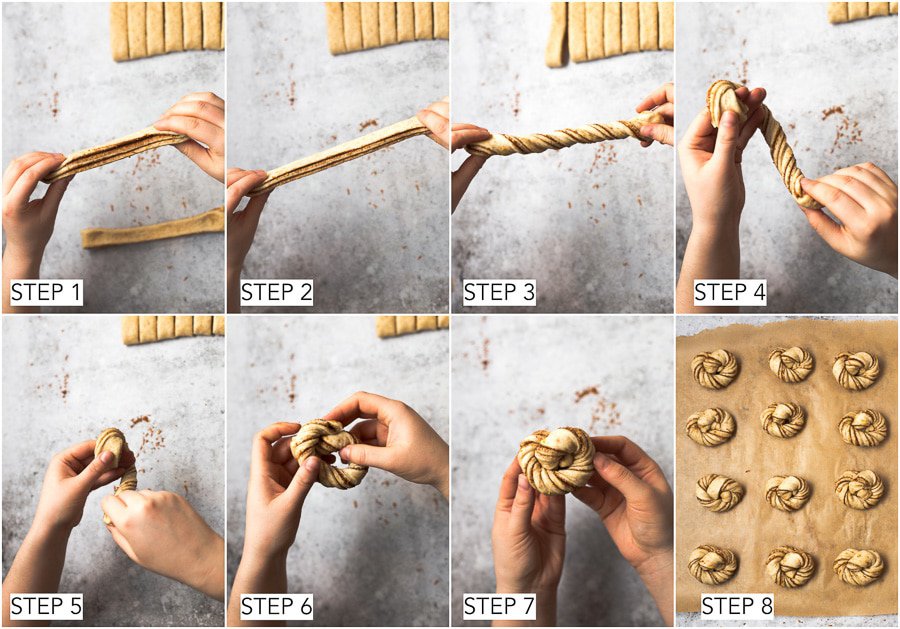
1 - Hold one strip of dough, one hand at each end.
2 - Very gently stretch the strip length-wise to create a longer, more compact strip of dough. Be careful not to squeeze it too hard as this might make the filling fall out.
3 - Hold the left end still whilst twisting the right end of the dough three times.
4 - Keep a hold of the left end of the dough and wrap the right end around the back of your fingers.
5 - 7 - Keep moving the right end to fold all the way around and over your left end of the dough. Finally, push the right end under the left to make your knot.
8 - Place all your cardamom buns on parchment paper.
Still having trouble forming your knots? This video tutorial shows you a very simple and quick way to form a knot.
Once you’ve got your knots ready on the parchment paper, it’s time to simply brush them over with almond milk, cover in cling film and let rise for at least 30 minutes. Do ensure that your cling film is NOT touching the buns at all.
You can do that by placing them in a large baking tray with higher sides and placing the cling film over the sides. Alternatively, you can use a taller object, e.g. glass/mug, to hold the cling film higher. Simply place four mugs or glasses at each side and cover with cling film.
In the meantime, you can pre-heat your fan oven to 356°F (180°C). If you're not using a fan oven you'll need to adjust the temperature to 392°F / 200°C.
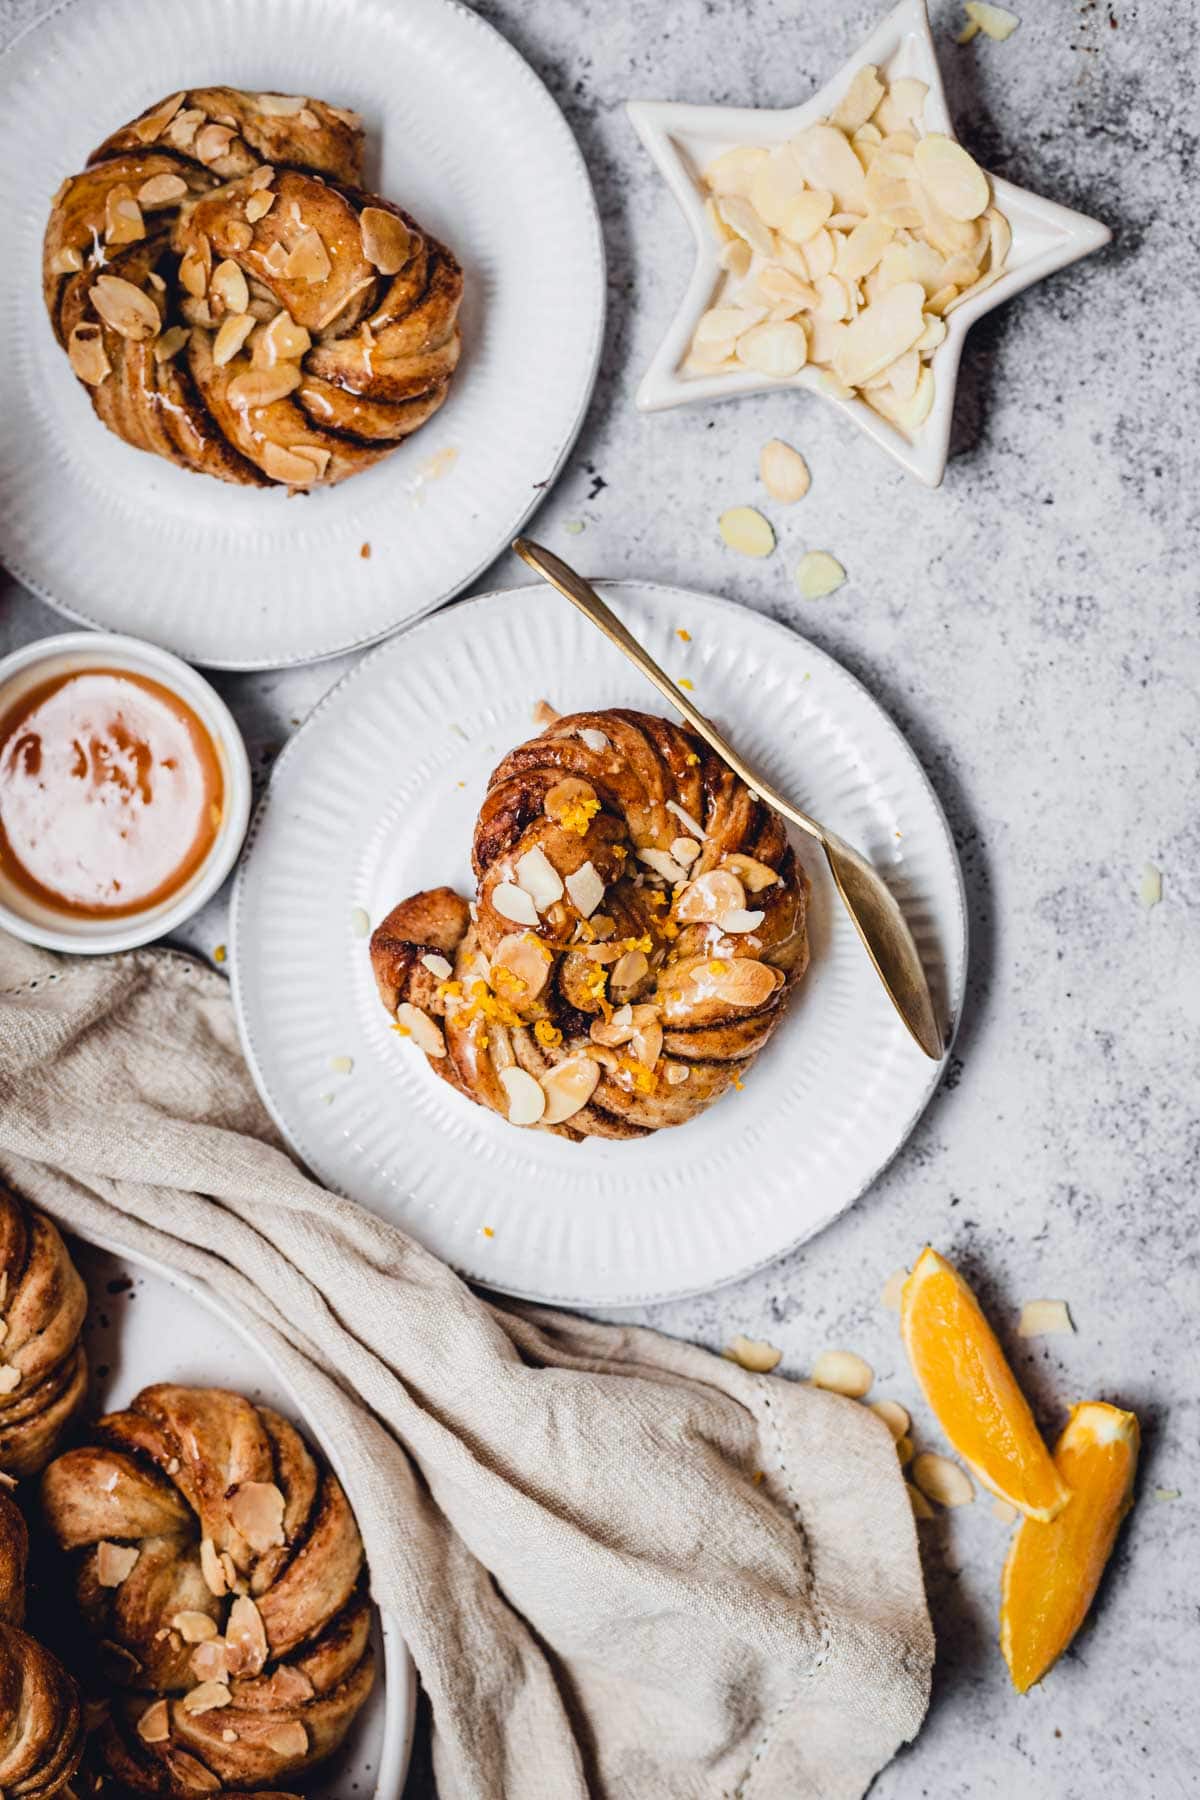
Once your second rise is finished, brush the knots again with almond milk, making sure to really cover the entire top surface. Sprinkle them with shaved almonds and pop in the oven for just 20 minutes until golden brown and perfectly soft in the middle.
F.A.Q.s
This recipe has been tested an insane amount of times (I swear I'm obsessed with these!), so your dough shouldn't be too dry.
If, however, your dough is dry for any reason, it might not be able to form into a ball.
If that happens, slowly add 1 teaspoon of water at a time until it has stuck together to form a perfect dough ball.
If your dough keeps sticking to the sides of your bowl or to your fingers, simply add 1 teaspoon of flour at a time.
This happens if you haven't kneaded your dough enough. Some typical signs of under-kneading include floppy, loose dough that tears very easily.
If you're interested in learning more about under-kneading & over-kneading check out the Kitchn article here!
That wraps it up! As always, if you have any trouble making my vegan orange cardamom buns, simply comment down below or message me directly on Instagram. I'll be sure to help you out in case you get stuck!
The form you have selected does not exist.
Did you know? I have two more recipes that use the same type of dough - my lemon curd rolls and my blueberry knot buns. You can also check out my full vegan desserts section here.
🍴Recipe
Vegan Orange Cardamom Buns
Equipment
- Breadmaker (optional)
- Rolling Pin
- Measuring cups or scales
Ingredients
FOR THE BREAD DOUGH
- 125 ml (4.23 floz) almond milk
- 100 ml (3.38 floz) water
- 1 teaspoon brown sugar
- 2¼ teaspoon (2.25 teaspoon) instant yeast
- 60 ml (2.03 floz) olive oil use light olive oil
- 400 g (14.11 oz) strong white bread flour
- ¾ teaspoon (0.75 teaspoon) ground cardamom
- 1 orange zest only
- 1 teaspoon salt
- 2 tablespoon orange juice
FOR THE FILLING
- 55 g (1.94 oz) brown sugar
- 3 tablespoon dairy-free butter
- 1¼ tablespoon (1.25 tablespoon) cinnamon
- 1,5 tablespoon (1.5 tablespoon) ground cardamom
- 2 oranges zest only
FOR THE GLAZE
- 65 g (2.29 oz) apricot jam or other jam of choice
- 20 ml (1.35 tablespoon) water or orange juice
TOPPINGS
- 4 tablespoon shaved almonds
- 5 tablespoon almond milk for brushing over your buns before baking
- 1 orange zest only
Instructions
FOR THE BREAD DOUGH
- First, add warm almond milk and water to a large mixing bowl. Then add the rest of the dough ingredients in the following order: sugar, yeast, olive oil, flour, cardamom, orange zest, and finally, salt (make sure to follow this order). It’s particularly important that the salt and yeast do not touch.
- Next, it’s time to start bringing all the ingredients together. Once you've started mixing, add orange juice and form into a round dough.
- Knead for approx. 10 minutes (either in a breadmaker or by hand). By this point your dough should be elastic and shaped into a loose ball.
- Finally, cover your dough with a large damp cloth and let rise at room temperature for at least 1 hour until doubled in size. Make sure the cloth doesn’t touch your dough.
- After the 1hr has passed, sprinkle a dash of white flour on a flat surface to make the rolling process smoother. Take your dough out of your mixing bowl and place it on the surface, ready to roll.
- Start rolling out your dough using a wooden or marble rolling pin. Roll out your dough until it measures approx. 0,5 cm in thickness (this is the equivalent of 0,2 inches).
- Use a spoon to spread out dairy-free butter equally across the surface.
- It’s time to add your filling (see instructions below). Spread it out equally across the surface.
- You will now need to fold your dough. Take the top third of your dough and carefully pull it over the second third. Finally, pull the lower third of your dough over the second third to create a dough ‘pocket’. Press down the top side gently.
- Cut dough into 12 to 13 equally-sized rectangles.
- Now is the time to form your knots (refer to the instructions in the blog post above - the photos might help you make the knots - alternatively, you can shape these into any other knot shape). Hold one strip of dough, one hand at each end. Very gently stretch the strip length-wise to create a longer more compact strip of dough. Be careful not to squeeze it too hard as this might make the filling fall out. Hold the left end still whilst twisting the right end of the dough three times. Keep a hold of the left end of the dough and wrap the right end around the back of your fingers. Keep moving the right end to fold all the way around and over your left end of the dough. Finally, push the right end under the left to make your knot. Place all your cardamom buns on parchment paper.
- Once you’ve got your knots ready, it’s time to simply brush them over with almond milk, cover in cling film and let rise for at least 45 minutes. Do ensure that your cling film is NOT touching the buns at all.
- In the meantime, you can pre-heat your fan oven to 356°F / 180°C fan oven. If you're not using a fan oven you have to adjust the temperature to 392°F / 200°C.
- Once your second rise is finished, brush the knots AGAIN with almond milk, making sure to really cover the entire top surface.
- Sprinkle them with almond shavings and pop in the oven for just 20 minutes until golden brown and perfectly soft in the middle.
- Once baked, make sure to top it off with the jam glaze (instructions below) and sprinkle with extra shaved almonds and some more orange zest.
FOR THE FILLING
- Prepare your filling simply by mixing sugar, cardamom, cinnamon, and orange zest in a small bowl. You can mix by hand using a fork or a spatula.
FOR THE JAM GLAZE
- Heat up your apricot jam and water in a small pan. If you want a stronger orange flavour, substitute water for orange juice. Stir occasionally to prevent from sticking to pan. Spread over your buns when serving.
Nutrition
Disclaimer: The nutritional information above is calculated automatically. The author of this post cannot guarantee 100% accuracy of this data.



Alyssa Lane
WOW!!! okay, this looks blessed! Do you have a recommendation for gluten free flour recommendation (garbanzo, almond, etc.)?
My Vegan Minimalist
Hiya Alyssa, thanks for your lovely comment! I've actually never made these gluten free so I'm not entirely sure what would work best. I'm thinking almond flour might work well given the other ingredients, but have never tried baking it this way myself. Let me know if you do try - I'd be intrigued to know how it turns out! 🙂
Brittany Lindgren
Working on making these now, very excited to try them, but I realized that although you list cinnamon in the ingredients for the filling, in the section at the bottom you've written "Prepare your filling simply by mixing sugar, cardamom and orange zest in a small bowl. " with no mention of the cinnamon. Where does the cinnamon come in? Can't wait to see how it all turns out.
My Vegan Minimalist
Ohh thank you for spotting this Brittany! Just fixed it in the recipe 🙂 x
Annie
Made this as a breakfast for my sister's birthday and it turned out AMAZING! Loved the filling and my whole kitchen smelled goooodd! Bookmarked!
My Vegan Minimalist
Ahhh so glad you enjoyed it Annie! Thanks for the love! Happy birthday to your sister! x
A
Hi, I noticed at you only mention a fan oven. Is it possible to make these in a conventional oven as well? If so, what would be the adjustments needed?
Thank you in advance,
A.
My Vegan Minimalist
Hi lovely - if you're not using a fan oven you just have to adjust the temperature to 200°C / 392°F. I have added that to the recipe now 🙂 Happy baking!! xx
Alice
Hi,
Thanks for the great recipe. How long do these keep for? I've found with other bun recipes after 24 hours they go a bit stale and the texture is less fluffy even if kept airtight!!!
Tajda Ferko
Hiya lovely, thanks for your kind comment! I've kept and eaten these up to 3-4 days after baking, but you're totally right, they do become less airy and dry out a little. If I don't eat them straight away, my trick is to quickly pop them in the microwave for roughly 30 seconds right before serving - this really helps revive them and bring back some of that fresher taste. Once they're all lovely and warmed up, I spread over some jam or the jam/orange glaze from the recipe and they're super tasty! I hope this helps answer your question and do let me know how they turn out if you make them - would love to hear your thoughts! x
Jannine
Loved these buns! Flavor is spot on, texture was soft and inviting. I also really liked that they are considerably healthier than your typical sweet bun/rolls. Thanks for a wonderful recipe!
Tajda Ferko
Ahh, thank you so much for your lovely review Jannine, so glad you enjoyed these buns! Totally made my day!
Yelena
Hi there. Do you think these can be made a night before, refrigerated and then baked in the morning?
Tajda Ferko
Hi Yelena, I haven't tried this myself but I think unfortunately they would keep rising overnight even in the fridge. You might have more luck trying to freeze them to prevent them from rising. Hope this helps! Do let me know if you've tried it out, I'd be interested to hear about it.
Lymoona
Obsessed with these. Their texture is just perfect. And the flavors combination is all i needed. Definitely recommend the recipe!
Tajda Ferko
Ahh thank you SO much for the lovely review!! So so happy you liked these!
Sarah
This was a great recipe! I converted it to a sourdough recipe, but that's the only change I made.
Cynthia
Pretty good! I made these with whole wheat bread flour and coconut oil instead of butter for the filling. I found the bread itself to have good texture, but I think the whole wheat flavor overpowers everything else. I think I would use white bread flour next time. I also found the filling to be a little lacking--I can't really taste the orange zest or spices at all--so maybe I need to make more? Or add more sugar? Not quite sure!
I made a glaze with orange juice and powdered sugar which gave them a lovely, shiny coat--very pretty, and masks some of the whole wheat taste.
Thank you!
Tajda Ferko
Hi Cynthia, thanks for the lovely comment! I'd definitely say go ahead and add more spices to the filling if you feel like it - it's entirely a matter of personal taste as I've also had readers suggest that the filling is too overpowering. x
Kieran
I made these a couple of days ago and WOW. Great recipe, had a couple of comments from people saying they were better than the ones from the bakery! I added some saffron to the dough on just to see what would happen. It worked pretty well and seemed to compliment cardamom.
Definitely coming back to this one! Thanks for such clear instructions. Meant my vegan boyfriend could see what all the fuss was about with me raving about cardamom buns.
Tajda Ferko
Ahh, your comment made my day! Thank you so much lovely! Adding saffron = BEST IDEA EVER. Going to have to try that out myself!
:)
I have made these twice in the past week, and they were excellent both times, so fluffy and delicious! I was amazed I was able to make something so fancy and delicious, and it wasn’t hard either. Kneading the cardamom- and orange-scented dough is such a pleasant experience. One of the times I used maple syrup instead of apricot jam, and that also worked well.
Tajda Ferko
Ahhh I'm over the mooon to hear you've enjoyed it so much, thank you for the wonderful review!