This easy immersion blender hummus results in the best dip with the least effort in under 10 minutes! Tangy lemon and nutty tahini work together to pack it full of flavor, while garlic & olive oil kick it up another notch. Simple ingredients & oil-free options.
Tip - Whilst I made this recipe using an immersion (stick/hand) blender, you can use any other blender too! Powerful blenders like Vitamix and Nutribullet will do a particularly good job!
Why You'll Love This Recipe
- It's super quick (under 10 minutes)
- Gluten-free and vegan
- Smooth & creamy
- No need for a food processor
- Can be made oil-free
- No need to cook the chickpeas
- Includes the best tips & tricks
- So easy to customise
Tips & tricks - my freshly baked herb twist bread dipped into this hummus tastes heavenly!
Ingredients
These are the ingredients you'll need to make my easy peasy immersion blender hummus.
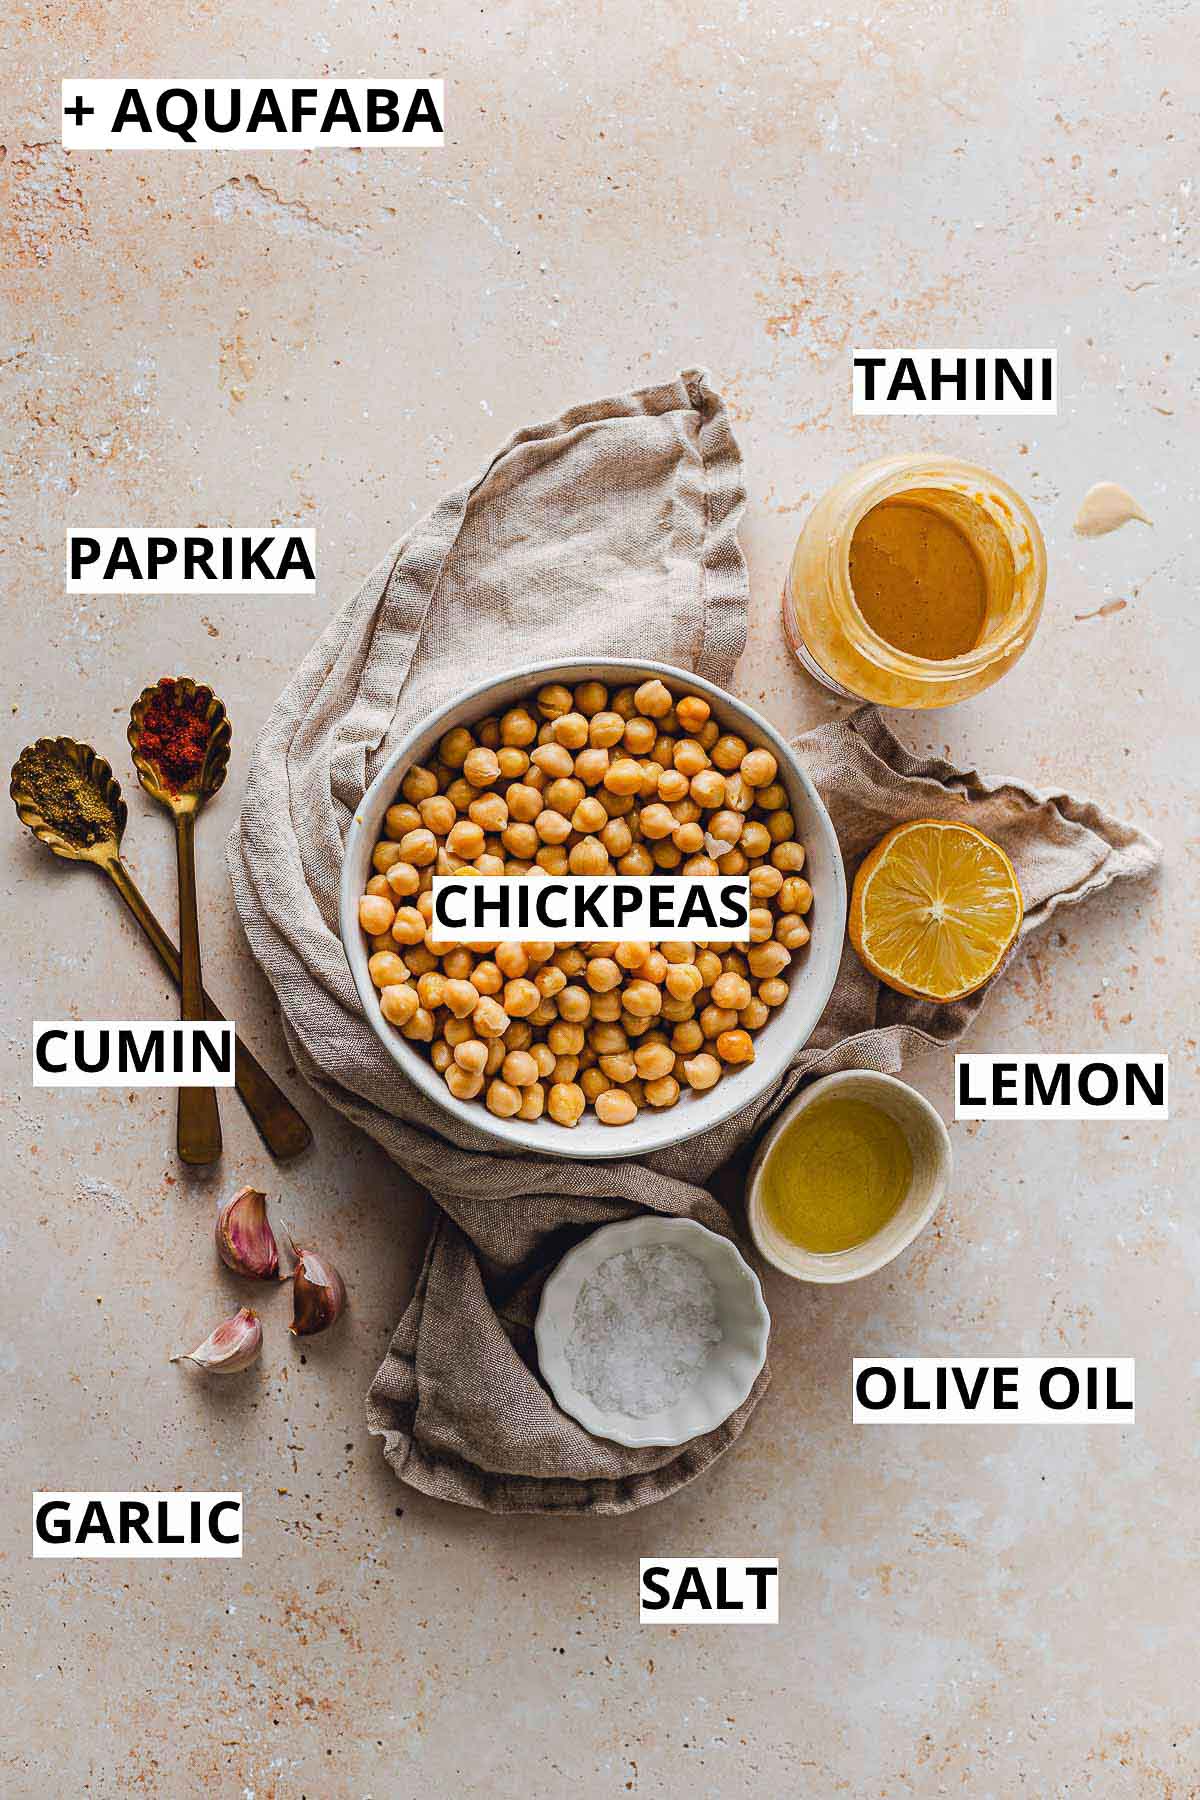
Ingredient notes:
- Chickpeas (aka garbanzo beans) - I used canned chickpeas to make this the easiest recipe ever. You can also use home-cooked chickpeas.
- Tahini (aka sesame paste) - You can find tahini in most large supermarkets (near the oils or condiments section)
- Aquafaba (aka chickpea brine) - This is the leftover liquid from a can of chickpeas.
- Olive oil - I opted for regular olive oil to keep this dish a bit lighter. You can use extra virgin if preferred.
Prefer your hummus oil-free? Leave out the oil and substitute it for aquafaba or water.
Step-by-step Photos
We're keeping this recipe SUPER easy. Let's take a look at the four simple steps below.
Don't forget you can find the full recipe (including exact ingredients and in-depth instructions) at the bottom of this page.
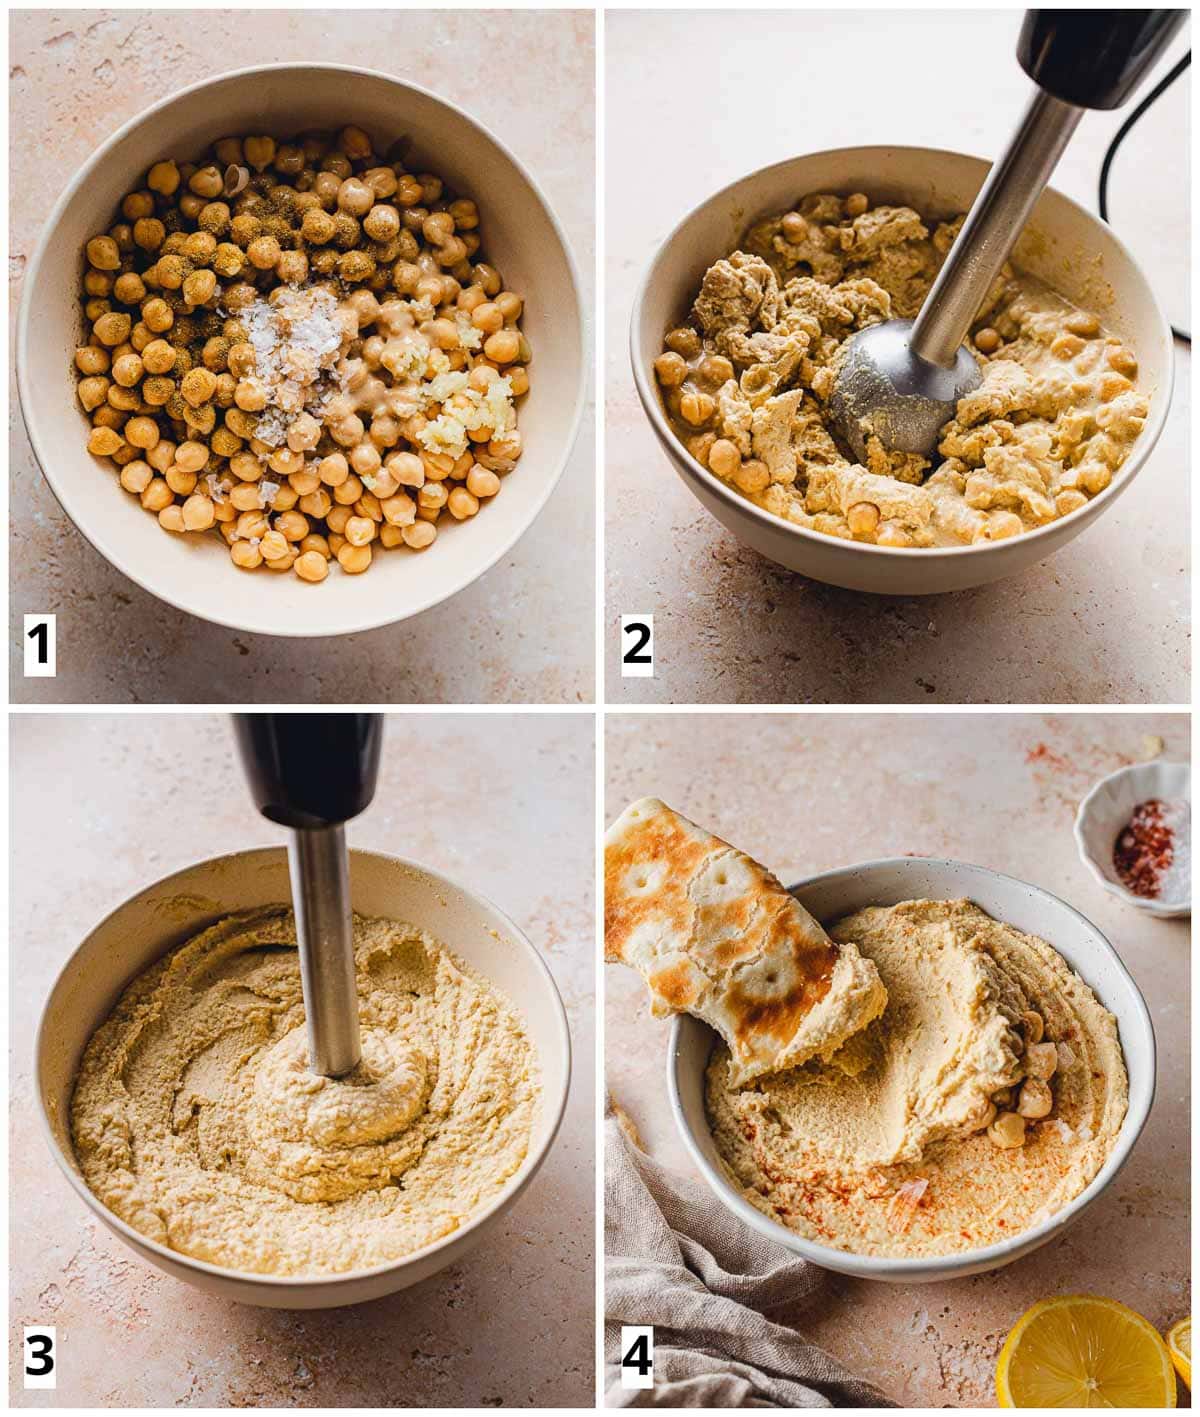
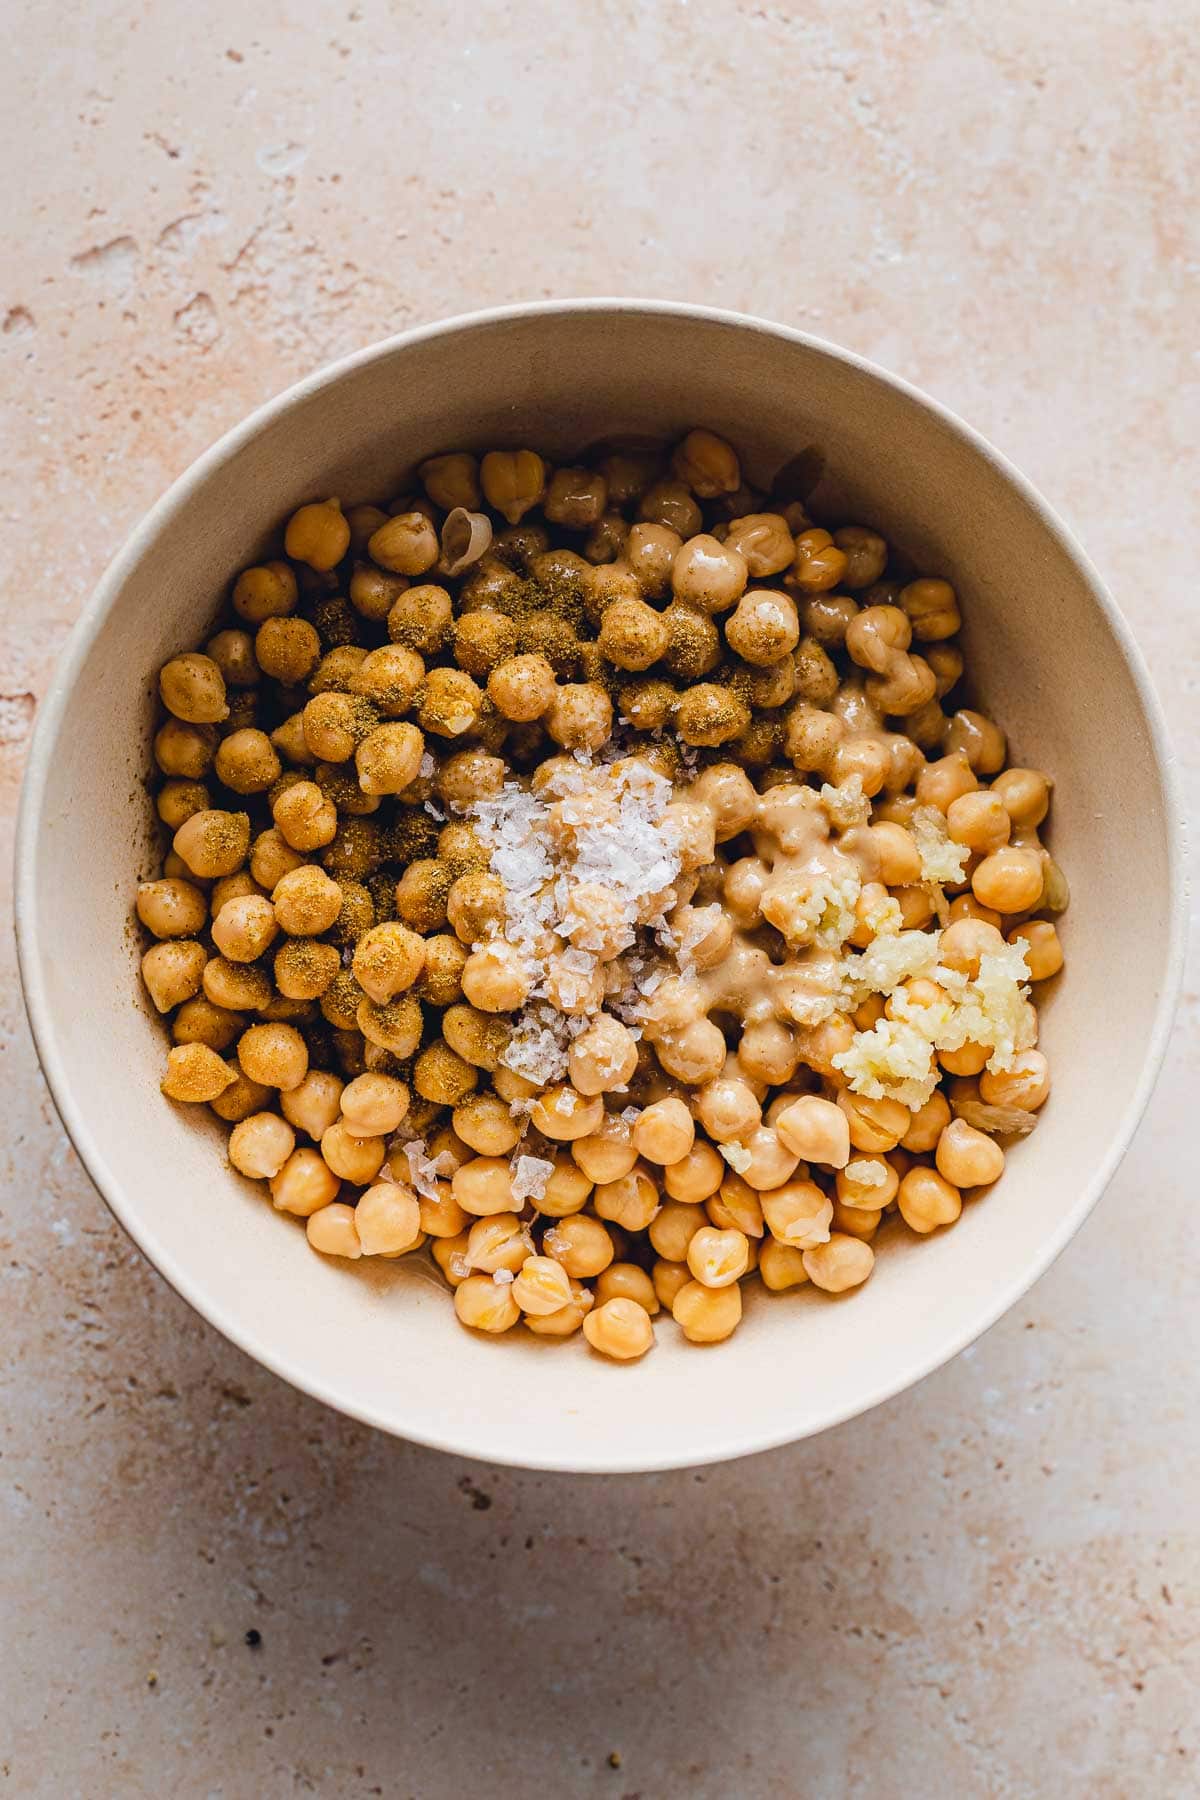
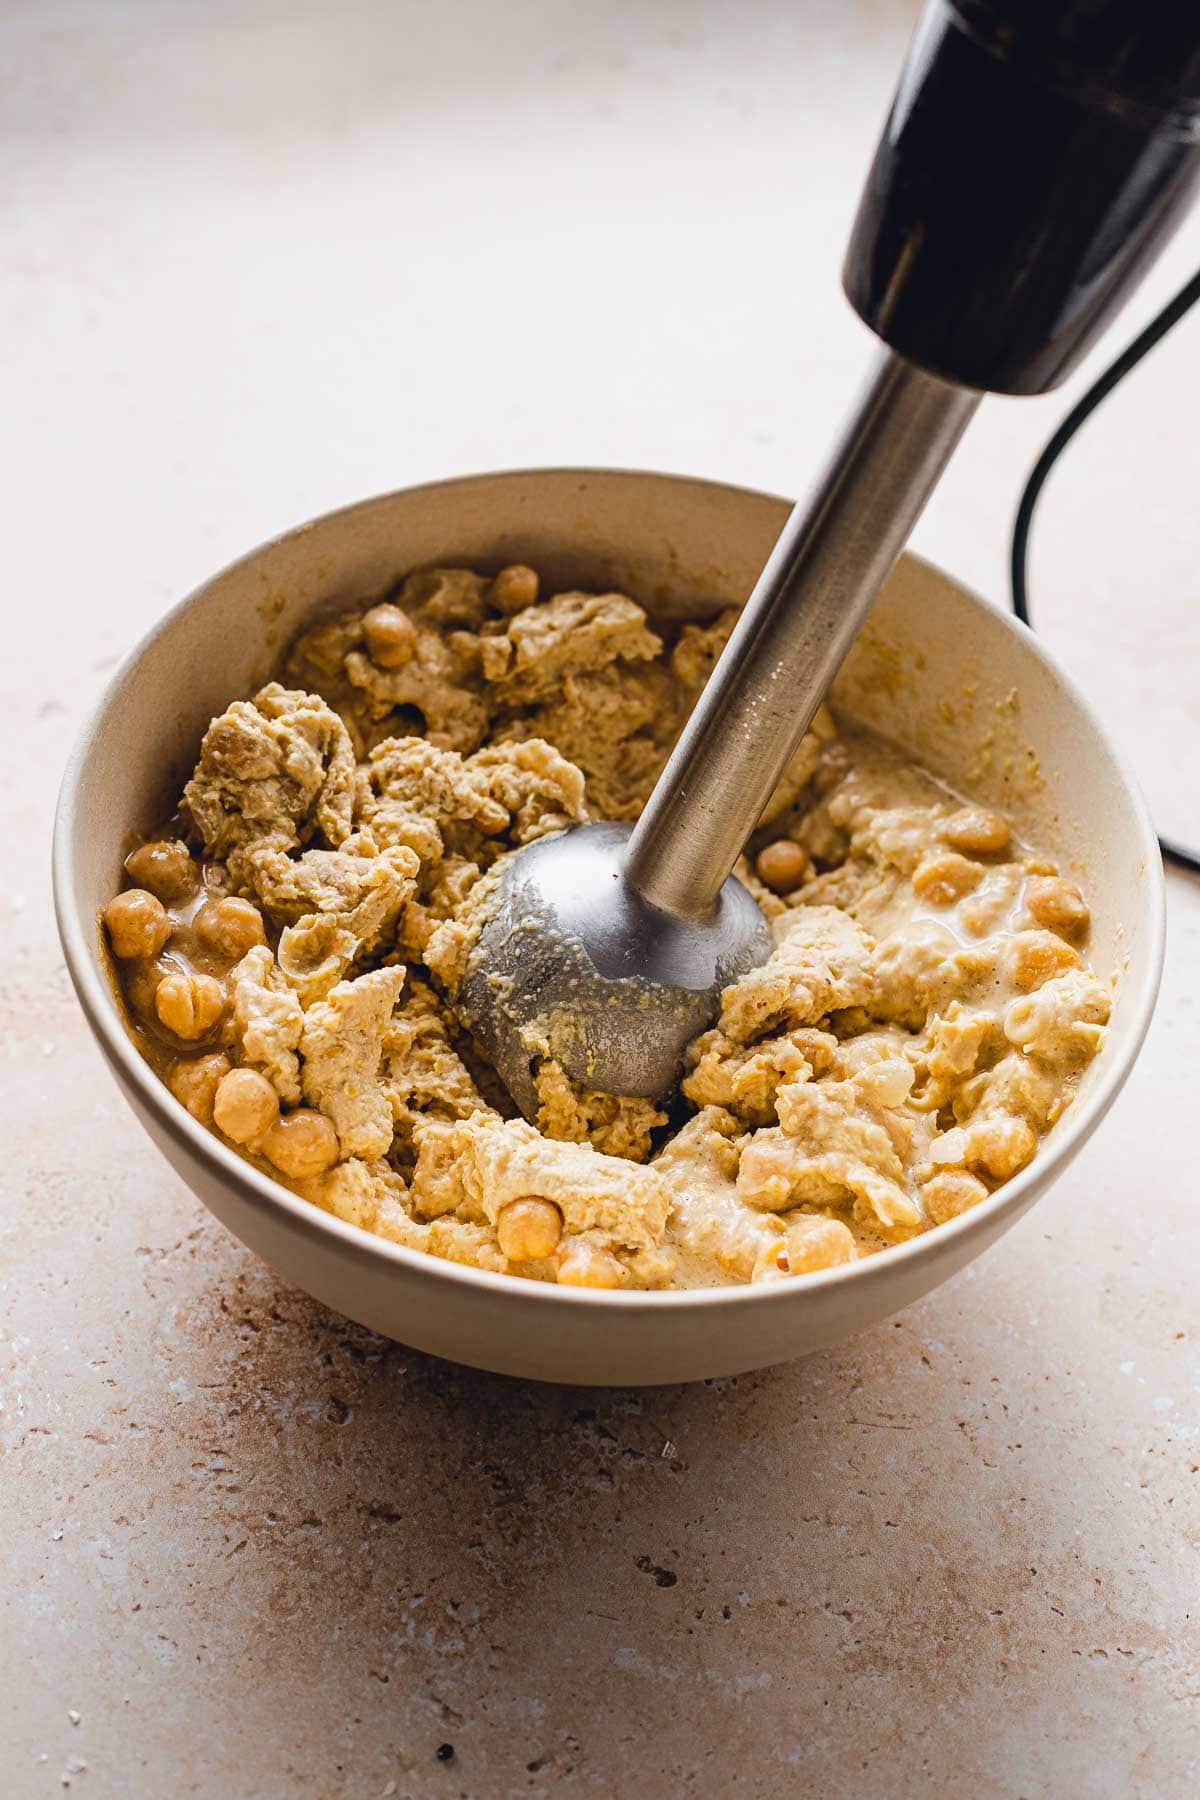
- Rinse and drain chickpeas. Add all ingredients to a large bowl.
- Start the immersion blender on low speed and increase gradually.
- Keep blending until creamy consistency. Stop and scrape off the sides from time to time if needed.
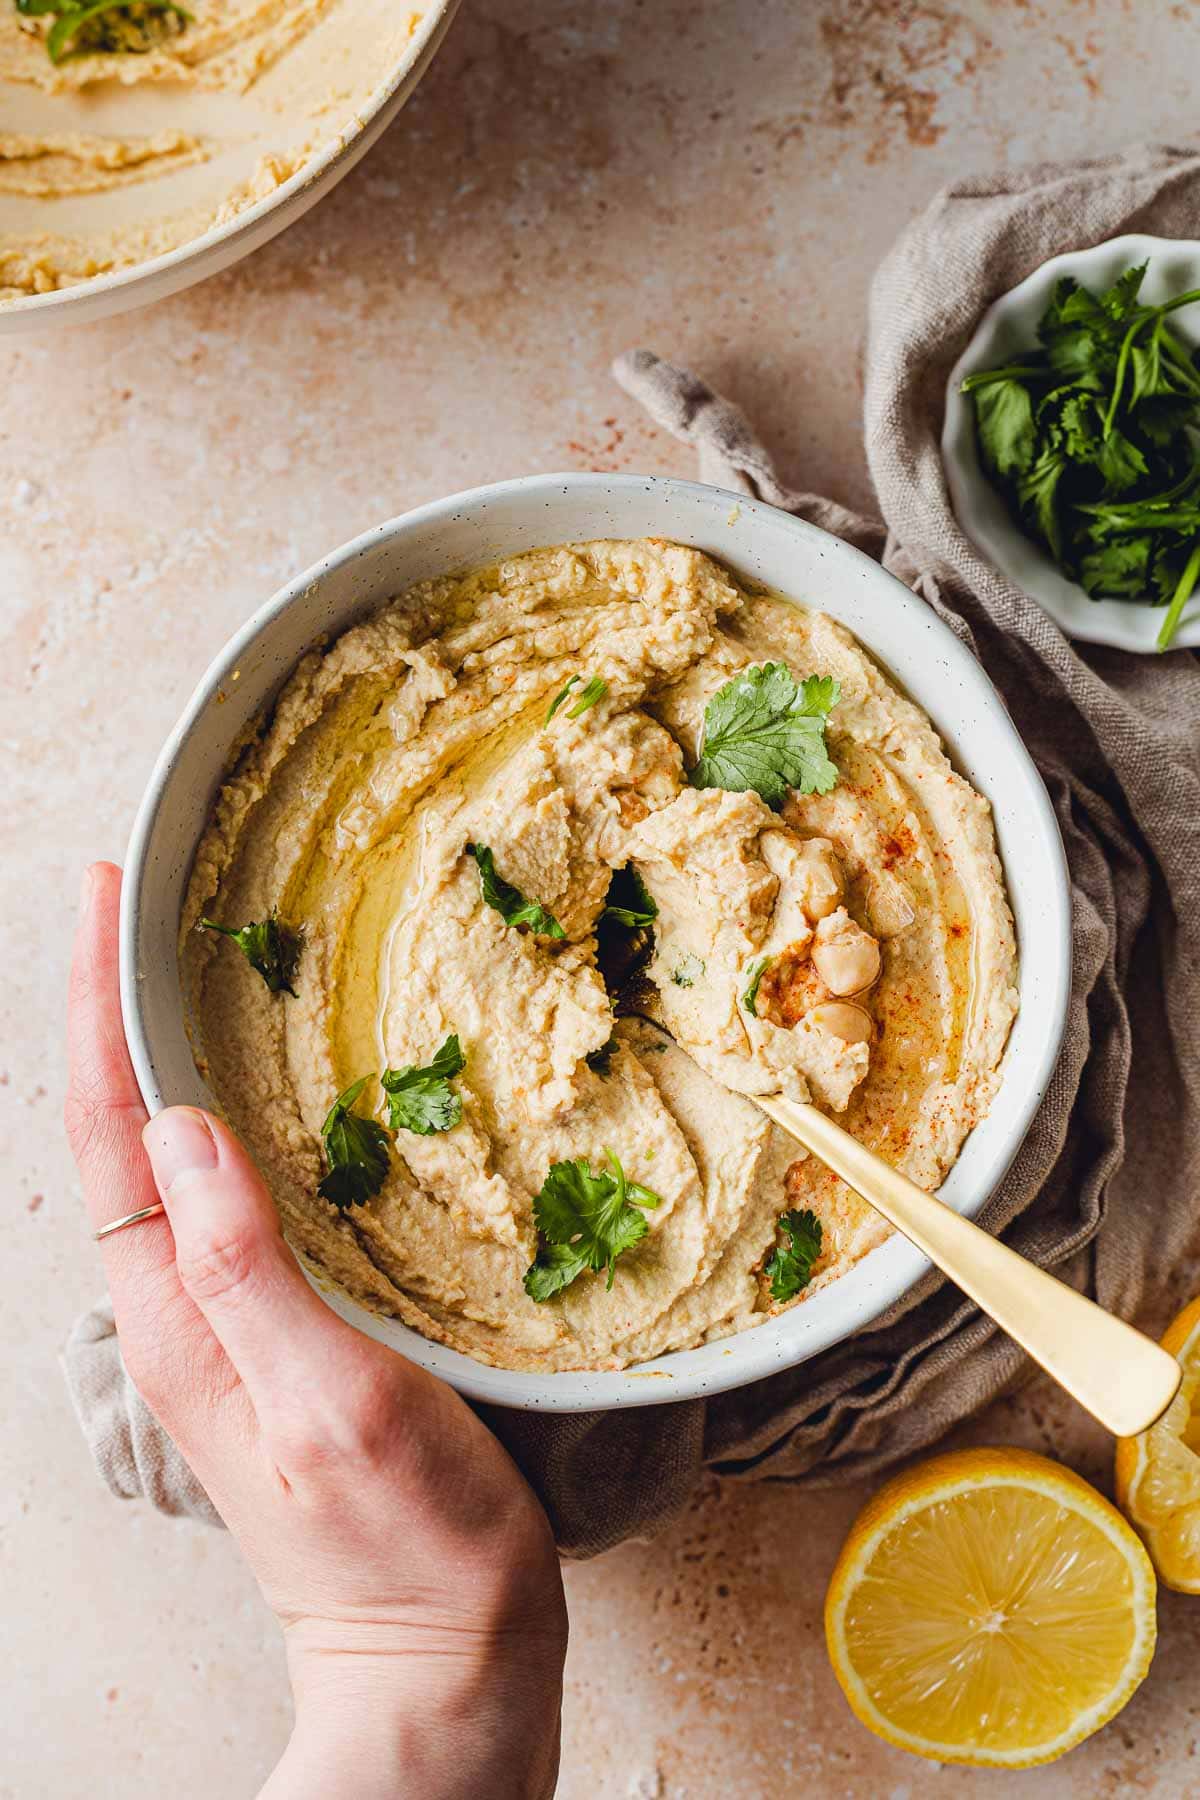
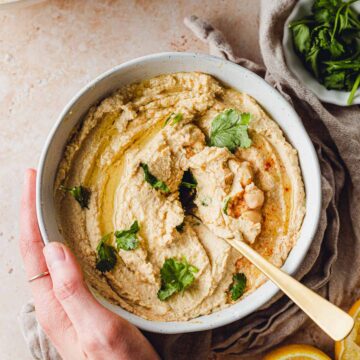
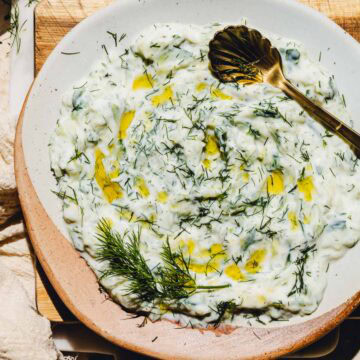
- To serve, drizzle with olive oil and garnish with more chickpeas, sesame seeds or cilantro/coriander.
So so easy and you practically can't go wrong!
Oops! Accidentally threw away your aquafaba? Just use water instead.
Pro Tips
- Start slow and be patient
Being patient when blending your hummus will pay off.
Remember, hand blenders are generally less powerful than other types of blenders. This means slightly more time will be needed to get the same results.
Aim for blending at least 5 minutes, but this will depend on your blender & preferences.
2. Peel the chickpeas
If you want that extra creamy hummus, make sure to peel the chickpeas.
I didn't do that as I wanted a super quick snack with no added steps. For me personally, the slight increase in creaminess is not worth the extra work.
But if creaminess is important to you, it's best to peel the chickpeas and discard the skin. This won't affect the flavour.
3. Mellow the garlic
Garlic adds an amazing depth of flavor to this hummus. Unless you absolutely hate garlic I would not leave it out.
However, you might want to make it less intense by soaking it in fresh lemon juice for a few minutes.
You can also use a clove or two less for a milder finish.
FAQs
Yep, no problem! The only difference is your hummus might turn out slightly less smooth.
First, make sure you've blended it for long enough. This process can take several minutes (at least 5 minutes).
If your hummus is still grainy, then add more liquid. Oil works particularly well. You could also add more aquafaba or lemon juice.
Simply add more oil, lemon juice, aquafaba, or water (or a combination of them all).
If stored correctly, homemade hummus will last for roughly 4-5 days in the fridge. Make sure it's placed in an airtight container.
Simply add more tahini or let it sit in the fridge for a few hours.
Did you know you can freeze homemade hummus? Simply place it in an airtight and freezer-safe container. Freeze it as soon as possible. This way you can extend its shelf life.
Serving

We've done the blending bit, now let's build the ultimate hummus!
Serving hummus with the right toppings makes it infinitely better.
Feel free to choose from the below list or use them all for an ultimate hummus experience.
Olive oil - Because my recipe is so low in oil you can drizzle a generous amount on top without making it too heavy.
Sumac - this tangy Mediterranean spice has a sour, acidic flavour making it the perfect addition to hummus. Sprinkle it on top to take your hummus to the next level! Shoutout to my Turkish friend Sedem for introducing me to sumac!
Cilantro/coriander - Works particularly well to elevate the lemon notes in your hummus. Sprinkle it on top just before serving.
Roasted sesame seeds - Simply roast sesame seeds in a pan until golden brown and sprinkle on top. I promise that the crunchy, nutty element will blow your taste buds away (not literally!).
Roasted chickpeas - drizzle drained chickpeas with olive oil, add any spices of your choice and bake in the oven for 15 minutes. So good!
Works particularly well when served with freshly baked bread. Yum!
Extra tip - you'll always want to customize hummus according to your own taste. Don't be afraid to adjust the recipe to make it the best for YOU. We all have different preferences. Add a kick of spiciness, a hint of salt or more/less garlic - whatever works best for you.
For more easy & healthy vegan recipes check out my:
If you made this recipe it would mean a LOT to me if you could leave a comment & review below - seeing your comments always makes my day!
🍴Recipe
The Best Easy Immersion Blender Hummus (Vegan & Oil-free Option)
EQUIPMENT
- Immersion blender
INGREDIENTS
- 2 cans chickpeas (standard 14 oz / 400g tins) reserve the liquid!
- 3 cloves garlic
- 3 tablespoon lemon juice freshly squeezed
- 2 tablespoon olive oil regular or extra virgin
- ⅓ cup tahini equals 8 tbsp
- 8 tablespoon aquafaba chickpea liquid
- 1 teaspoon salt or more to taste
- ½ teaspoon ground cumin
- ½ teaspoon paprika powder
INSTRUCTIONS
- Rinse and drain chickpeas.
- Add all your ingredients to a large bowl.
- Start the immersion blender at low speed. Move the blender around the bowl slowly. Gradually increase to the highest speed.
- If needed, stop to scrape the ingredients off the blade and blend again.
- Keep blending (and scraping off the ingredients if needed) until creamy consistency.
- To serve, drizzle the hummus with olive oil and top off with chickpeas or sesame seeds*
Notes
Nutrition
Disclaimer: The nutritional information above is calculated automatically. The author of this post cannot guarantee 100% accuracy of this data.


Eva says
So so good!!! Rich, but not too thick and overwhelming and so easy to make as well.
Tajda Ferko says
Thanks lovely!! It's my favourite hummus too - obsessed with how EASY it is to make 🙂 x
Kevin says
Turned out great. Easy clean up too. Thanks.
Tajda Ferko says
So happy yo hear you liked it Kevin! Thank YOU for making it!
Elena says
This was such an easy recipe and it tastes just as good or better than more complicated hummus recipes I’ve followed before. Will definitely be making again!!
Tajda Ferko says
Aww thank you so much, so happy to hear that!!
Candida says
Doubled this recipe in my ninja, so we have some healthy snacking for now & some in the freezer for later. Thanks so much for this yummy and practical recipe!!
Tajda Ferko says
Thanks Candida, glad you enjoyed it! Really happy to hear that! x
Brian says
This recipe was incredible. I was looking for a quick snack to make, and hummus sounded good, so I found this recipe and am glad I did. The consistency was perfect! I followed the recipe exactly as it was laid out. I would recommend taking the husk off of the garbonzo bean - I did, and that's probably why the texture is out of this world!!!
Tajda Ferko says
Thank you so so much for your incredible review Brian!! Really happy to hear you enjoyed it so much! xxx
Kim says
So creamy and good! I picked some fresh tomatoes from my garden and had a great meal with sliced tomatoes and this delicious hummus!! My food processor wasn't working and was so happy to find your immersion blender option.
Thank you, Tajda!!🥰
Tajda Ferko says
I'm so happy to hear that Kim!! Thanks so much for your lovely review & feedback. Sounds like the perfect summer meal x
rama says
I am going to be making this tomorrow BUT adding roasted red bell pepper to it.
Tajda Ferko says
That sounds absolutely incredible. Let me know how it went!
Bari says
This recipe is perfection! I did peel the chickpeas, and the restaurant quality smoothness was worth the extra time. I also put it in the blender but I followed the recipe to the letter and my belly couldn't be happier! I won't be buying hummus in the store anymore. Thanks for this!
Tajda Ferko says
That's amazing! So happy to hear that Bari 🙂