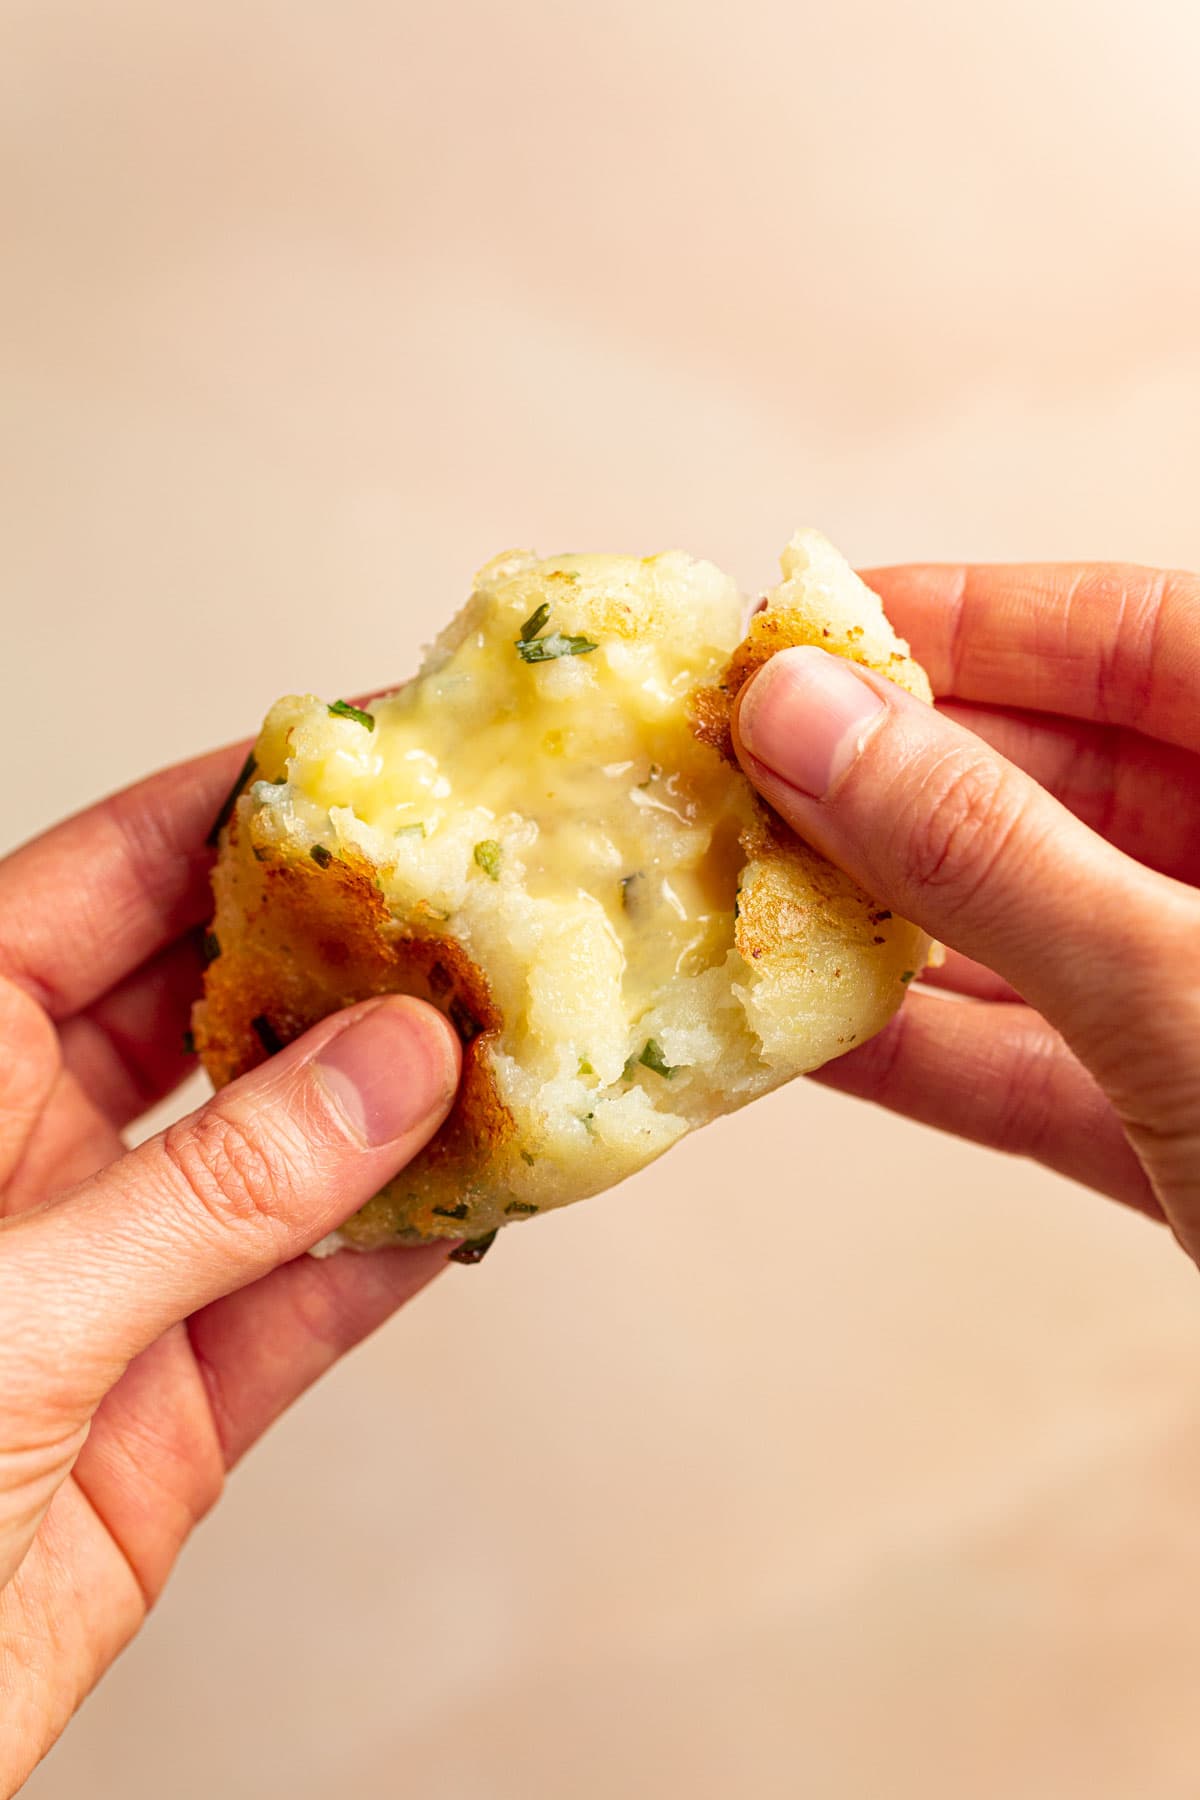
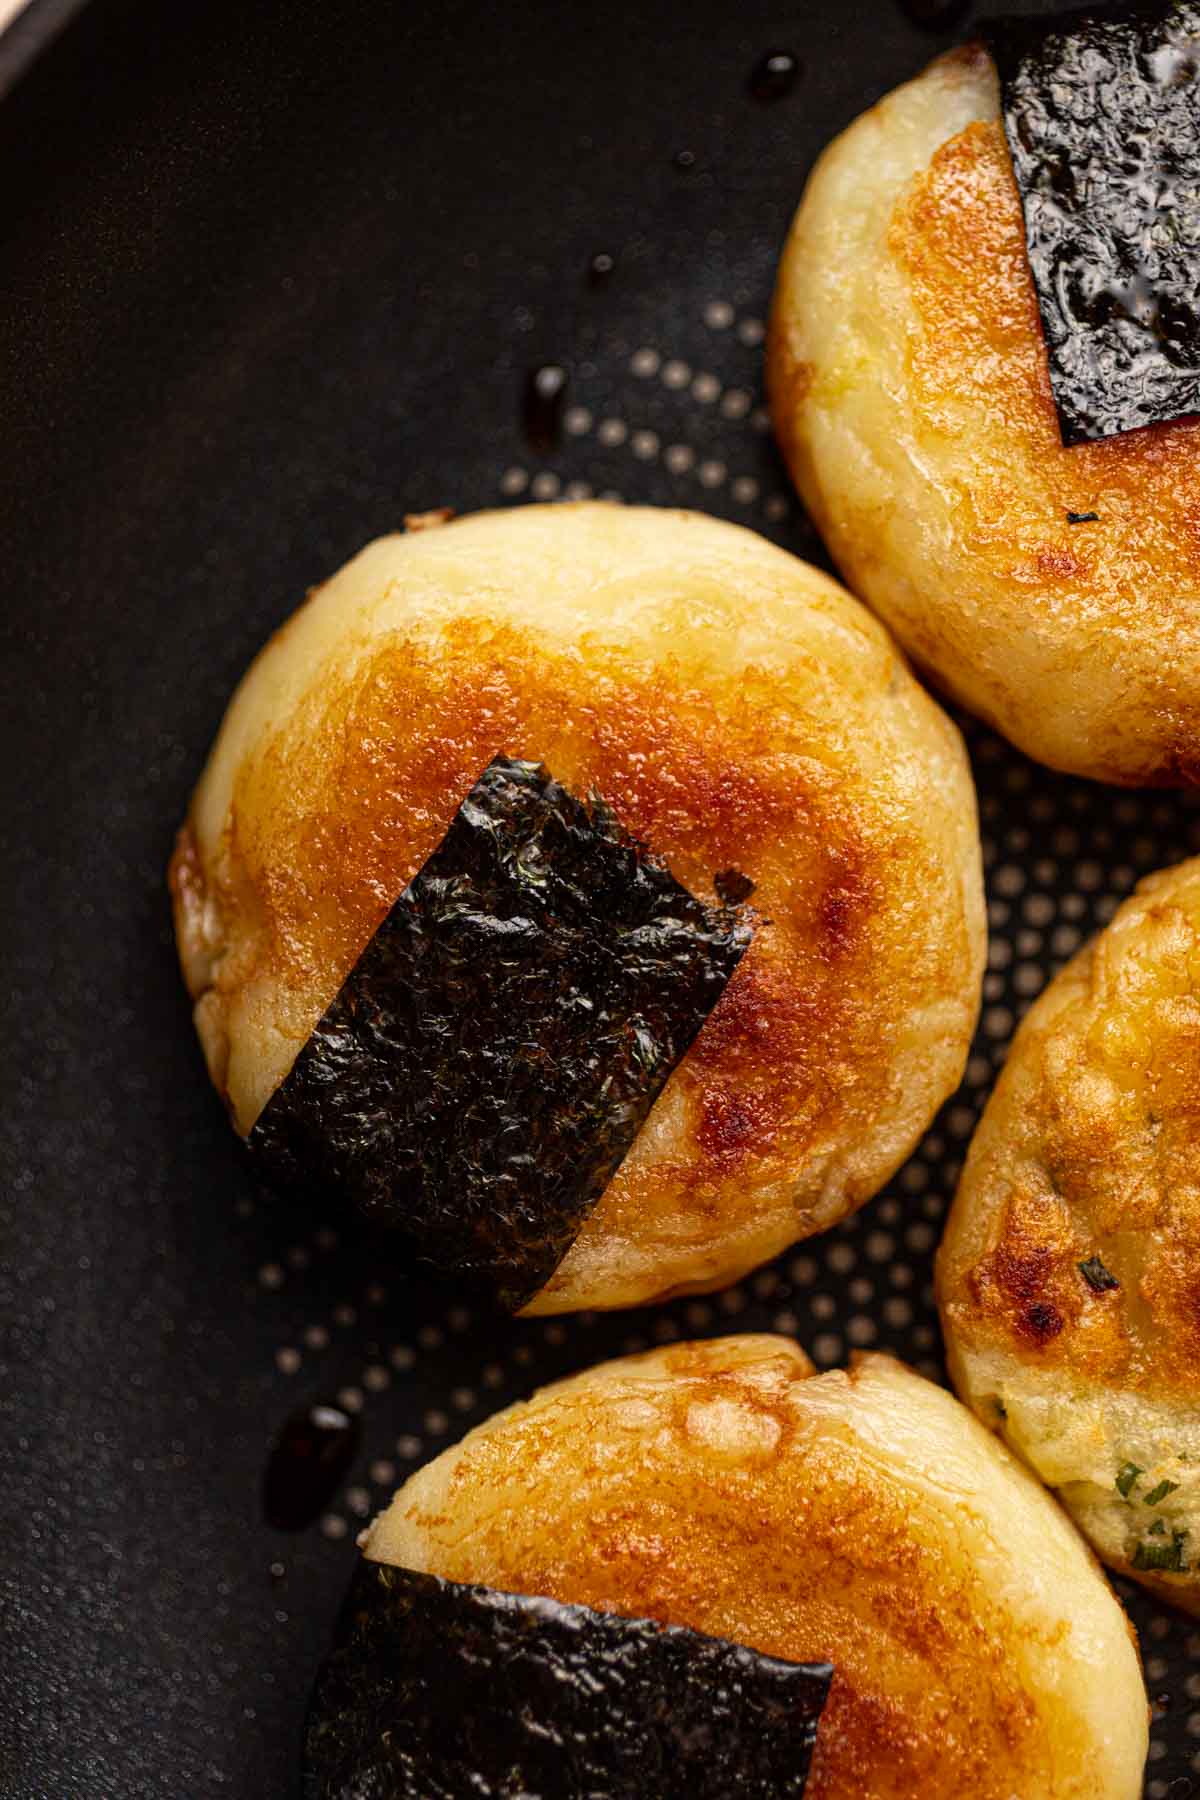
This chewy potato mochi can be served sweet or savory and is quickly becoming my household's favorite snack! The soft, stretchy texture paired with a crispy outside is the reason for endless snacking.
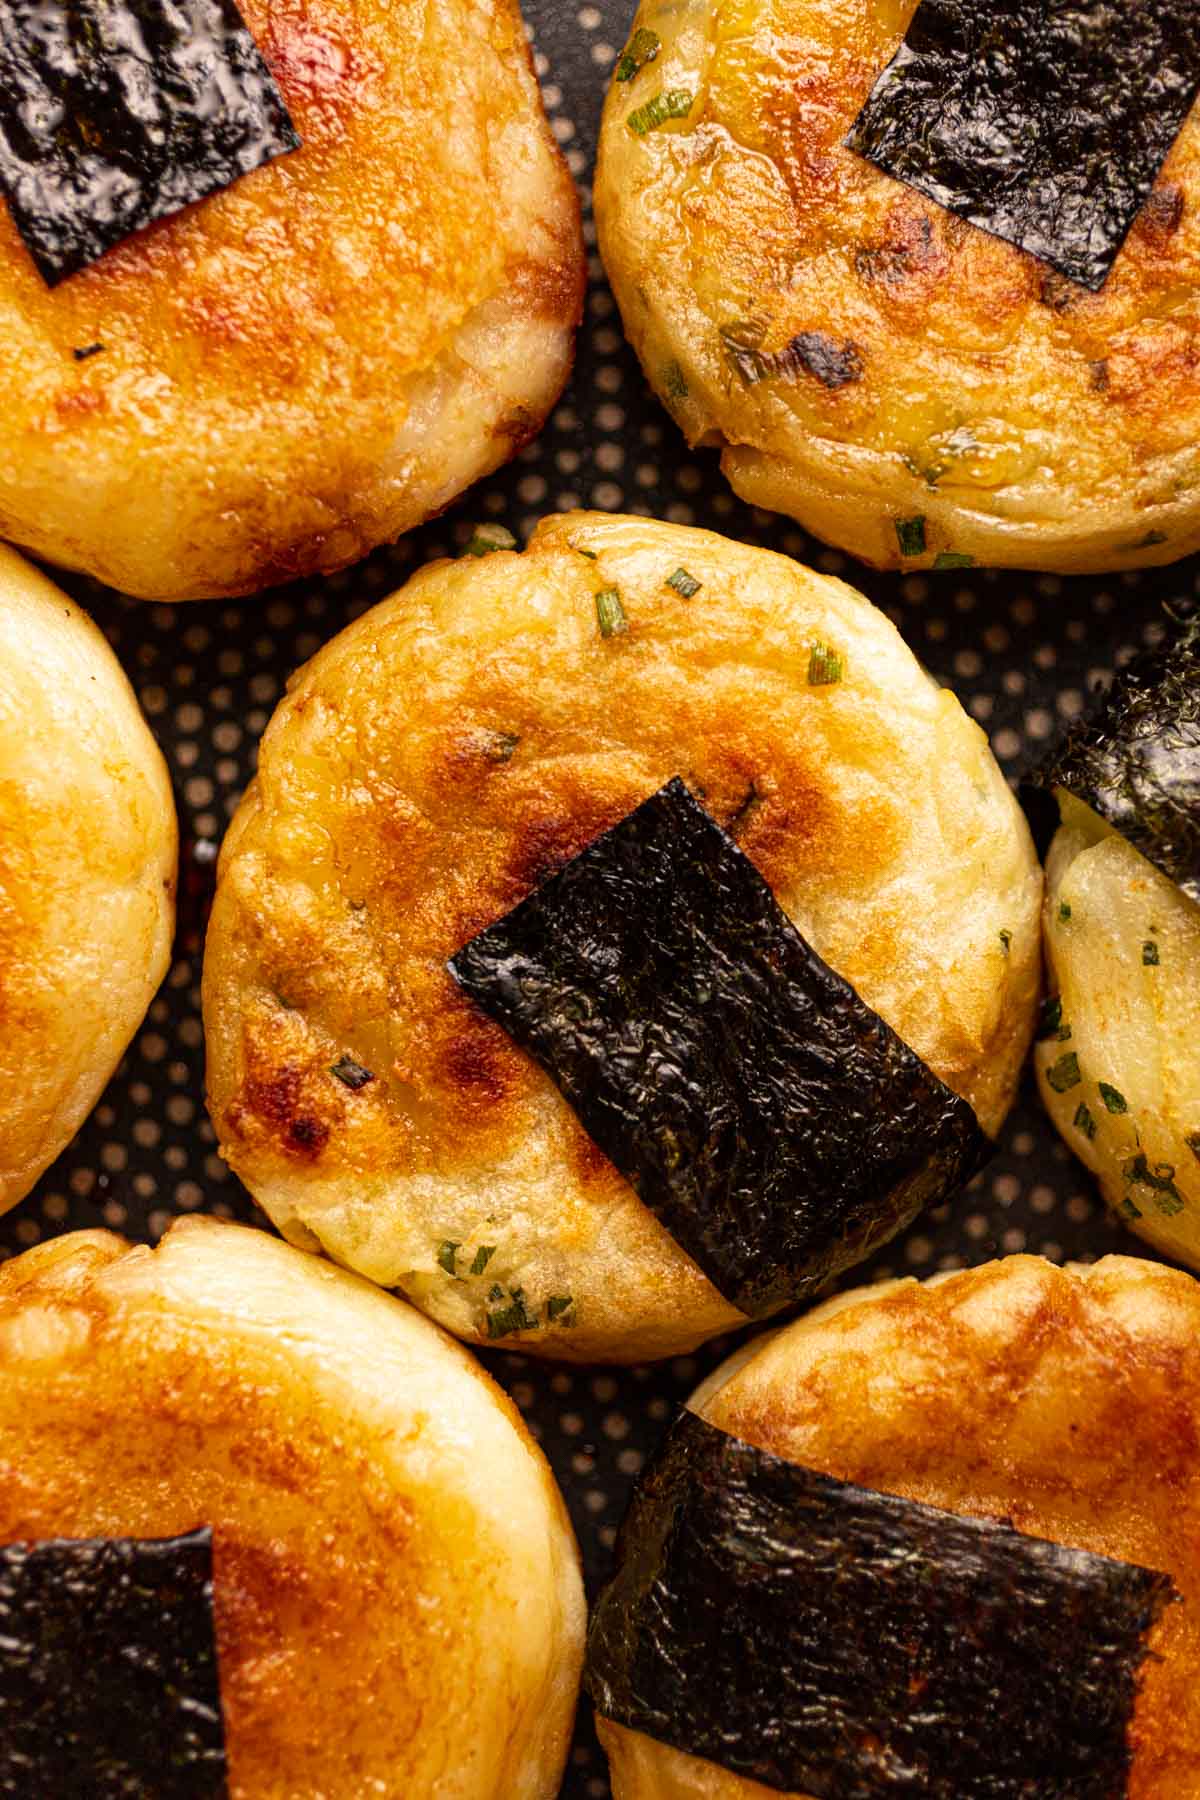
Traditionally, mochi is a sweet snack from Japan and is made with glutinous rice flour. This potato variation can be made sweet or savory and enjoyed with a variety of toppings and sauces.
Jump to:
💌 Why I Love This Recipe
- The perfect snack for lovers of chewy and crispy textures.
- A simplified recipe ideal for first-timers.
- Highly versatile - add toppings, and enjoy it sweet or savory.
- Uses just 5 simple ingredients (plus salt).
- Accompanied by the most delectable umami sauce.
🛒 Ingredients
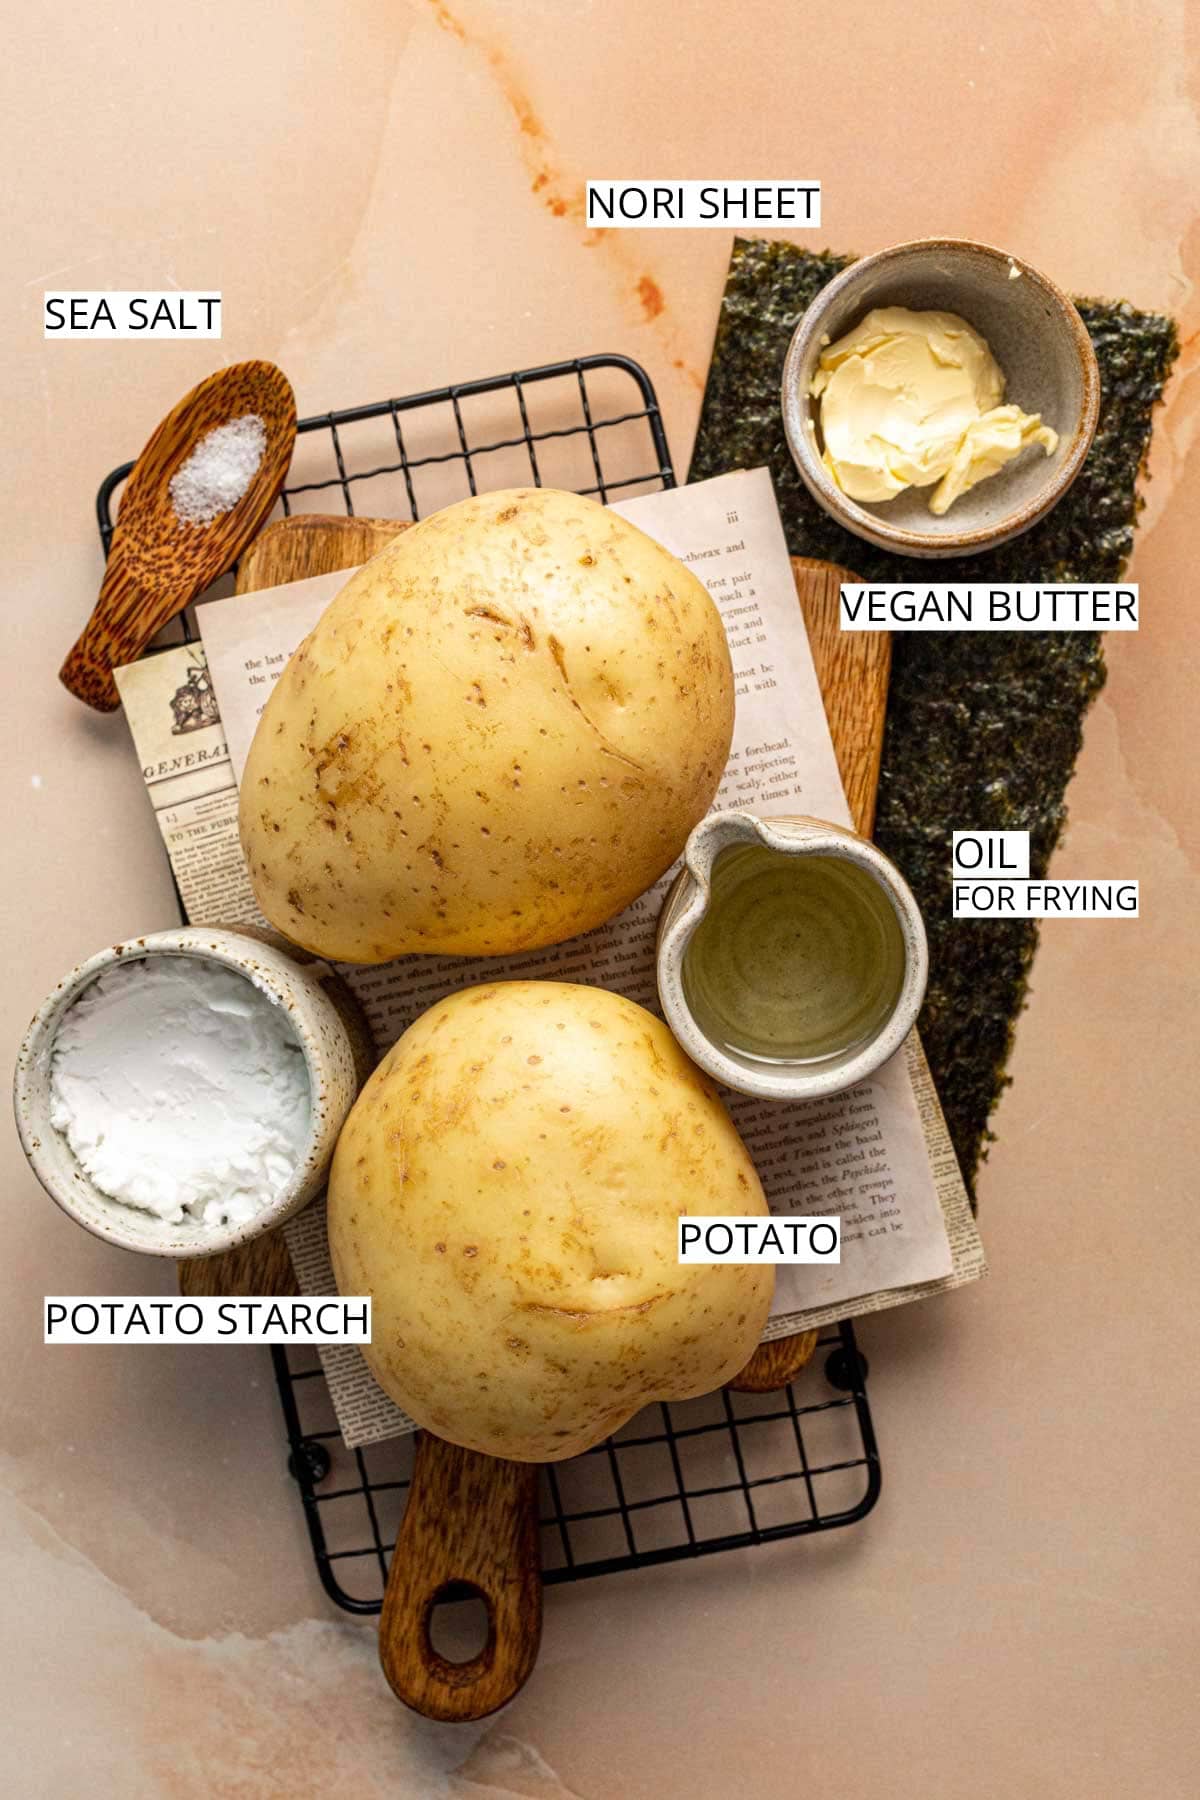
- Potatoes: The star of this recipe, providing the starchy base for the mochi. I recommend using russet potatoes. You can also use Yukon Gold or Maris Piper potatoes.
- Potato Starch: This humble ingredient is crucial for binding the ingredients together and achieving the desired chewy texture. You can replace it with cornstarch, but you'll be left with a less chewy texture. Some recipes also use glutinous rice flour or tapioca starch, but I haven't tested that yet.
- Butter: I used a dairy-free butter spread. You can use any butter you want - it's there simply just to add a slightly savory flavor and softness.
- Salt: To enhance the flavors (Note - leave it out for a sweet version).
- Oil for Frying: Any vegetable oil will do - for example, sunflower, light olive oil, or avocado oil. Frying gives mochi its signature crunch while keeping the inside soft and chewy.
- Nori Sheet (Seaweed Sheet): Adds a hint of umami and pairs well with any savory toppings. Find it in your local supermarket in the Japanese food section or order online.
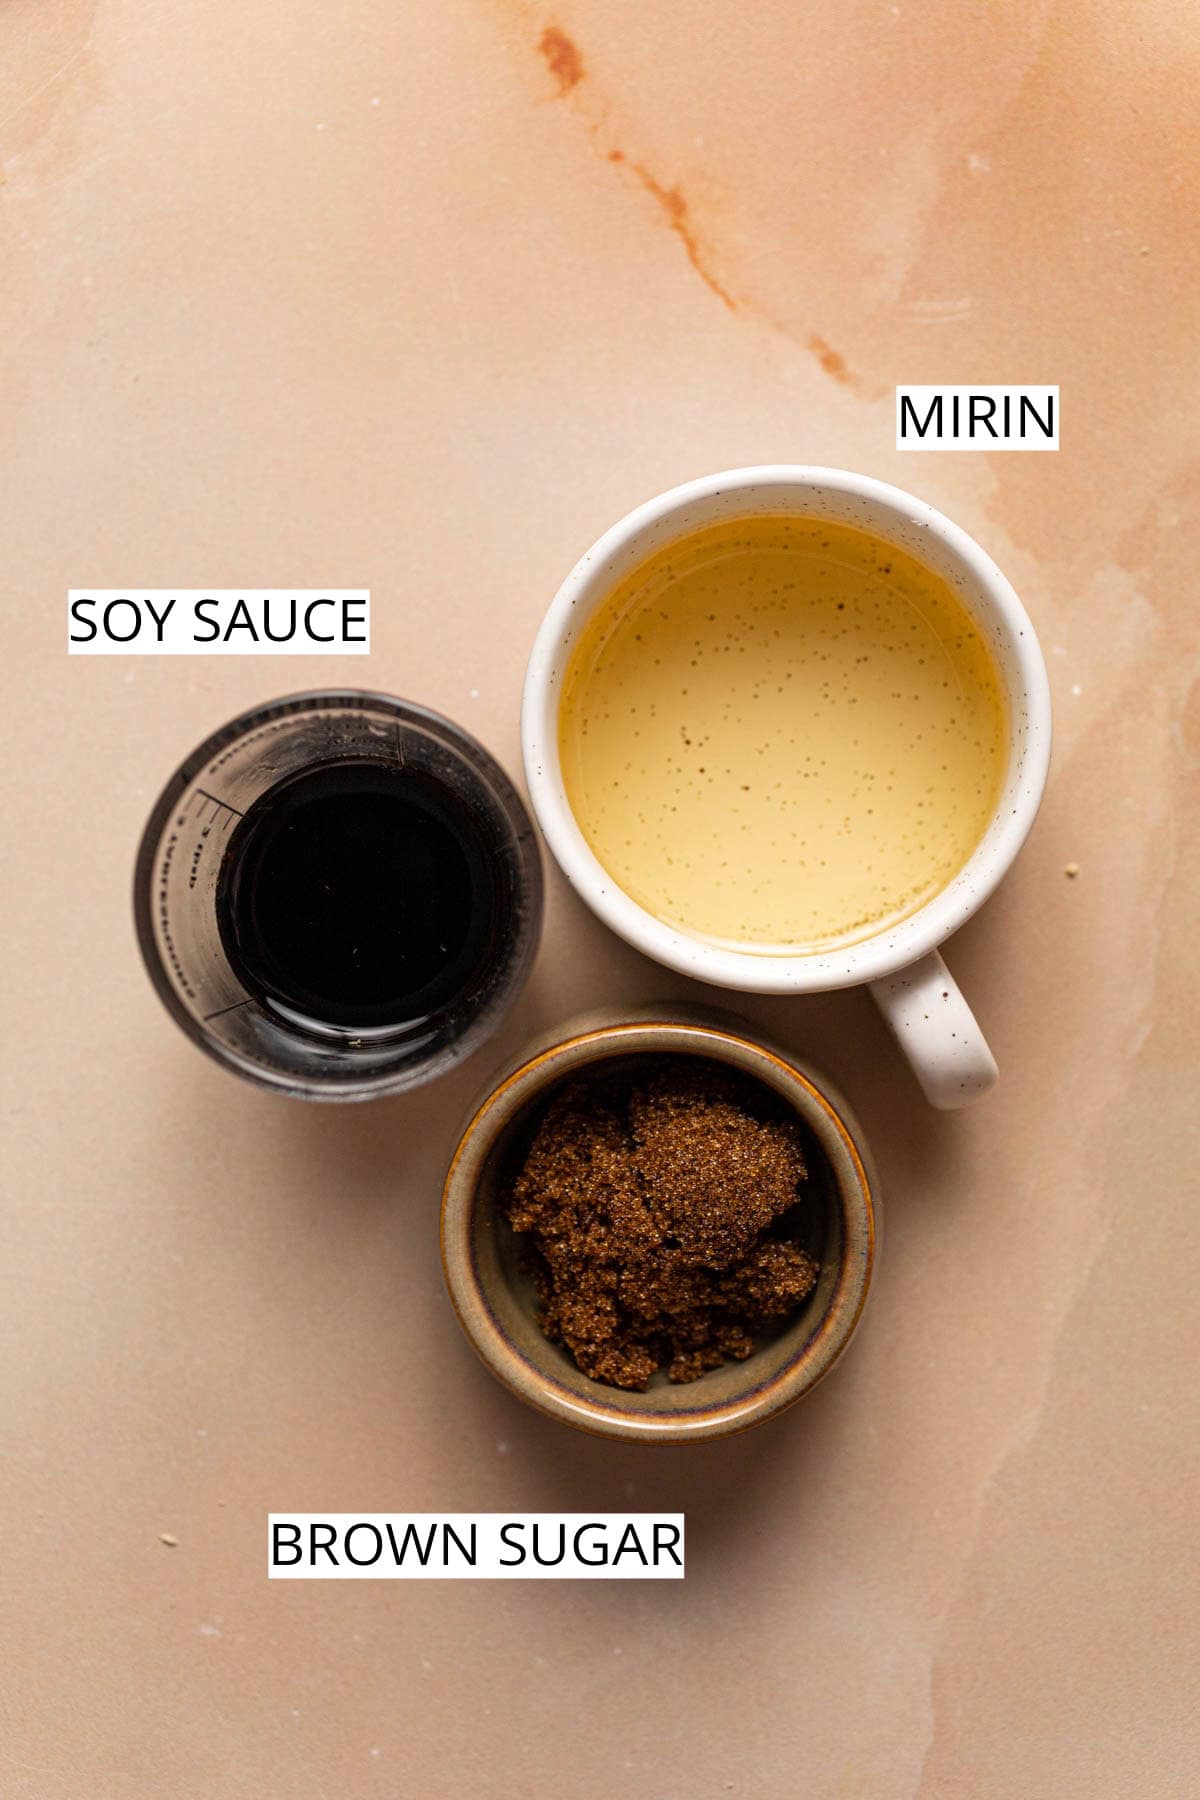
To make the optional sauce, you will need to gather:
- Soy Sauce: For a savory umami flavor, soy sauce is key. Opt for a good-quality soy sauce (I like Kikkoman) if possible. It truly makes a surprisingly big flavor difference.
- Brown Sugar: Adds a rich caramel-like sweetness. It also adds a warm and comforting element, which is just what mochi is all about.
- Mirin: This sweet rice wine can be found in Asian supermarkets or online. It adds complexity to this sauce's flavor profile.
🔪 Equipment
- Knife & chopping board
- Large Pan
- ¼ Cup Measuring Cup
- Potato Masher (or fork)
- Frying Pan
👣 Step-by-Step Instructions
If it's your first time making mochi, don't panic. It looks a little complicated initially, but it's a really simple recipe!
Note: The following is a simplified overview of the process. Scroll to the recipe card at the bottom for detailed instructions.
Follow these 8 easy steps to make your potato mochi.
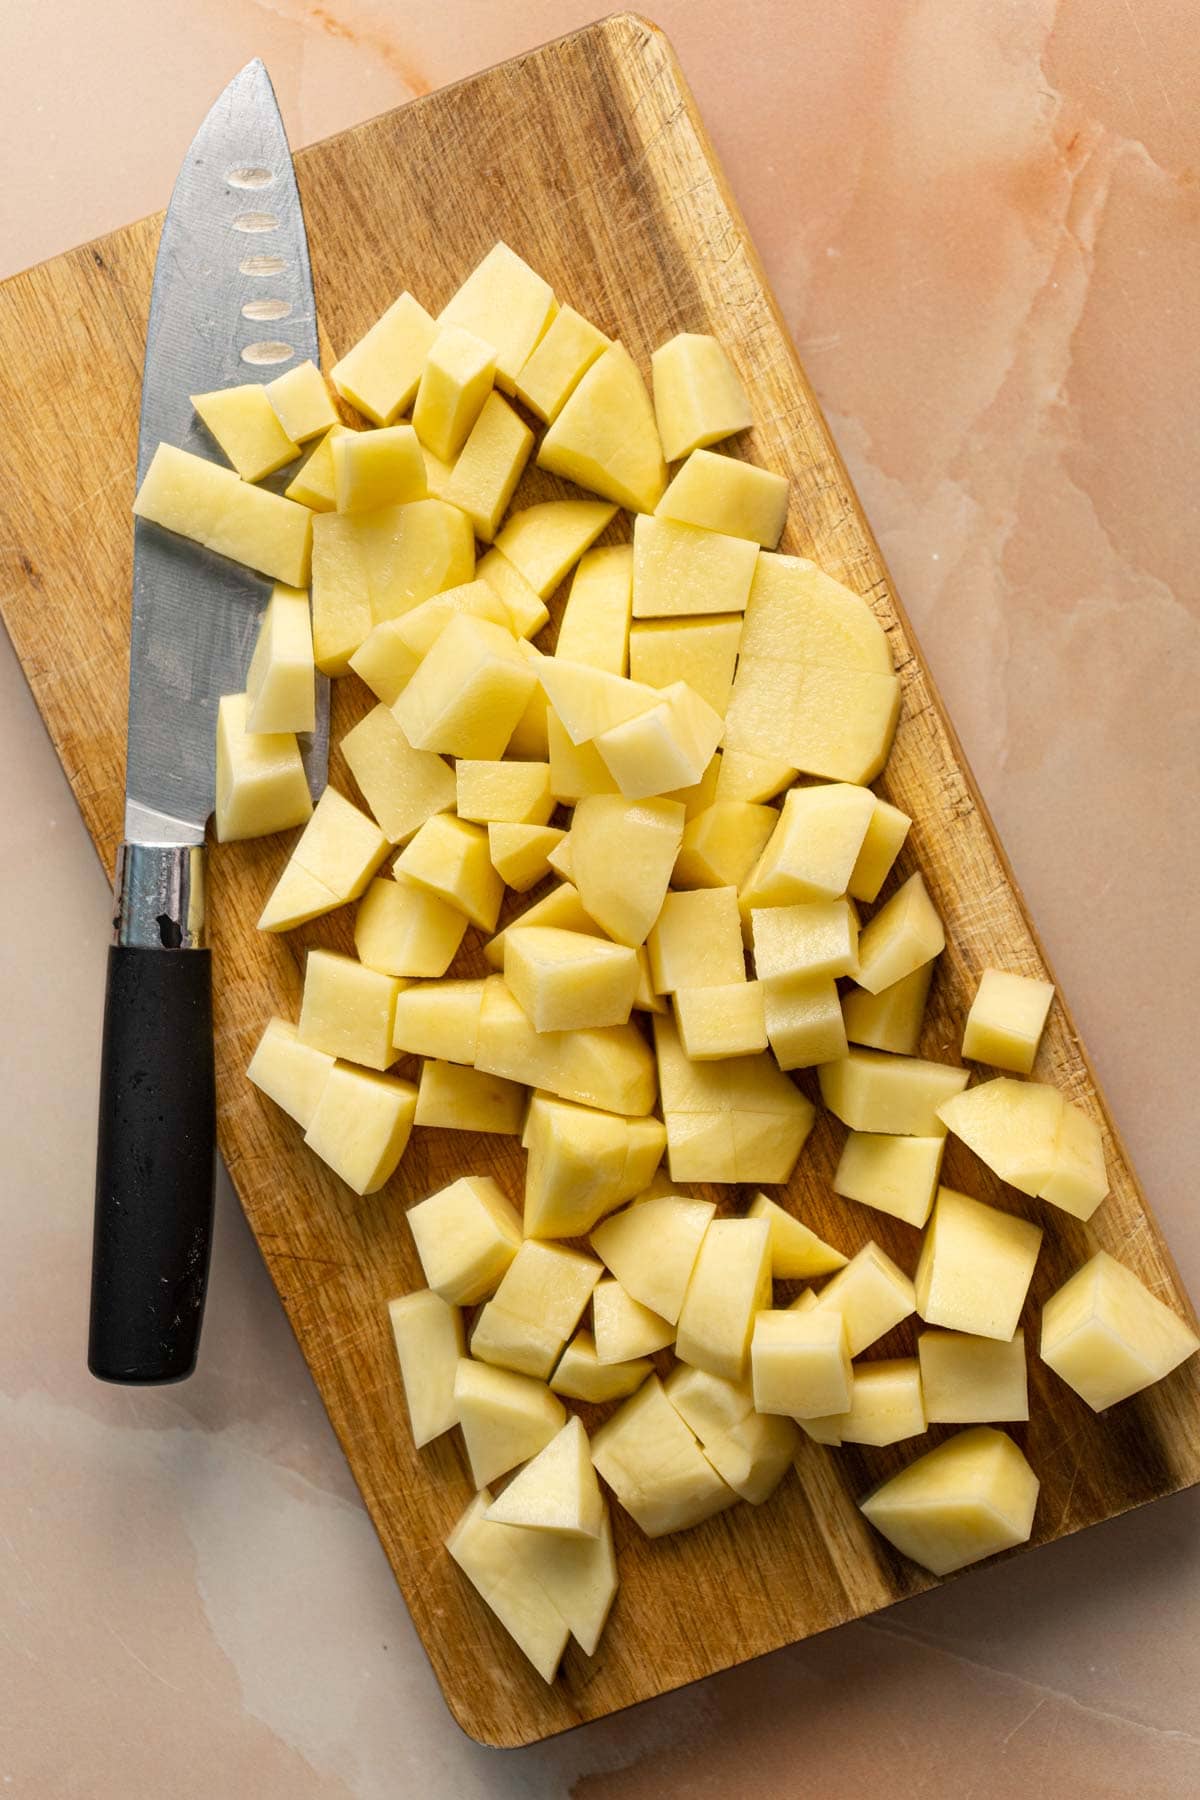
Step 1: Prepare the Potatoes. First, peel and dice the potatoes into 1-inch cubes. (approximately).

Step 2: Boil the Potatoes. Place potatoes in a large pan with water. Boil until soft, about 15 minutes.
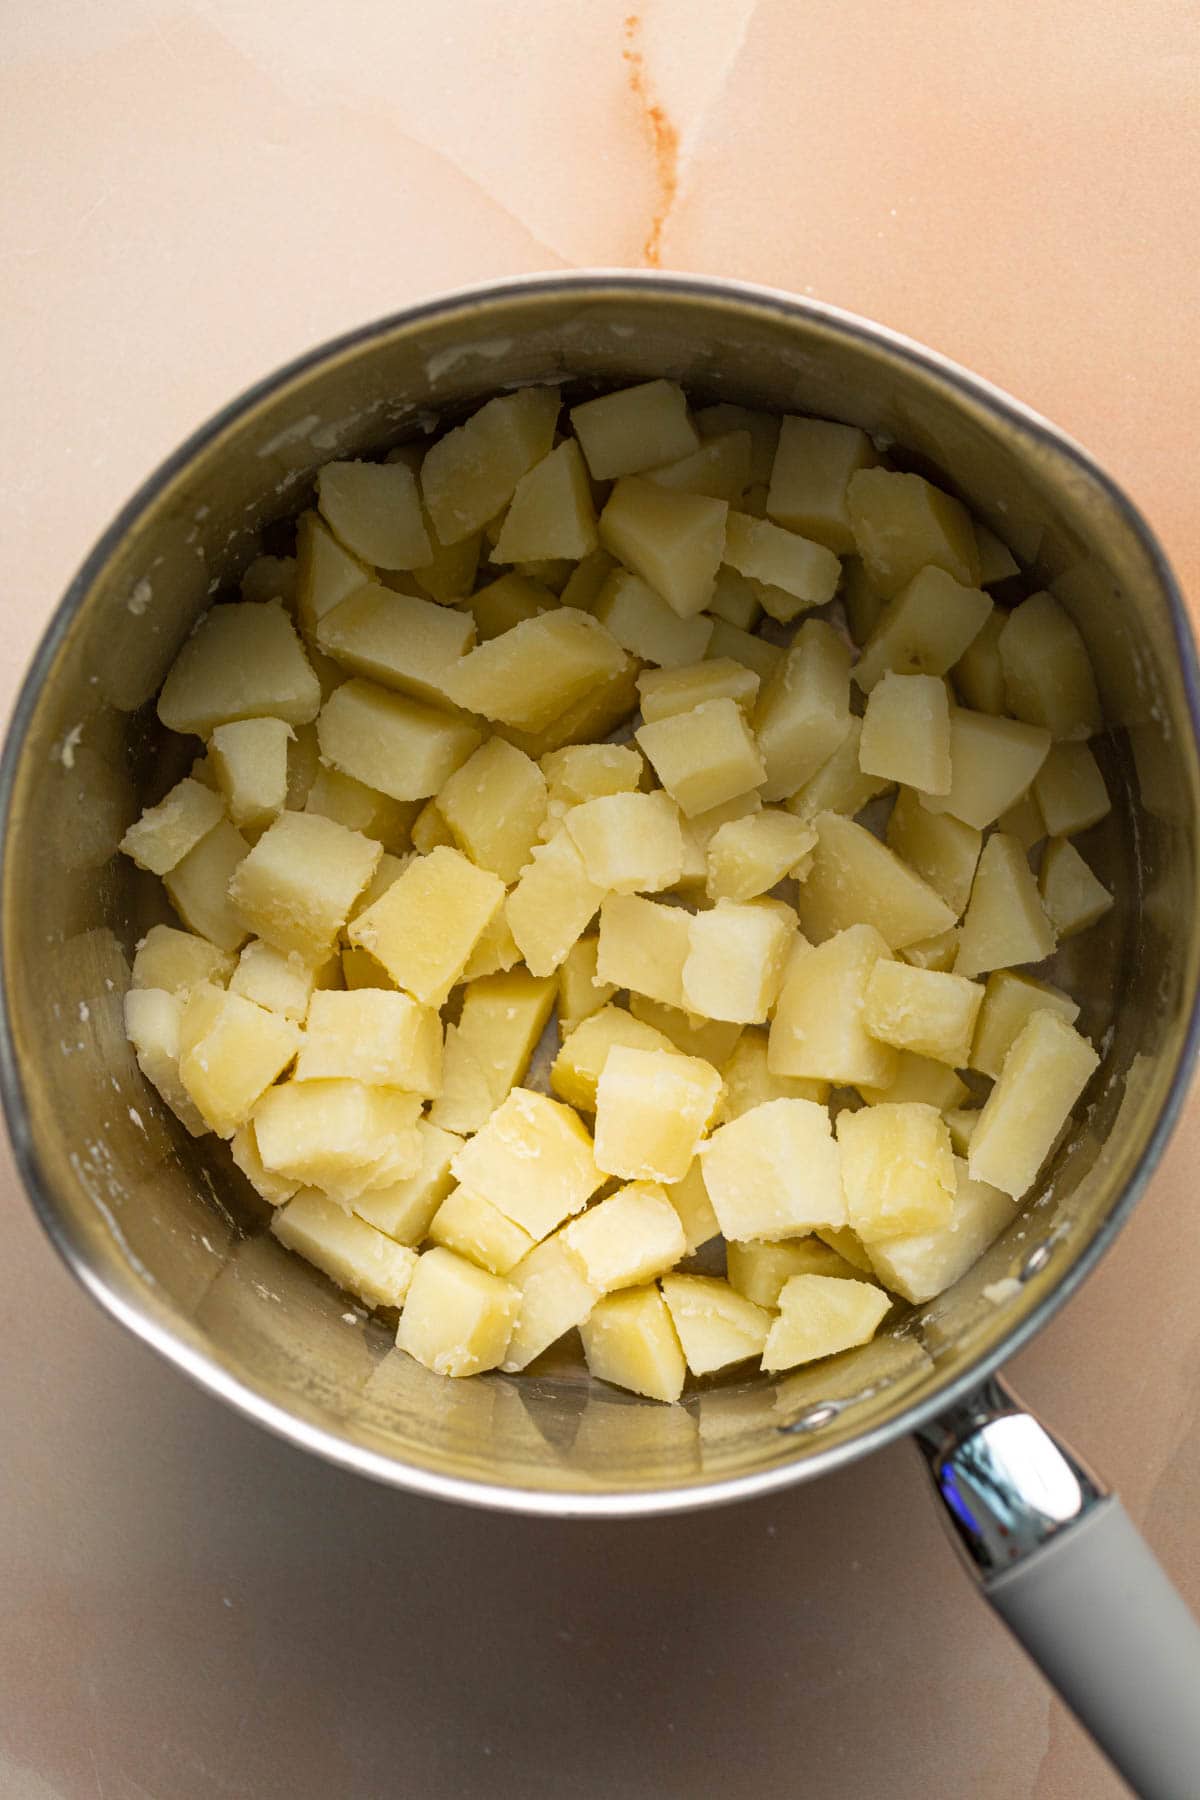
Step 3: Drain. Drain the potatoes well, removing any leftover water.
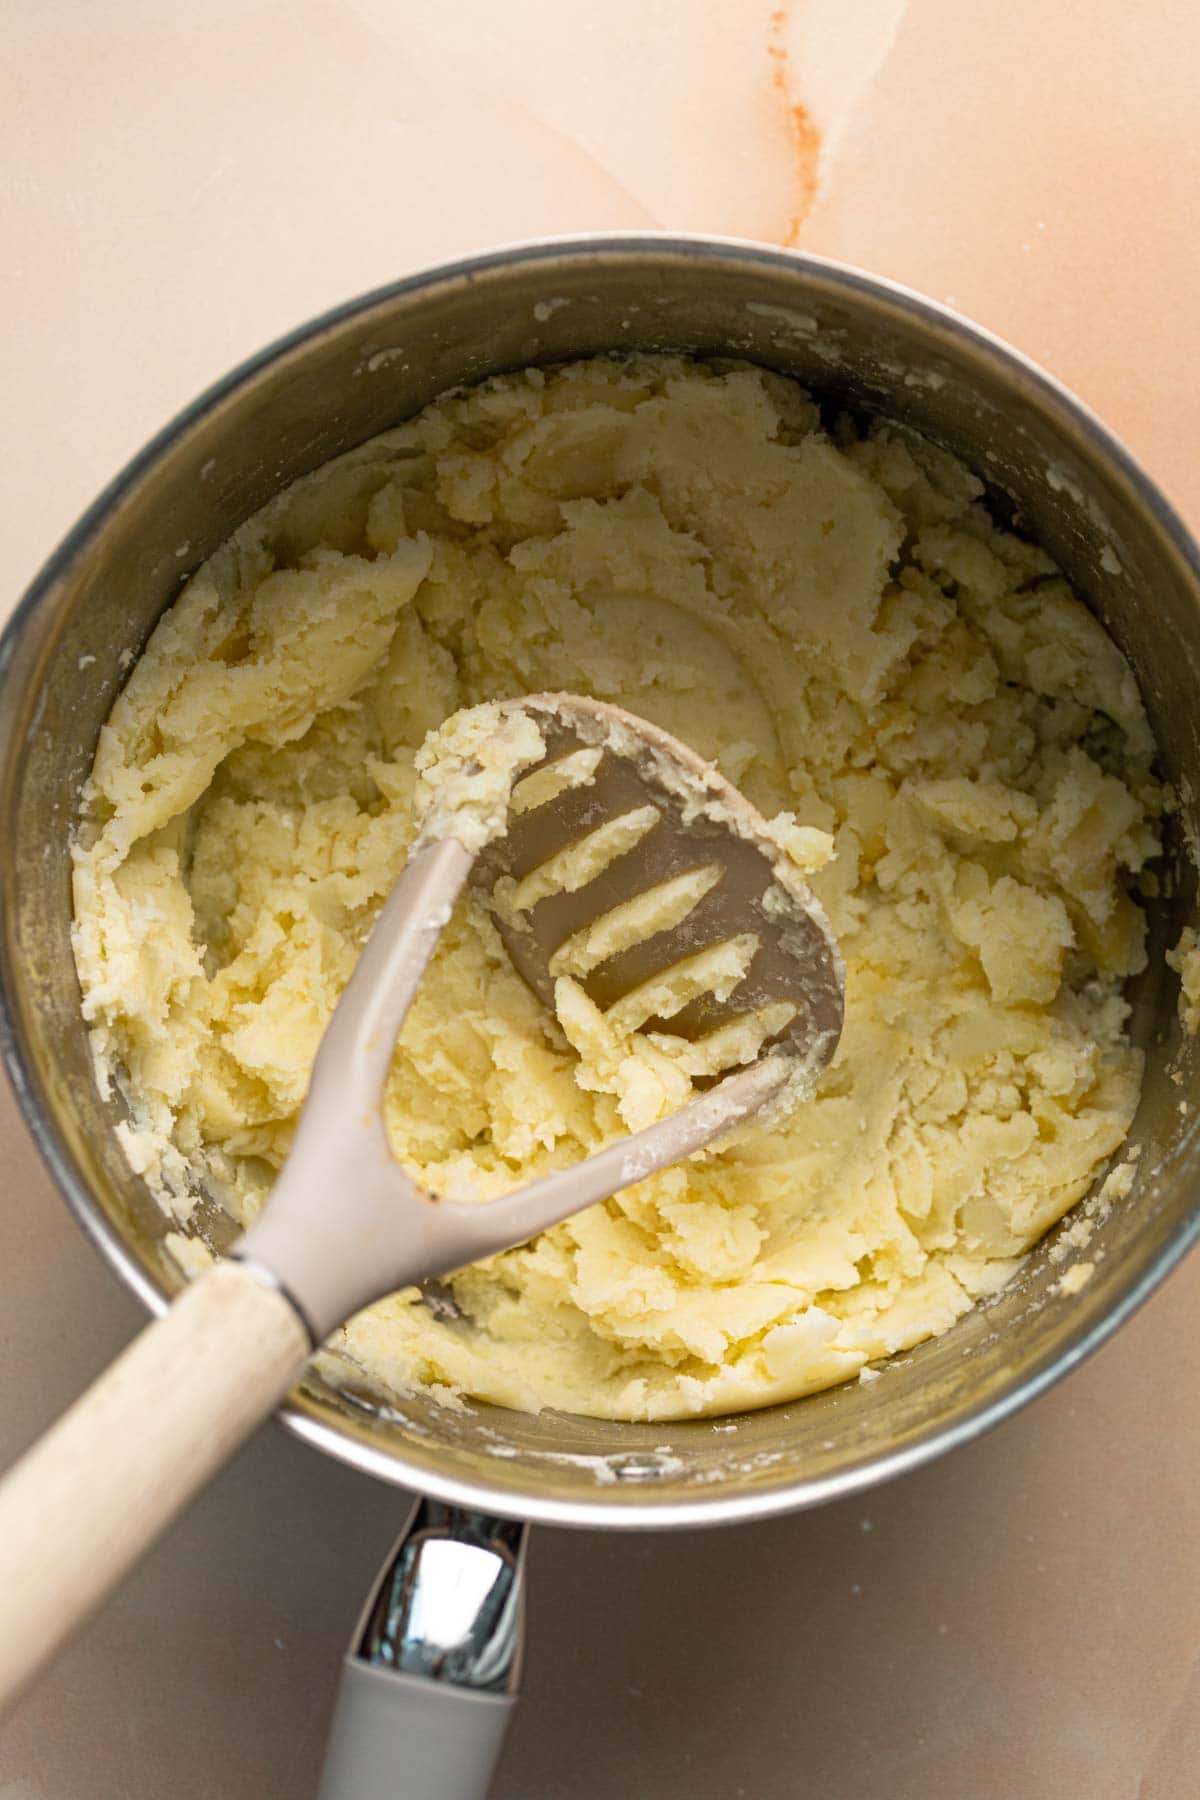
Step 4: Mash. Use a fork or a potato masher to mash the potatoes until completely soft and no lumps remain.
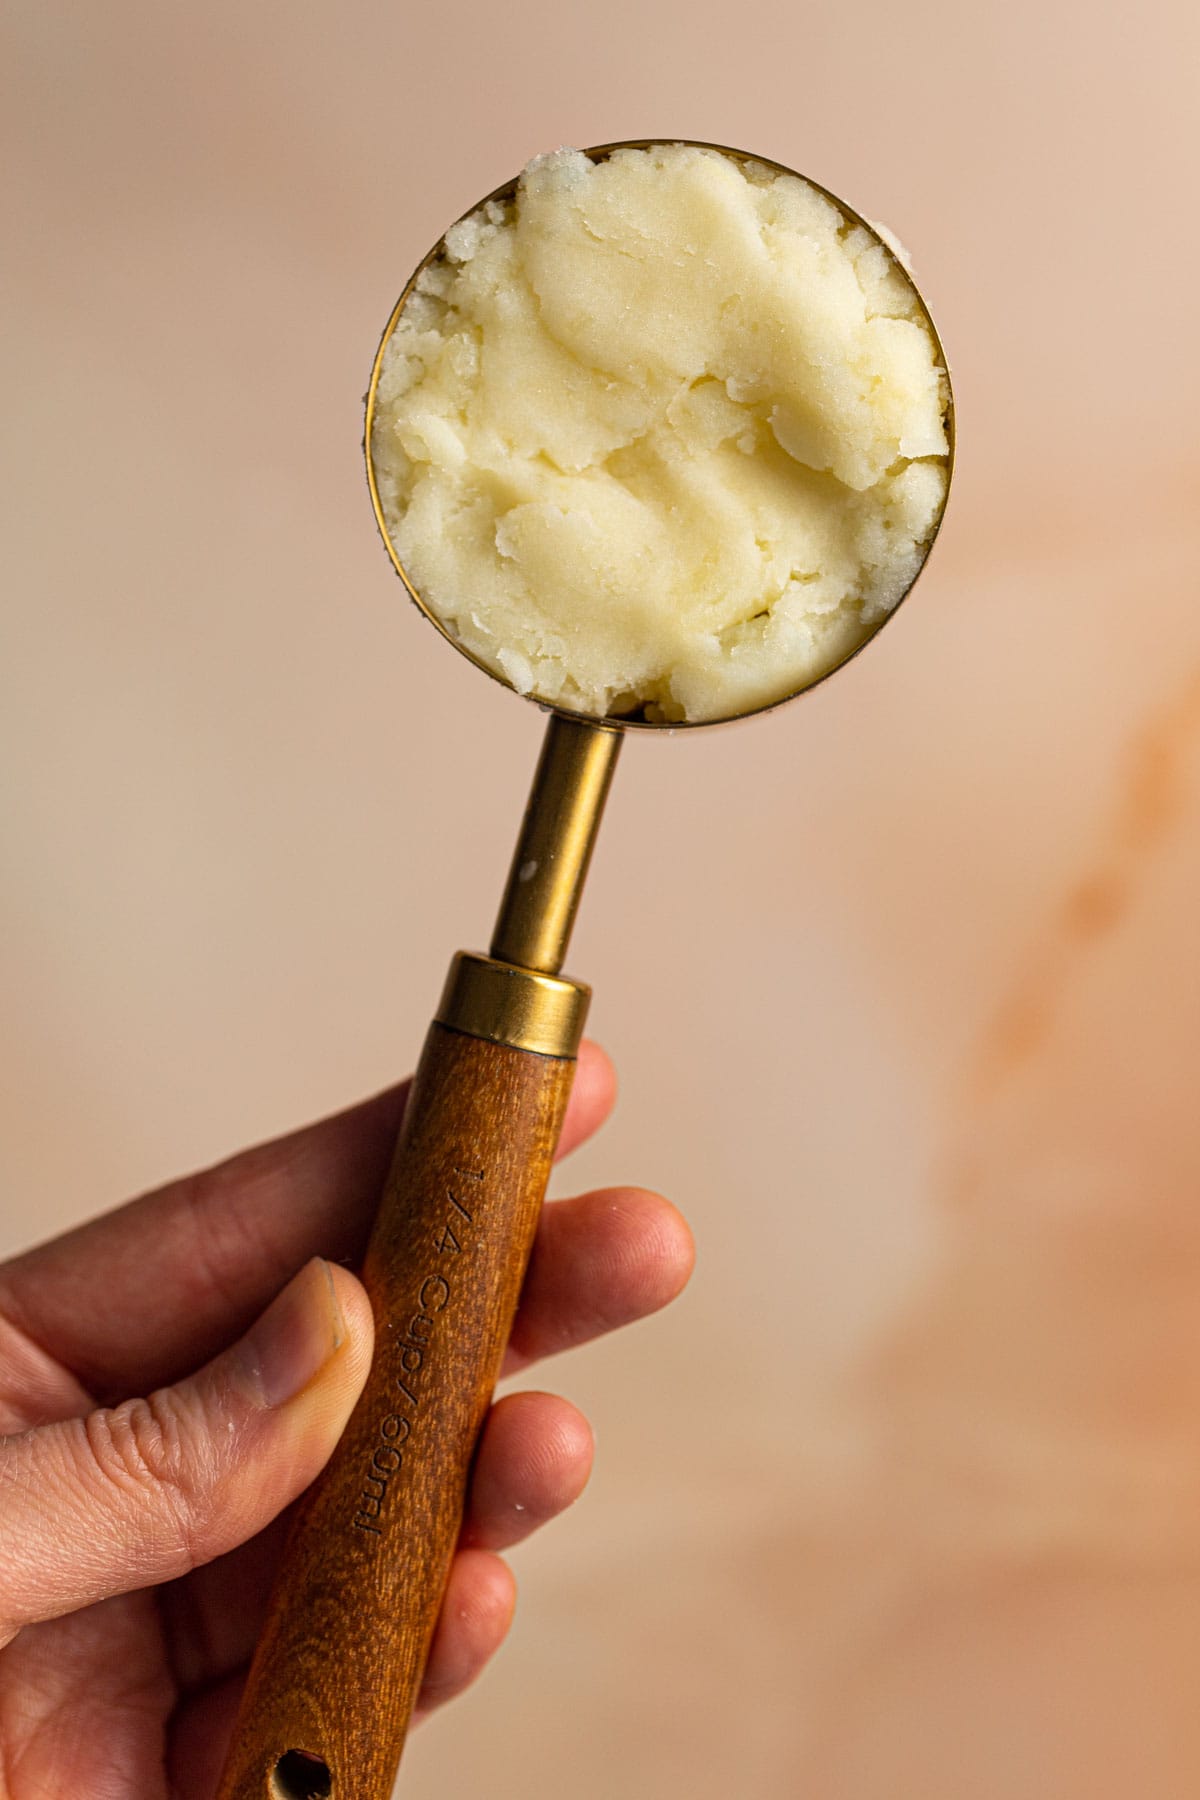
Step 5: Add & Measure. Add the remaining ingredients to the mashed potatoes. Mix well with a fork until combined. Then scoop out ¼ cup.
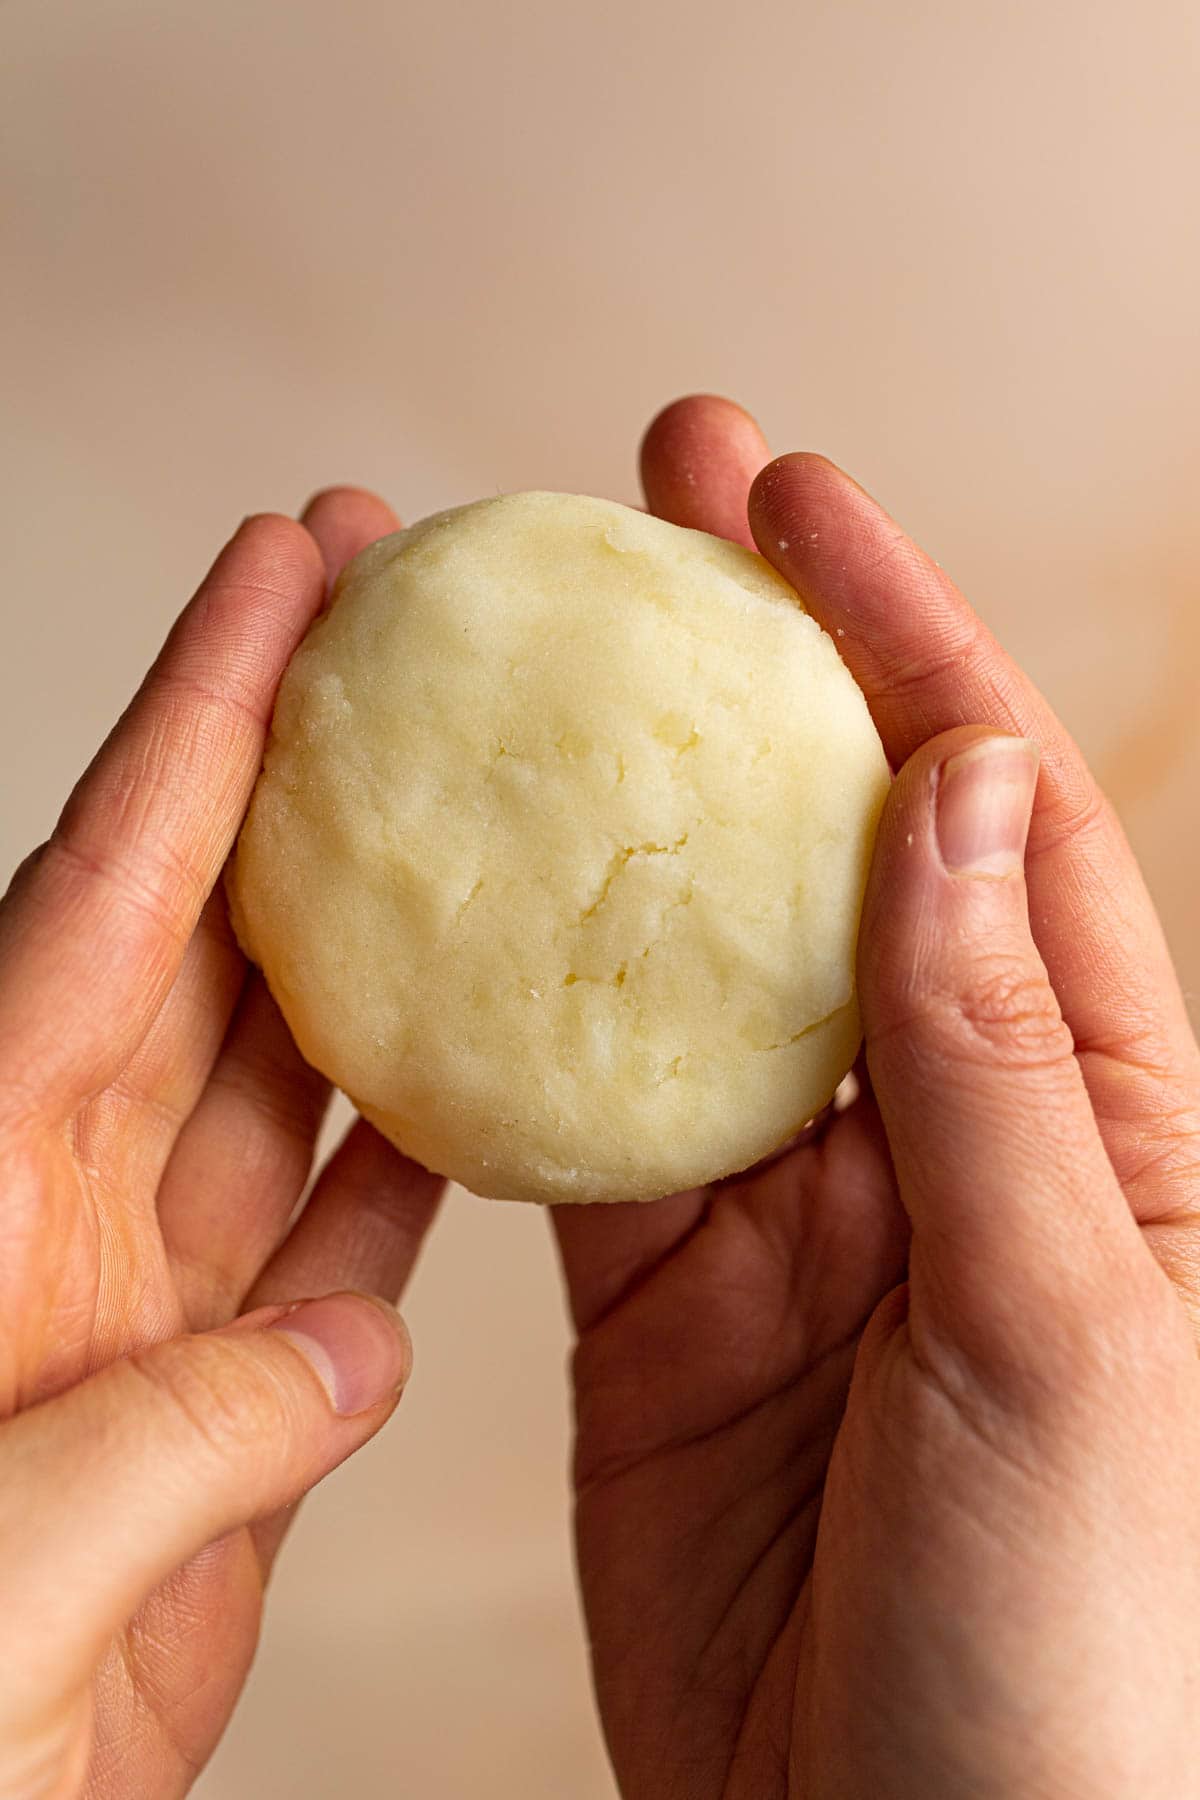
Step 6: Shape It. Use your hands to shape ¼ cup of the mixture into a smooth disc. Repeat until you've used up all the dough.
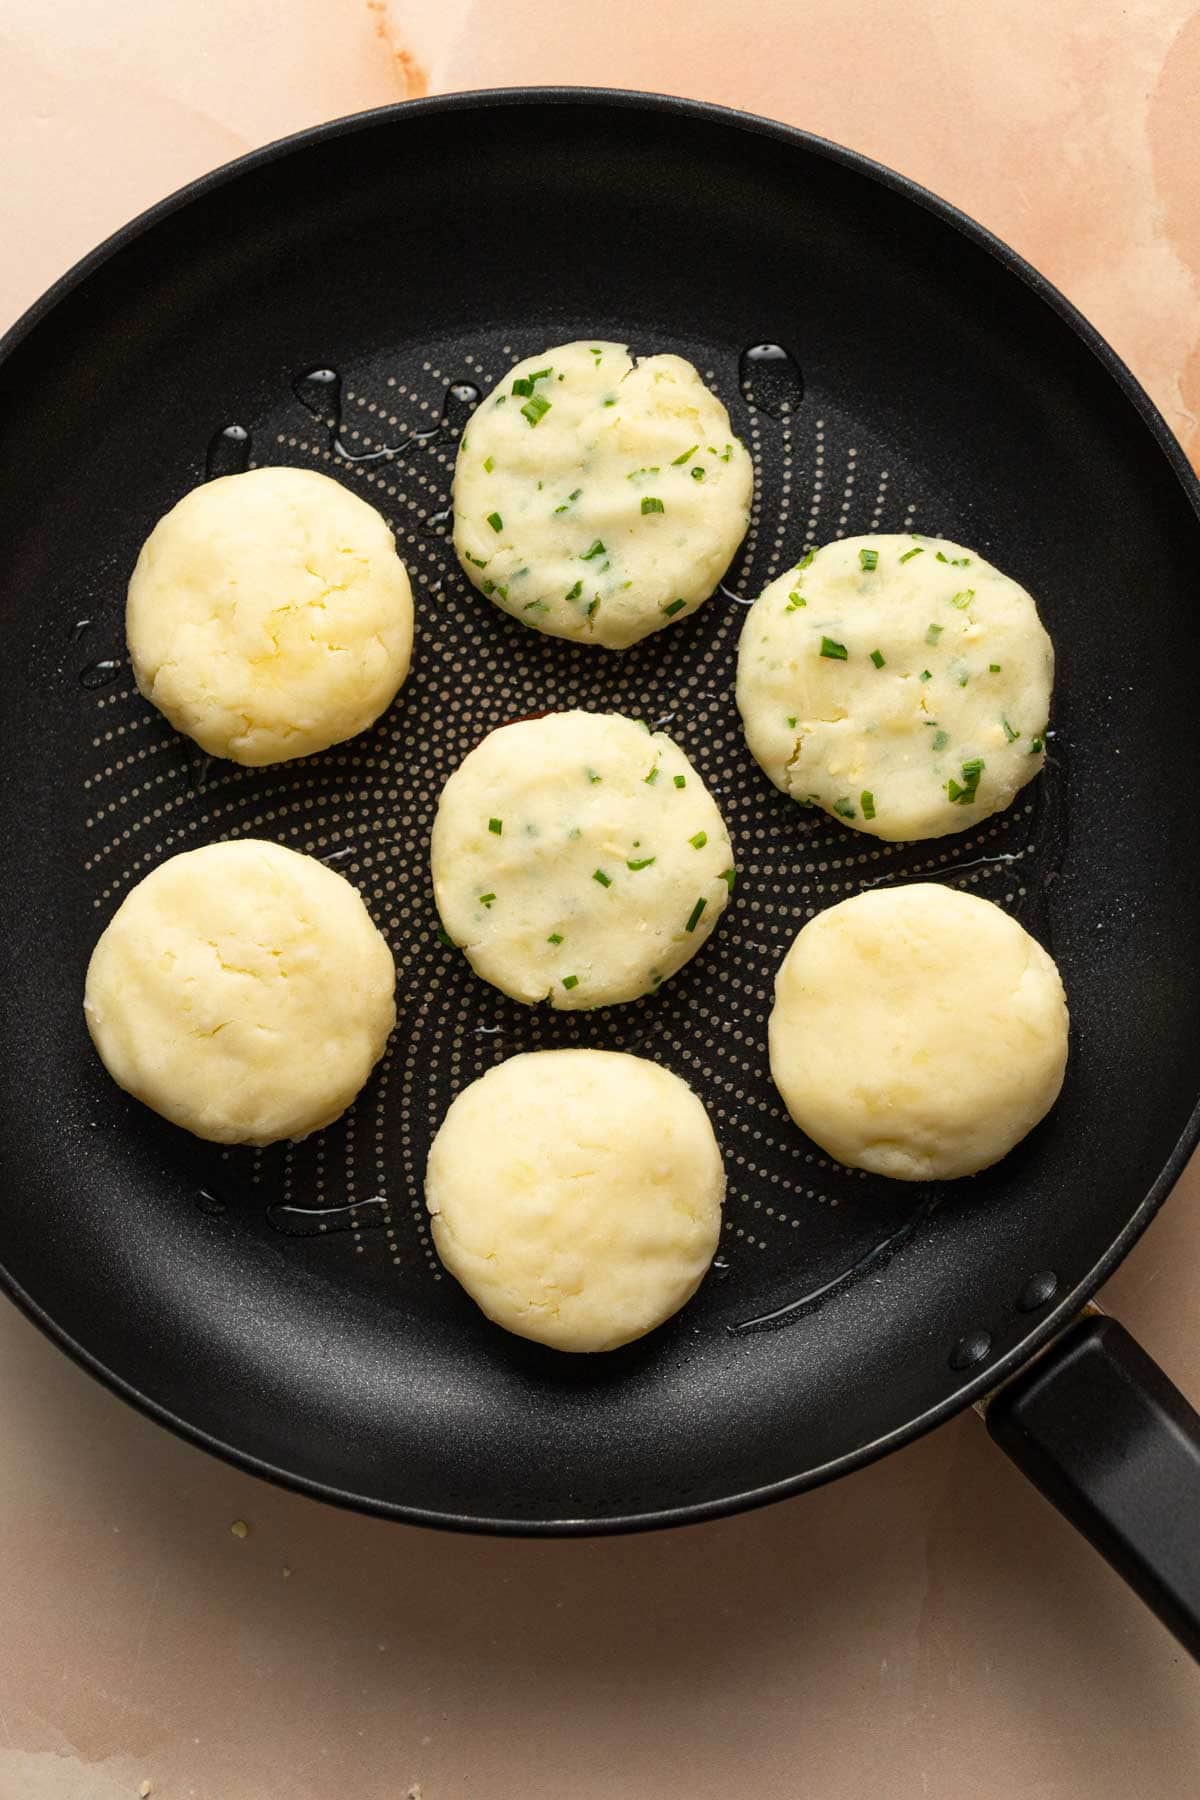
Step 7: Heat Oil. Heat oil in a frying pan. Add mochi, spacing them out equally. Depending on your pan size, you might need to fry them in several batches.
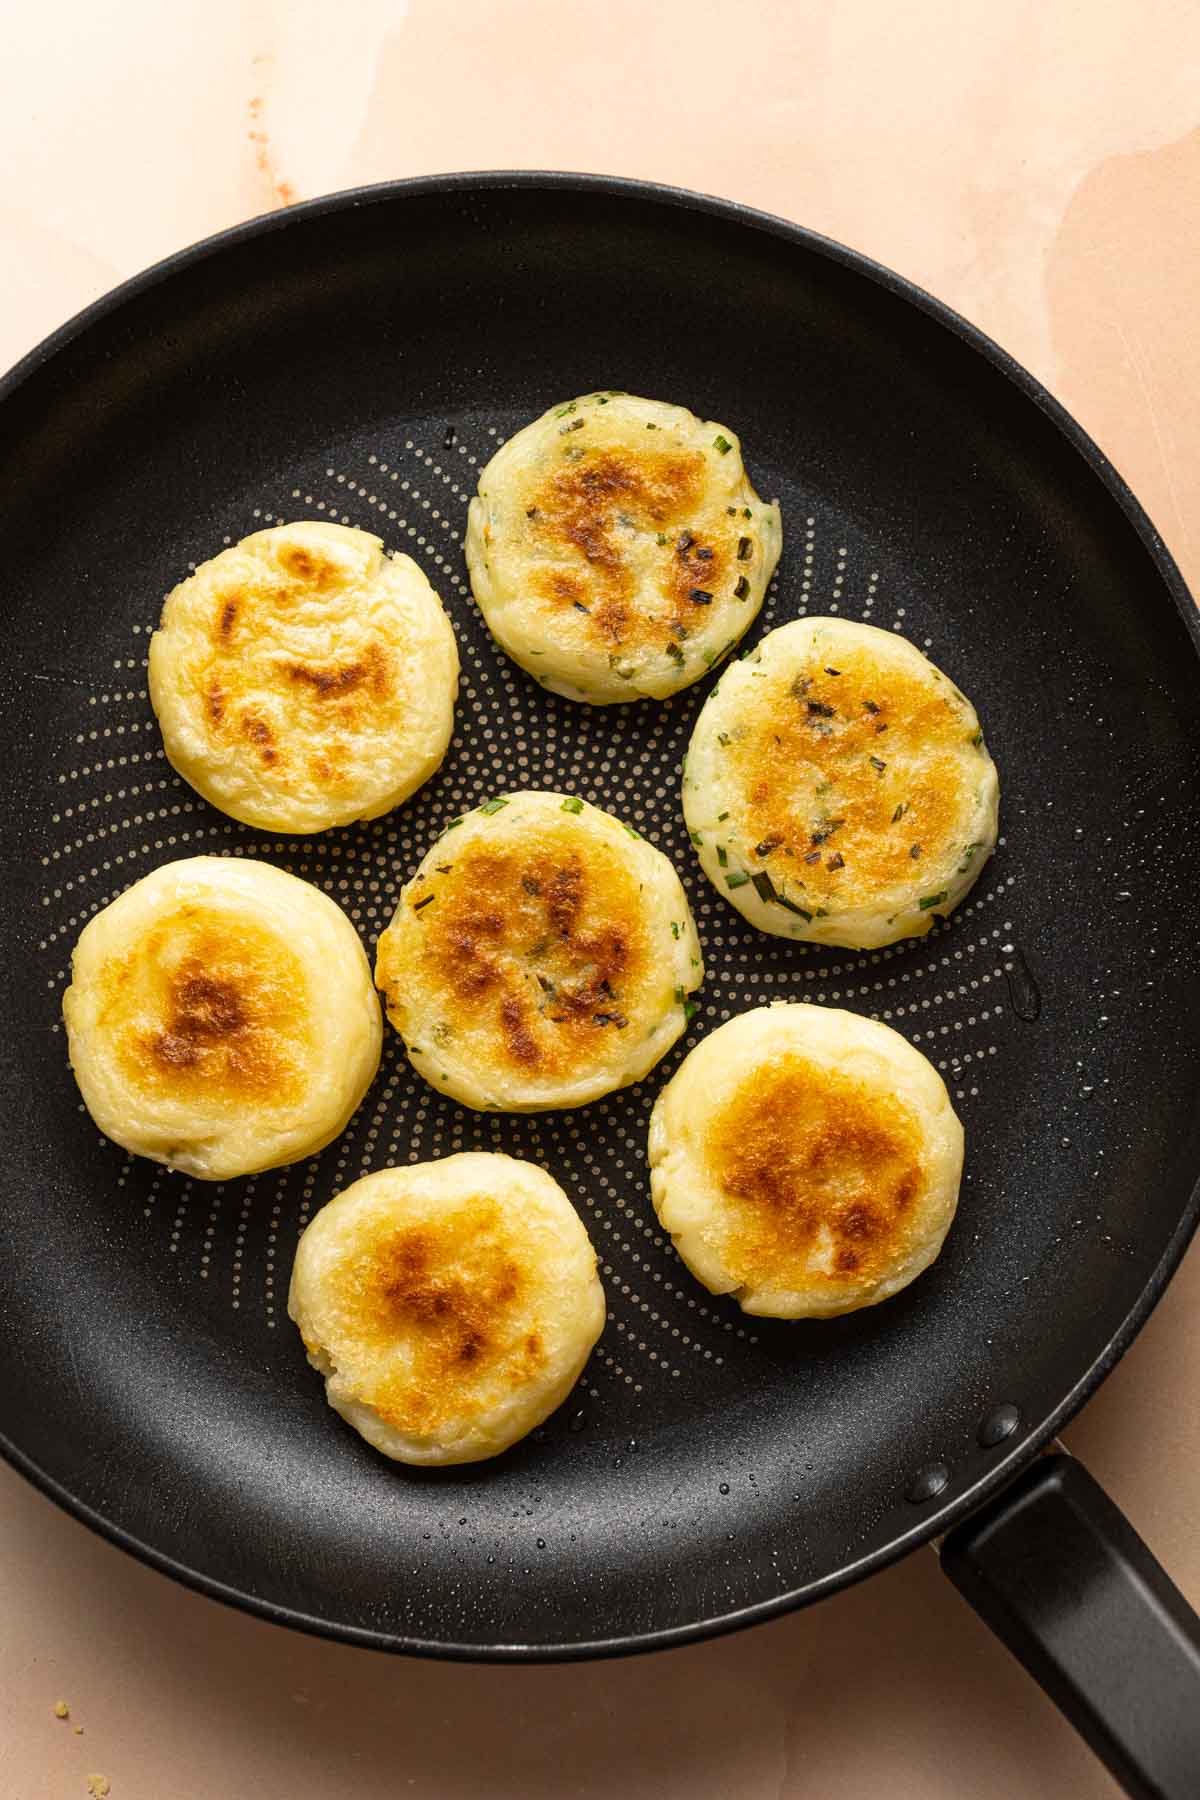
Step 8: Fry mochi. Fry on each side until golden brown and crispy.
If desired, dab off any excess oil with a paper towel.
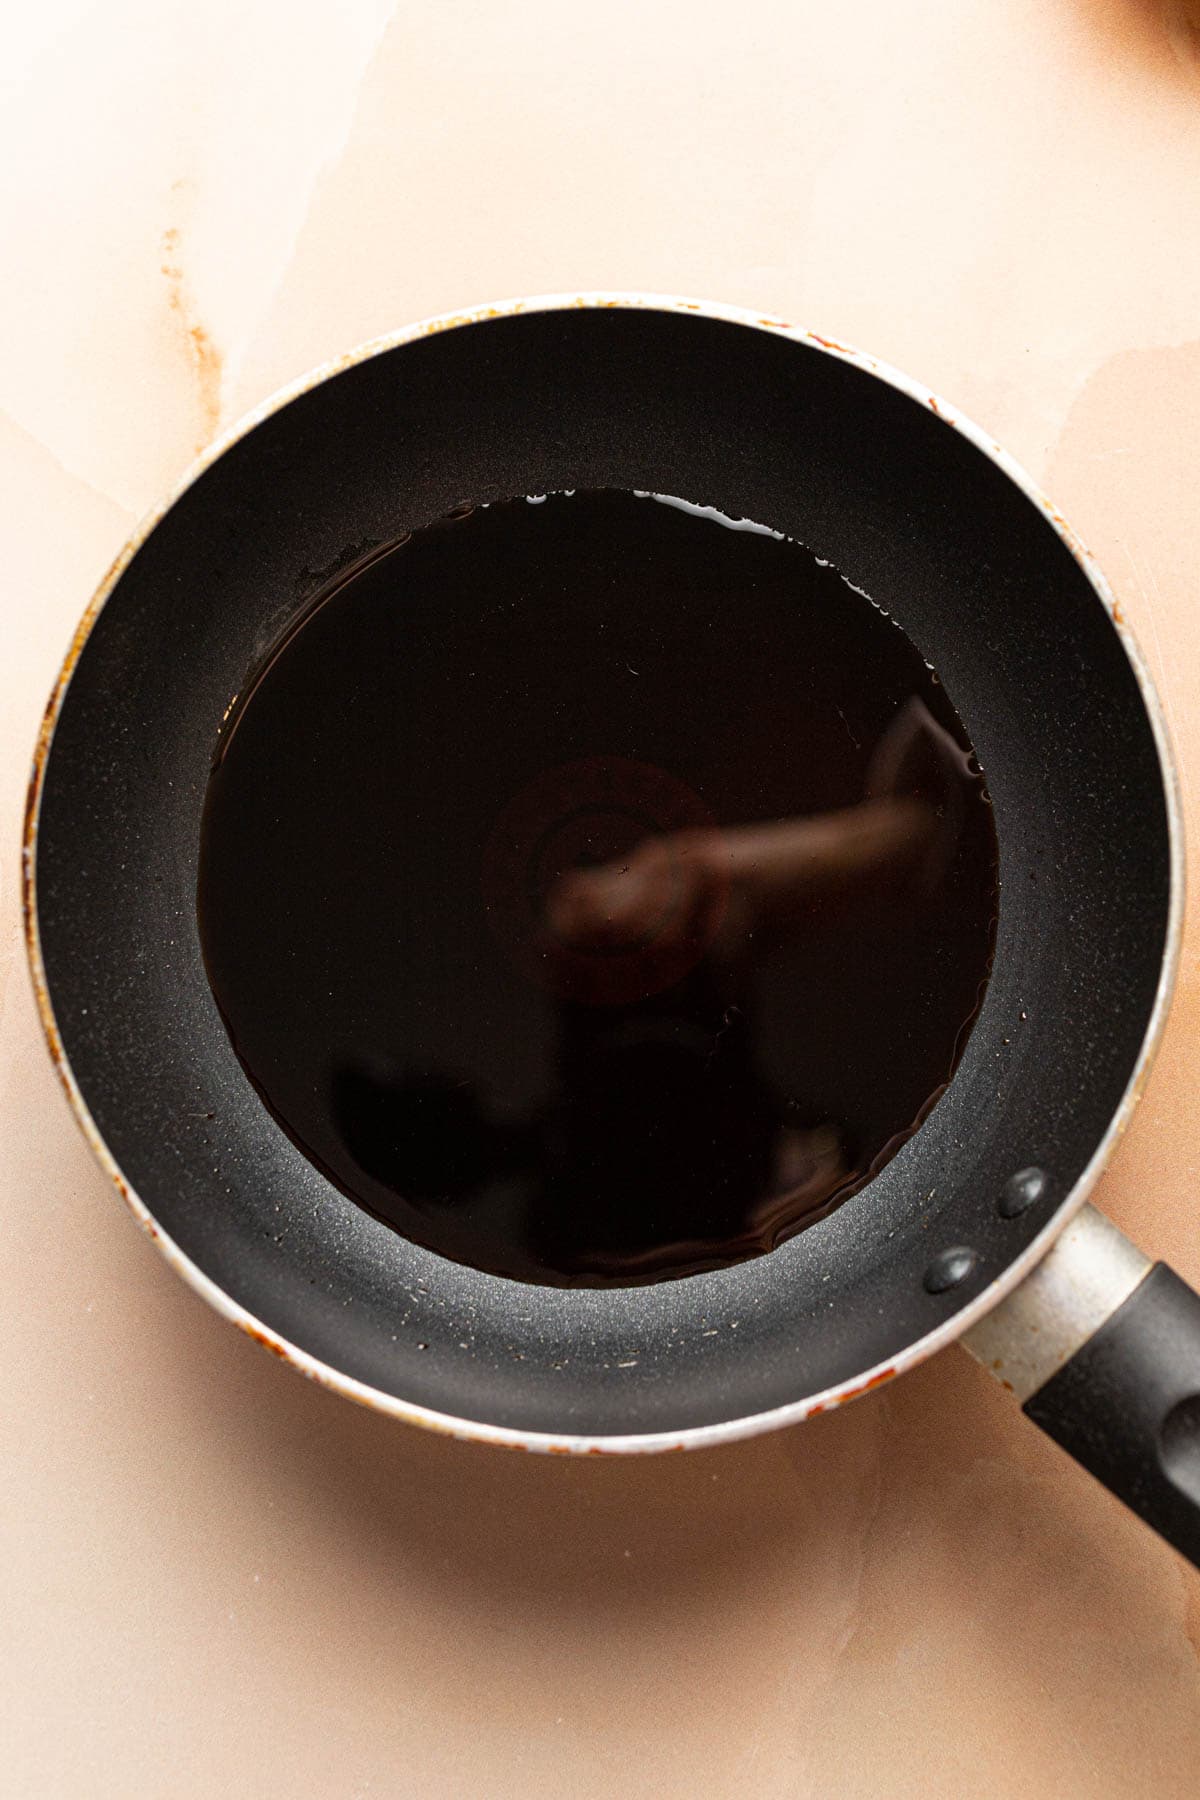
For a savory mochi, prepare the sauce by adding soy sauce, sugar, and mirin in a small pan. Heat until the sugar is dissolved. In the meantime, wrap a small strip of nori around the bottom of each mochi, Then dip each mochi into the sauce.
For a sweet mochi, leave out the salt when making the dough, and make sure you are using unsalted butter. Stuff them with a dollop of red bean paste or drizzle with maple syrup.
Mochi breaking? If your mochi can't be formed into a disc or is breaking in the frying pan, the dough is too wet. Add more potato starch.
🥄 Measuring
Many similar mochi recipes call for your dough to be divided into equal parts before forming a disc and frying.
I find it easier to simply use a ¼ cup measurement to determine the size of each mochi. You can use a smaller or bigger cup, too, depending on your preference.
Simply scoop the dough into the cup measurement and then shape it with your hands.
If you find dividing the dough into equal parts easier (or if you don't have the cup measurements), you can do that instead.
🧀 Cheese & Chive Version
One of my favorite ways of taking this mochi to a new level is by stuffing it with vegan cheese and fresh chives.
After mixing all the ingredients to create a mochi dough, simply add finely chopped chives to the mixture. Stir well until combined.
Here's how to stuff the mochi. I used vegan cheddar-style cheese.
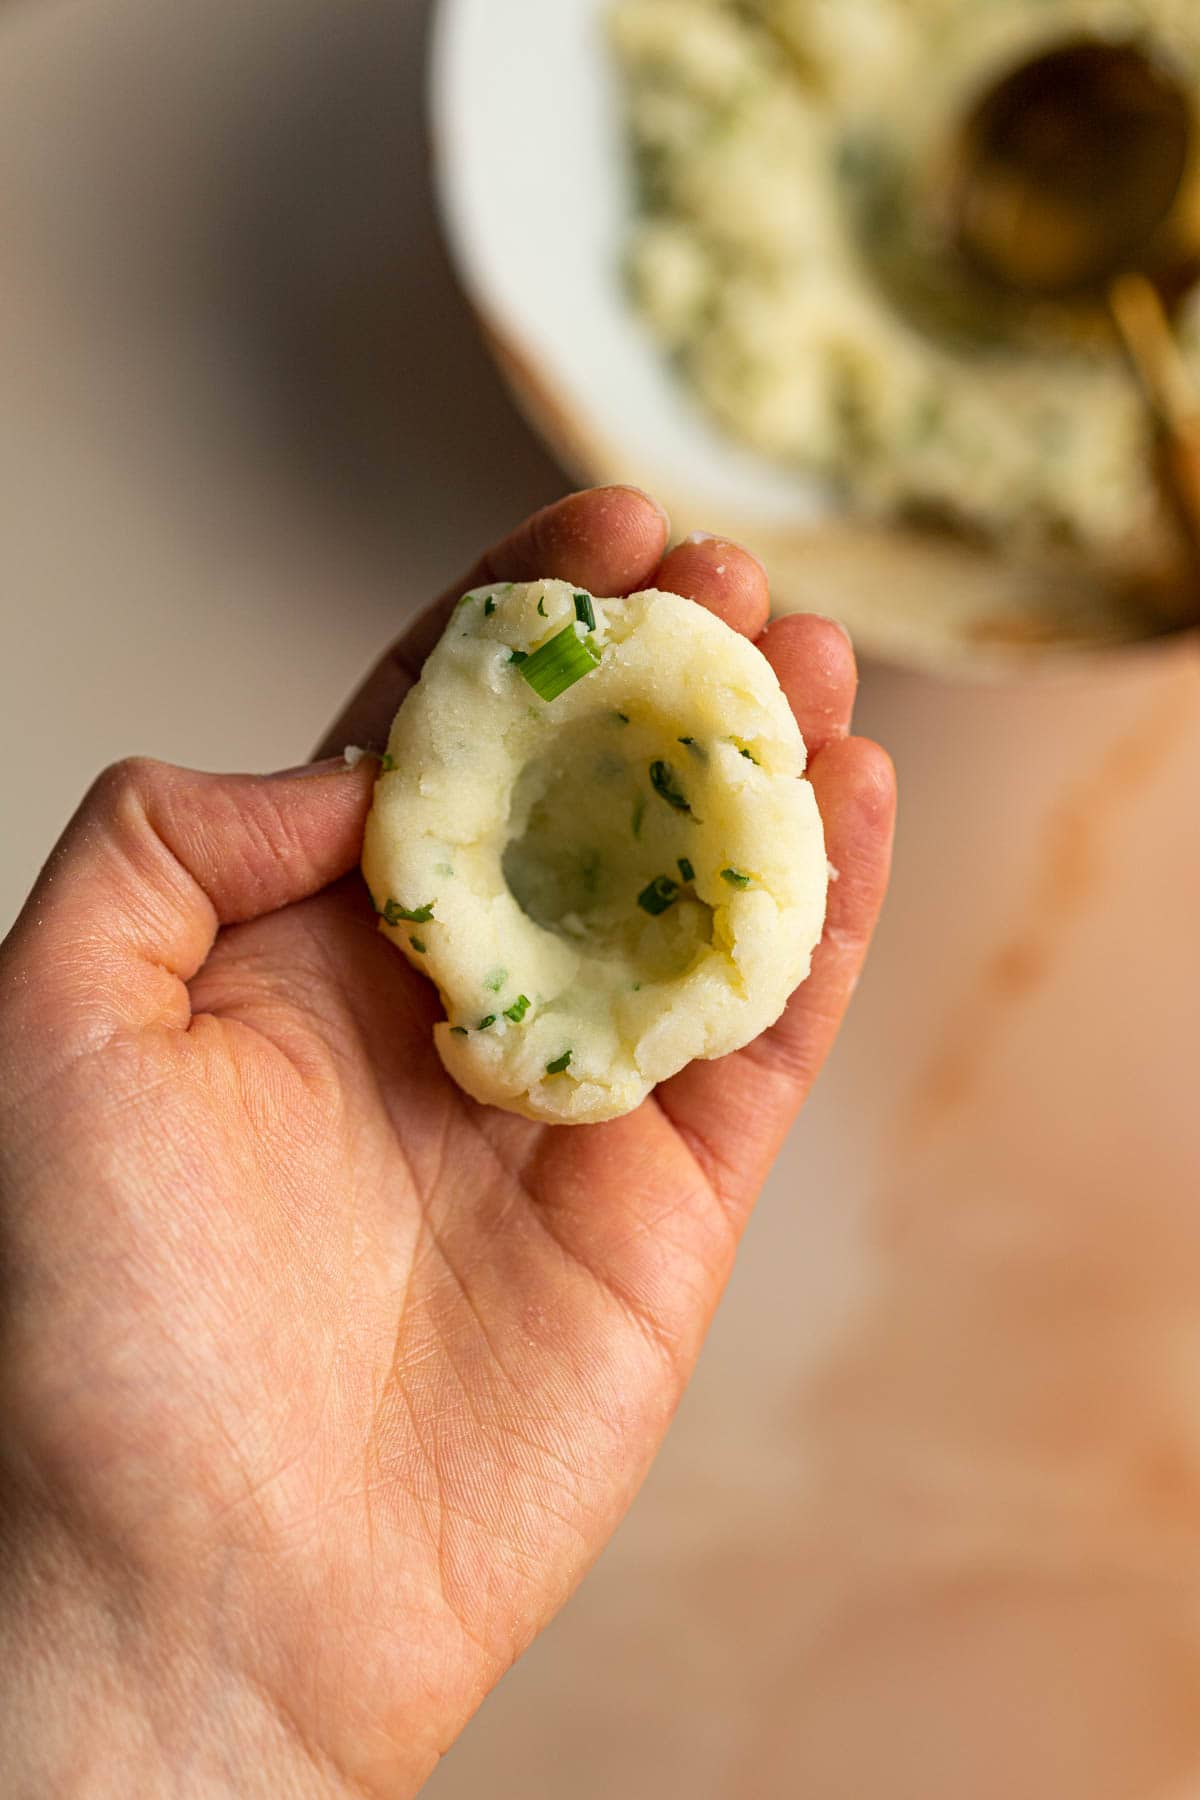
Step 1 - Shape ¼ cup of the mixture into a disc. Use your fingers to create a well in the center.
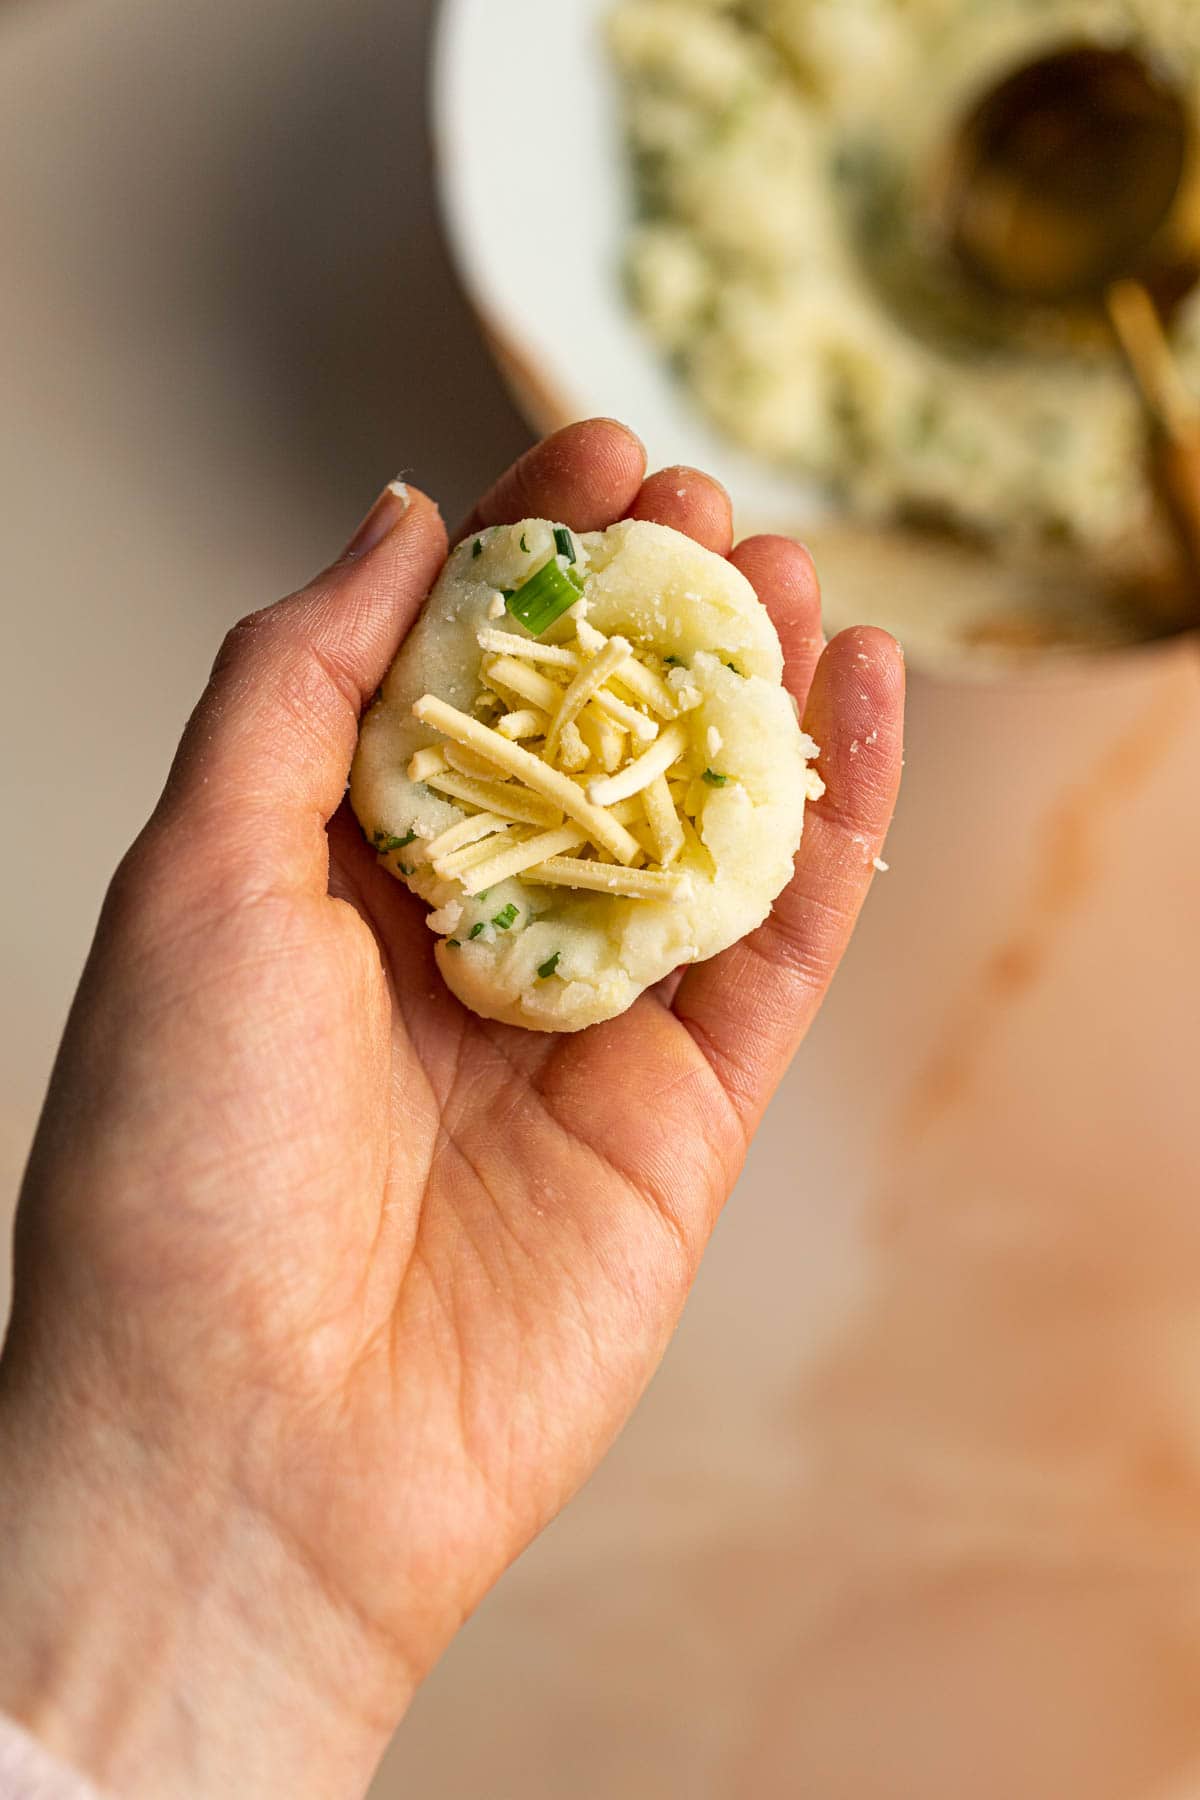
Step 2 - Stuff the well with cheese*.
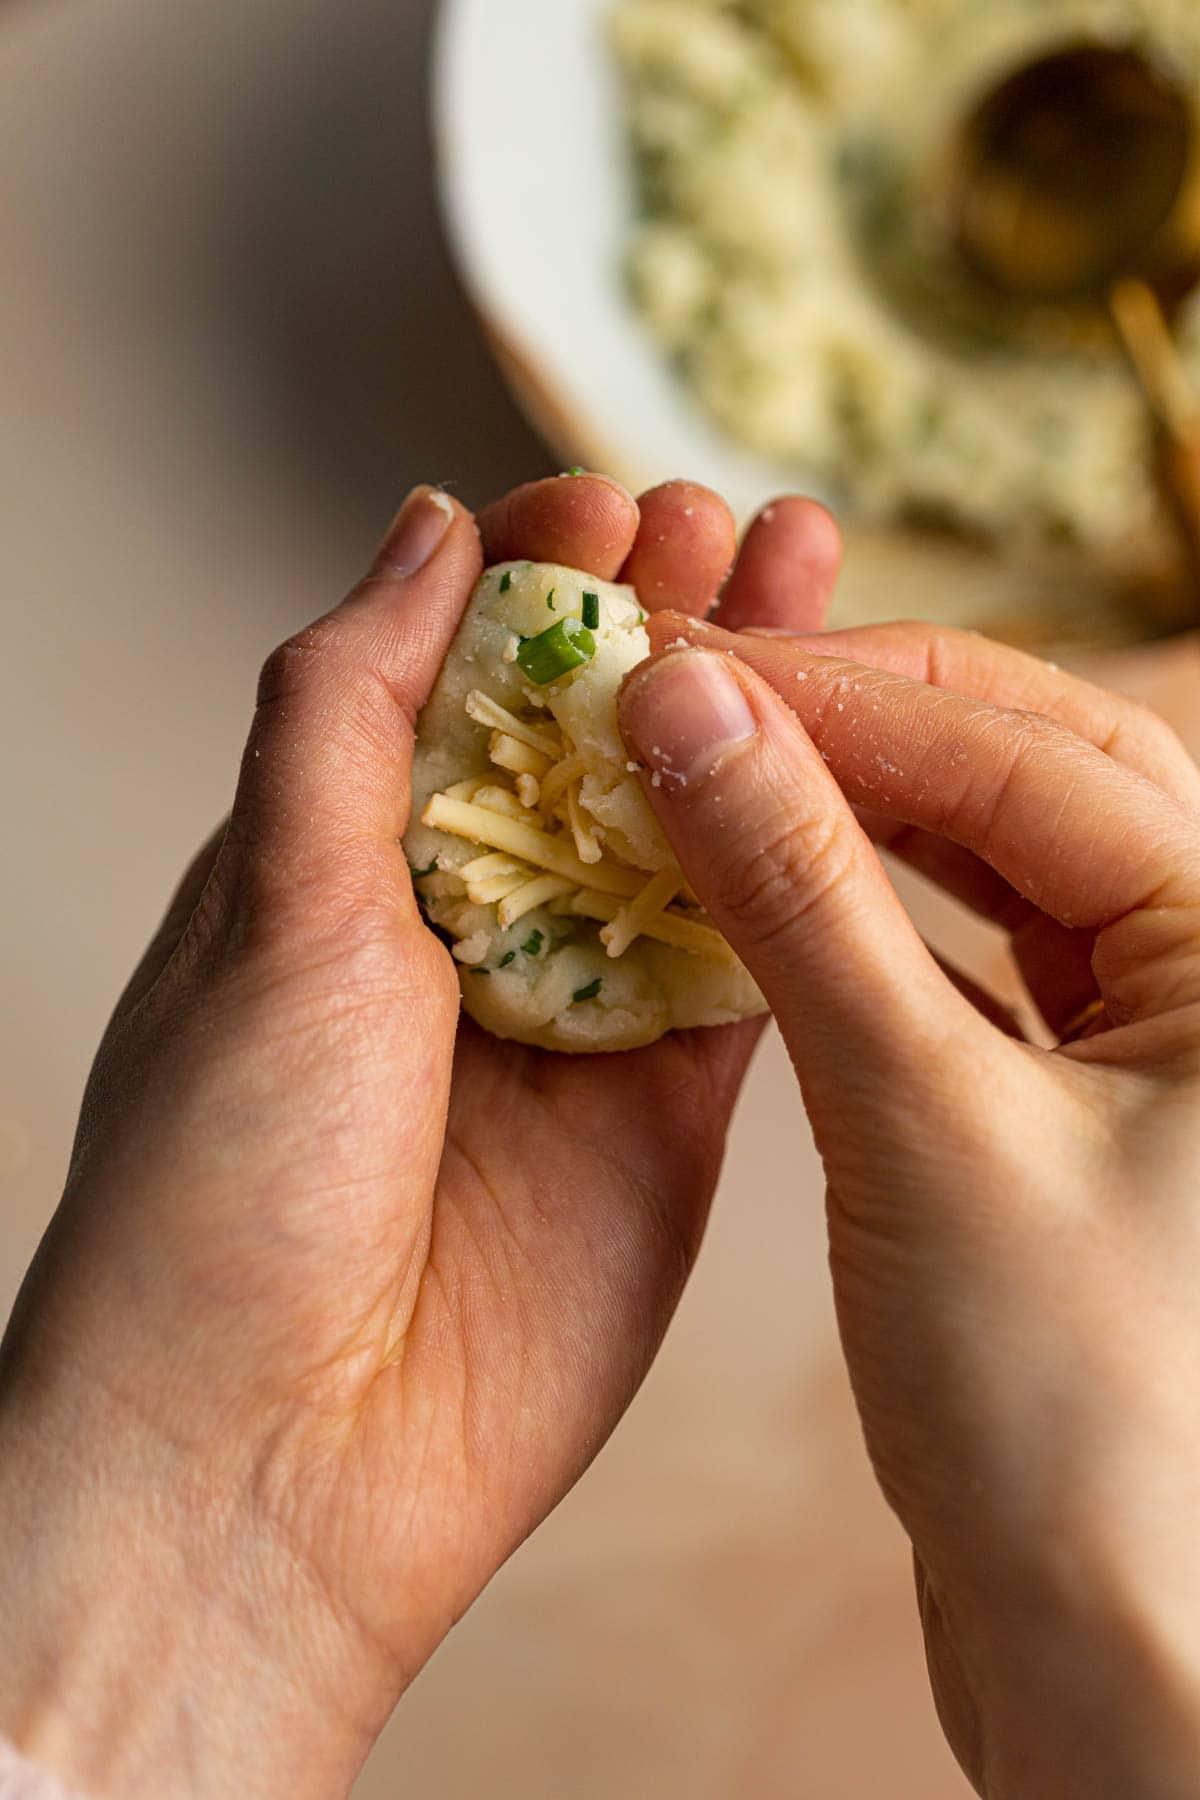
Step 3 - Pull the sides over the cheese to cover the cheese completely.
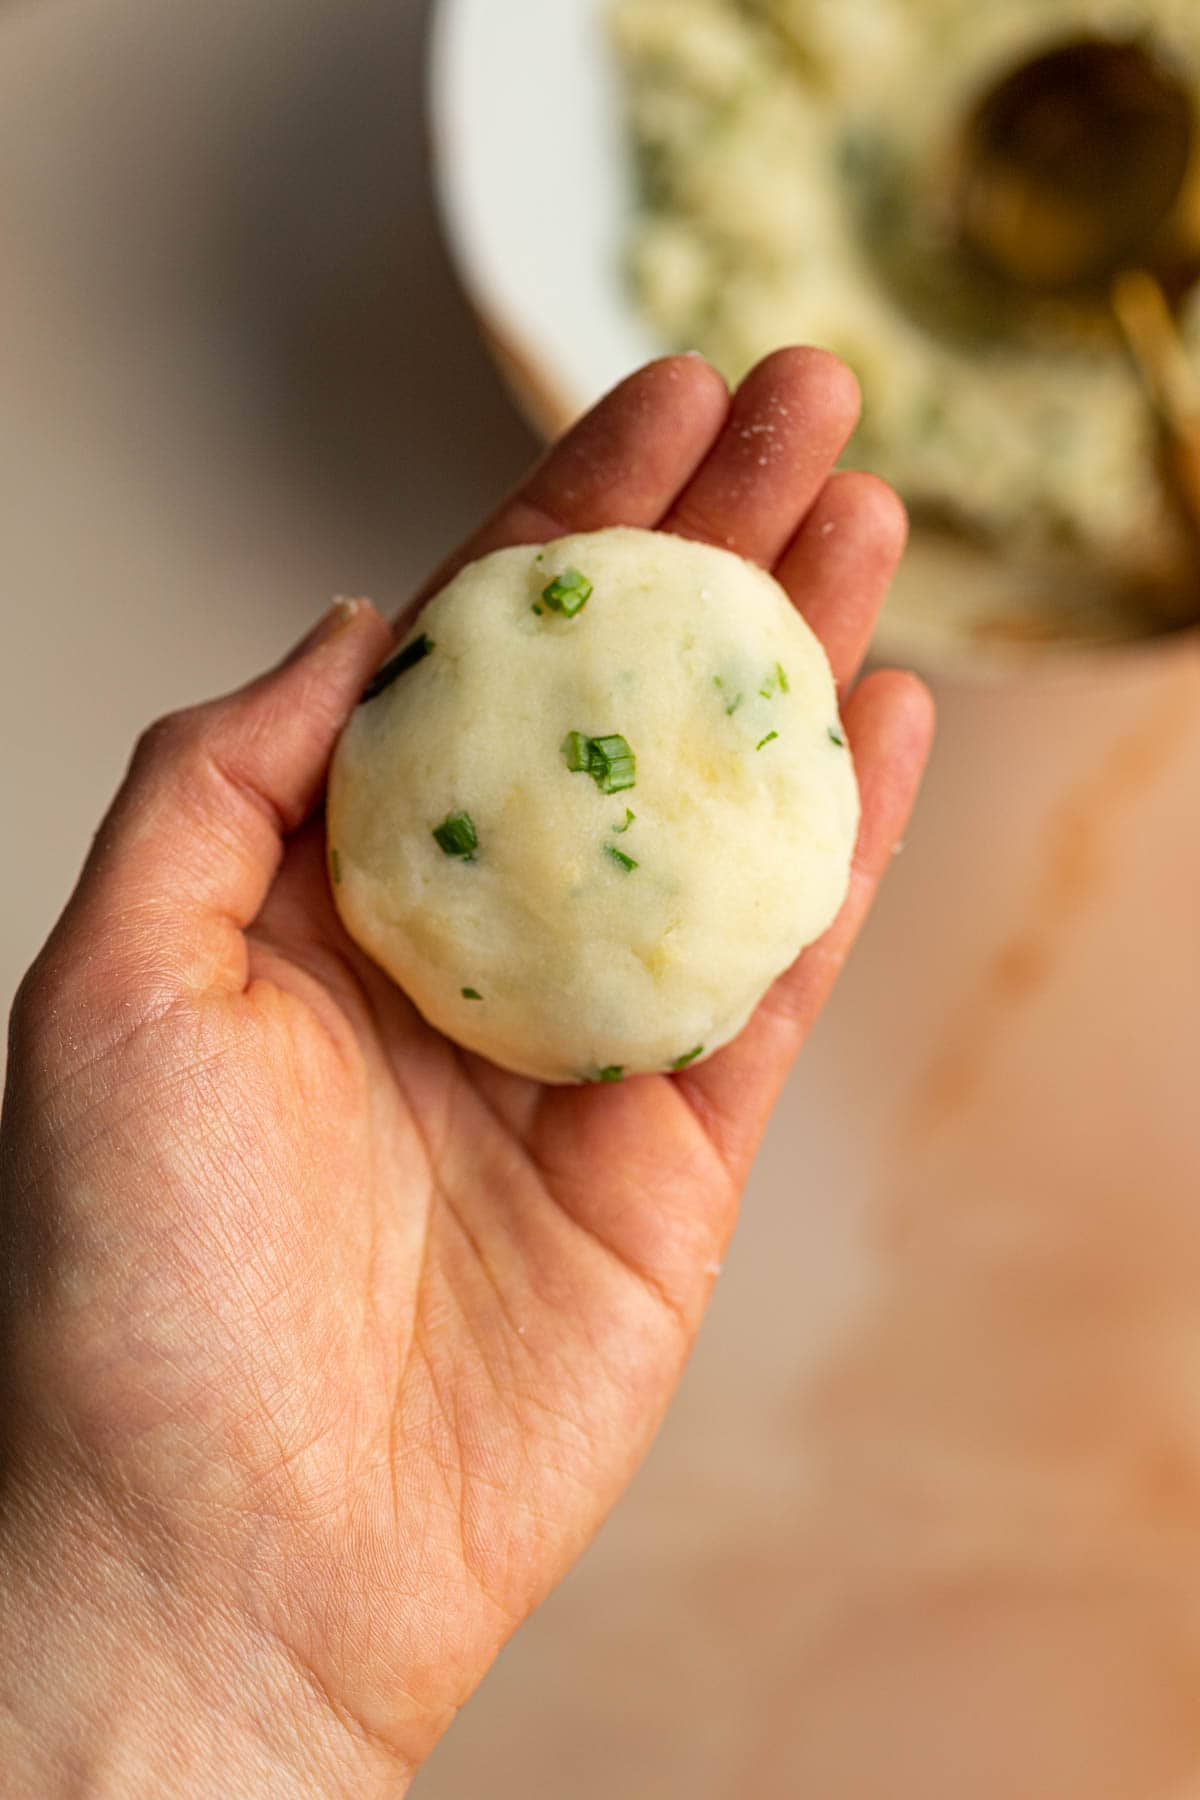
Step 4 - Gently fry the mochi in oil (as you would normally).
- Note- cubes or small slices work better than shredded cheese.
👨🍳 Chef's Tips
- Choose the Right Potatoes: The type of potato you choose is crucial. Stick to russet, Yukon Gold, or Maris Piper potatoes.
- Slightly Overcook: I recommend slightly overcooking the potatoes to make them easier to mash. They should be almost effortless to mash. This will create a soft cushion-like mochi.
- Let it Cool: After creating your mixture, let the mochi dough cool. This will make them easier to handle and shape into the mochi form.
- Get Creative: You can try different molds (even cookie cutters work) to experiment with different shapes.
- Stick to Medium Heat: Don't be tempted to fry these at high heat. You'll want medium heat to achieve that golden brown exterior without burning.
- Savory or Sweet: Using the same base, you can make savory and sweet mochi. For savory mochi, follow the recipe as it is and serve with dipping sauce. For sweet mochi, leave out the salt & fill it with your favorite sweet fillings, like red bean paste.
- Reheat in a Toaster Oven: If you have leftovers, reheat them in a toaster oven to restore the crispy exterior and chewy interior. This will help bring back the delicious texture of your homemade potato mochi.
❓Frequently Asked Questions
Yes! Purple sweet potatoes work beautifully for a sweet variation of Potato Mochi.
Yes, a toaster oven is ideal for reheating to restore the crispy exterior and chewy interior.
🥔 Serving Ideas
- Turn it into a sweet treat by drizzling it with maple or agave syrup.
- Enjoy it with a side of miso-glazed tofu for more plant protein.
- Serve it with a nutrient-packed tender broccoli.
📦 Storage Tips
While this potato mochi is best enjoyed fresh, here's how to make the most of your leftovers.
To store - let mochi cool down to room temperature. Transfer it to an airtight container. Consume within 2-3 days.
To reheat - whatever you do, don't reheat these in a microwave. The crispy outside will turn soft and mushy. I suggest reheating in an oven or a toaster oven to revive their crunch.
👋 Conclusion
Got questions about potato mochi? I'm always happy to help you out in the comments section below.
Have you tried out this recipe? Please consider leaving feedback (star rating) or comment below. Creating recipes is time-consuming, so your comments & feedback are very much appreciated!
🍴Recipe

Easy Potato Mochi - Tasty Sweet or Savory Snack
EQUIPMENT
- Knife & chopping board
- large pan
- ¼ cup measuring cup
- Potato masher
- Frying pan
INGREDIENTS
Mochi
- 1.25 pounds (570 g) potatoes about 2 large potatoes
- 2.5 tablespoon potato starch
- 1 tablespoon vegan butter melted or softened
- 1 teaspoon salt
- 1 tablespoon oil for frying
- ½ nori sheet for wrapping
Sauce
- 3 tablespoon soy sauce
- 2 tablespoon brown sugar
- 2 tablespoon mirin
INSTRUCTIONS
Mochi
- Prepare the Potatoes. First, peel and dice the potatoes into 1-inch cubes (approximately).1.25 pounds potatoes
- Boil the Potatoes. Place potatoes in a large pan with water. Boil until soft, about 15 minutes.
- Drain. Drain the potatoes well, removing any leftover water.
- Mash. Use a fork or a potato masher to mash the potatoes until completely soft and no lumps remain.
- Add & Measure. Add potato starch, vegan butter & salt to the mashed potatoes. Mix well with a fork until combined. Then scoop out ¼ cup.2.5 tablespoon potato starch, 1 tablespoon vegan butter, 1 teaspoon salt
- Shape It. Use your hands to shape ¼ cup of the mixture into a smooth disc. If the mixture can't be formed into a disc, add more potato starch & mix well. Repeat until you've used up all the dough.
- Heat Oil. Heat oil in a frying pan. Add mochi, spacing them out equally. Depending on your pan size, you might need to fry them in several batches.1 tablespoon oil
- Fry the mochi. Fry mochi on each side until golden brown and crispy.
Sauce
- Mix. Add soy sauce, sugar, and mirin to a small pan.3 tablespoon soy sauce, 2 tablespoon brown sugar, 2 tablespoon mirin
- Dissolve. Heat until the sugar is dissolved. Then dip each mochi into the sauce on both sides.
- Wrap. To finish it off, wrap a small strip of nori around the bottom of each mochi.½ nori sheet
- Serve & Enjoy. I like serving it with miso-glazed tofu for extra protein or some pan-fried broccoli.
Notes
- Slightly Overcook: I recommend slightly overcooking the potatoes to make them easier to mash.
- Let it Cool: After creating your mixture, let the mochi dough cool. This way, they will be easier to handle.
- Stick to Medium Heat: Don't be tempted to fry these at high heat. You'll want medium heat to achieve that golden brown exterior without burning.
- Savory or Sweet: Keep in mind you can make both savory and sweet mochi using the same base. For savory mochi, follow the recipe as it is and serve with dipping sauce. For sweet mochi, fill it with your favorite sweet fillings, like red bean paste.
Disclaimer: The nutritional information above is calculated automatically. The author of this post cannot guarantee 100% accuracy of this data.


Leave a Reply