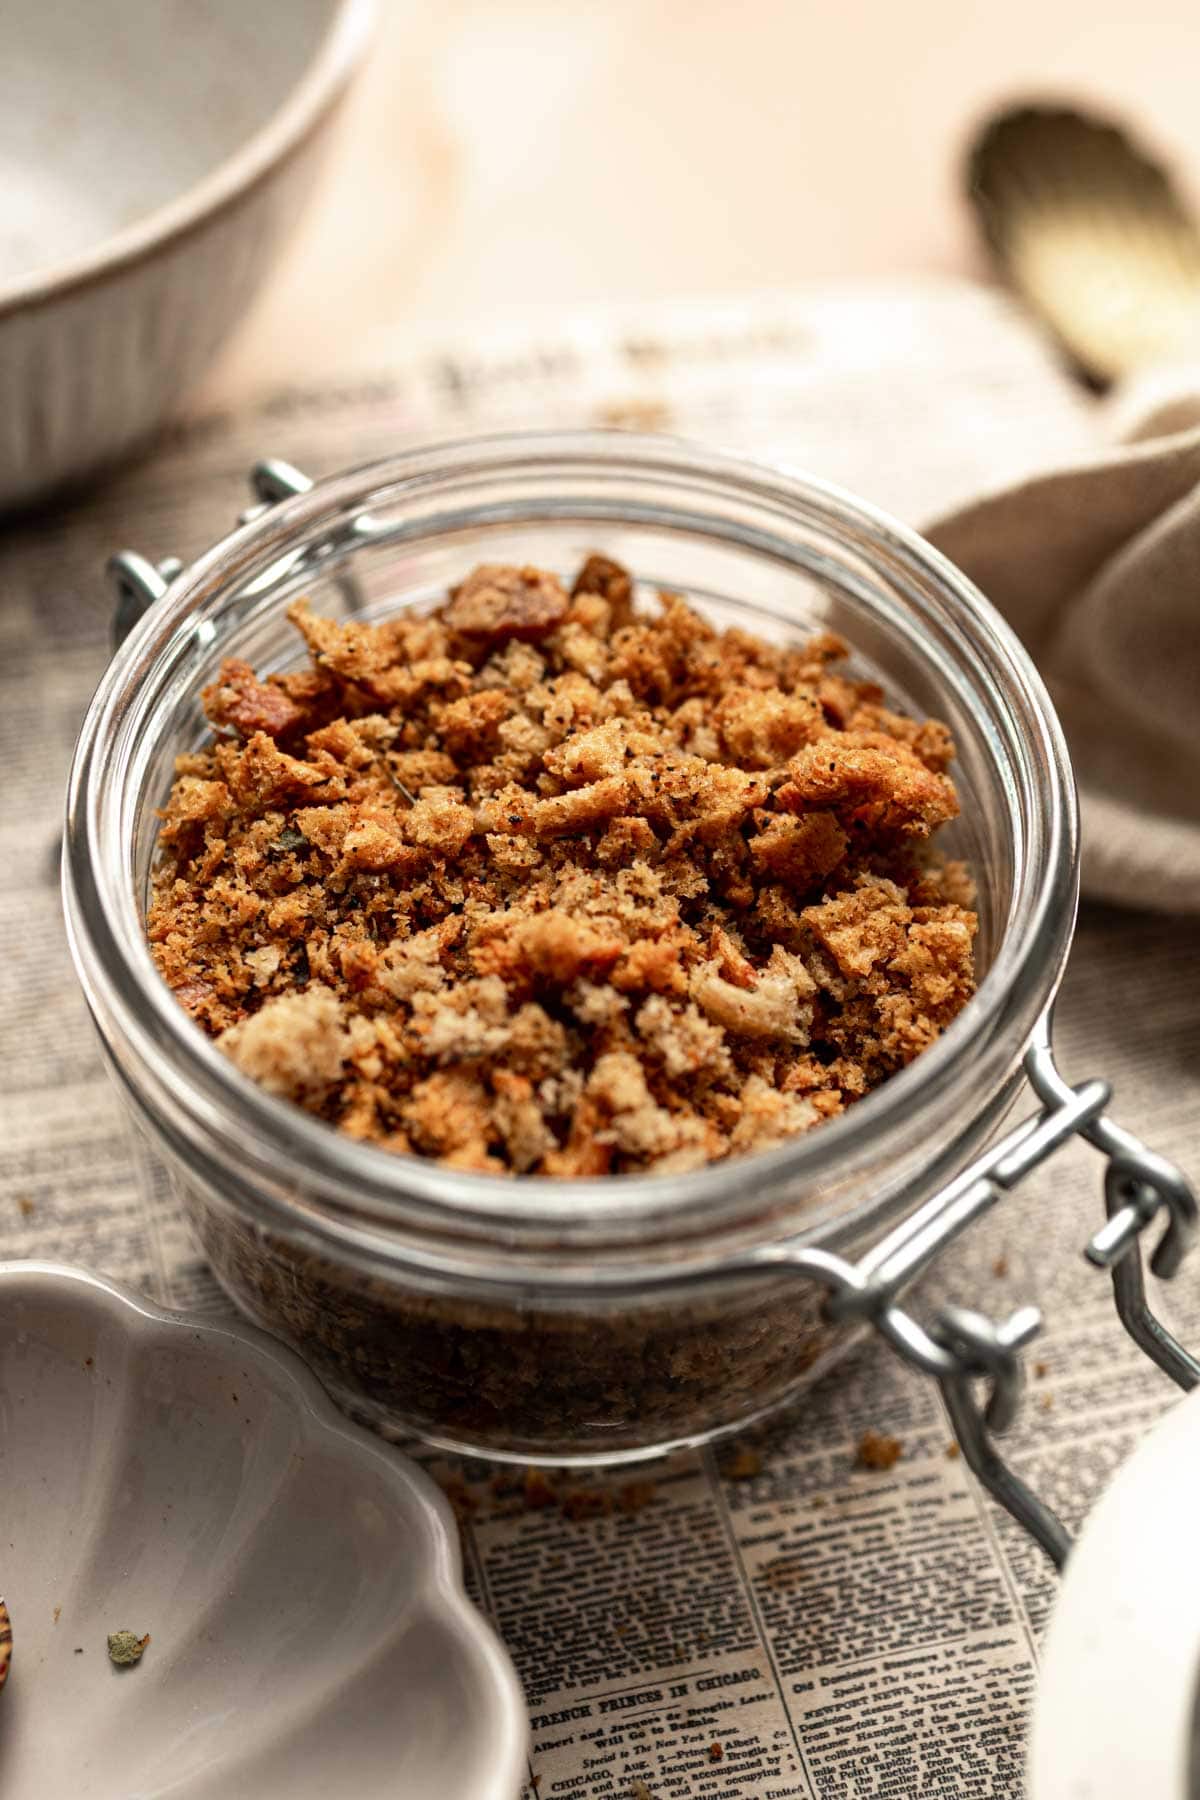
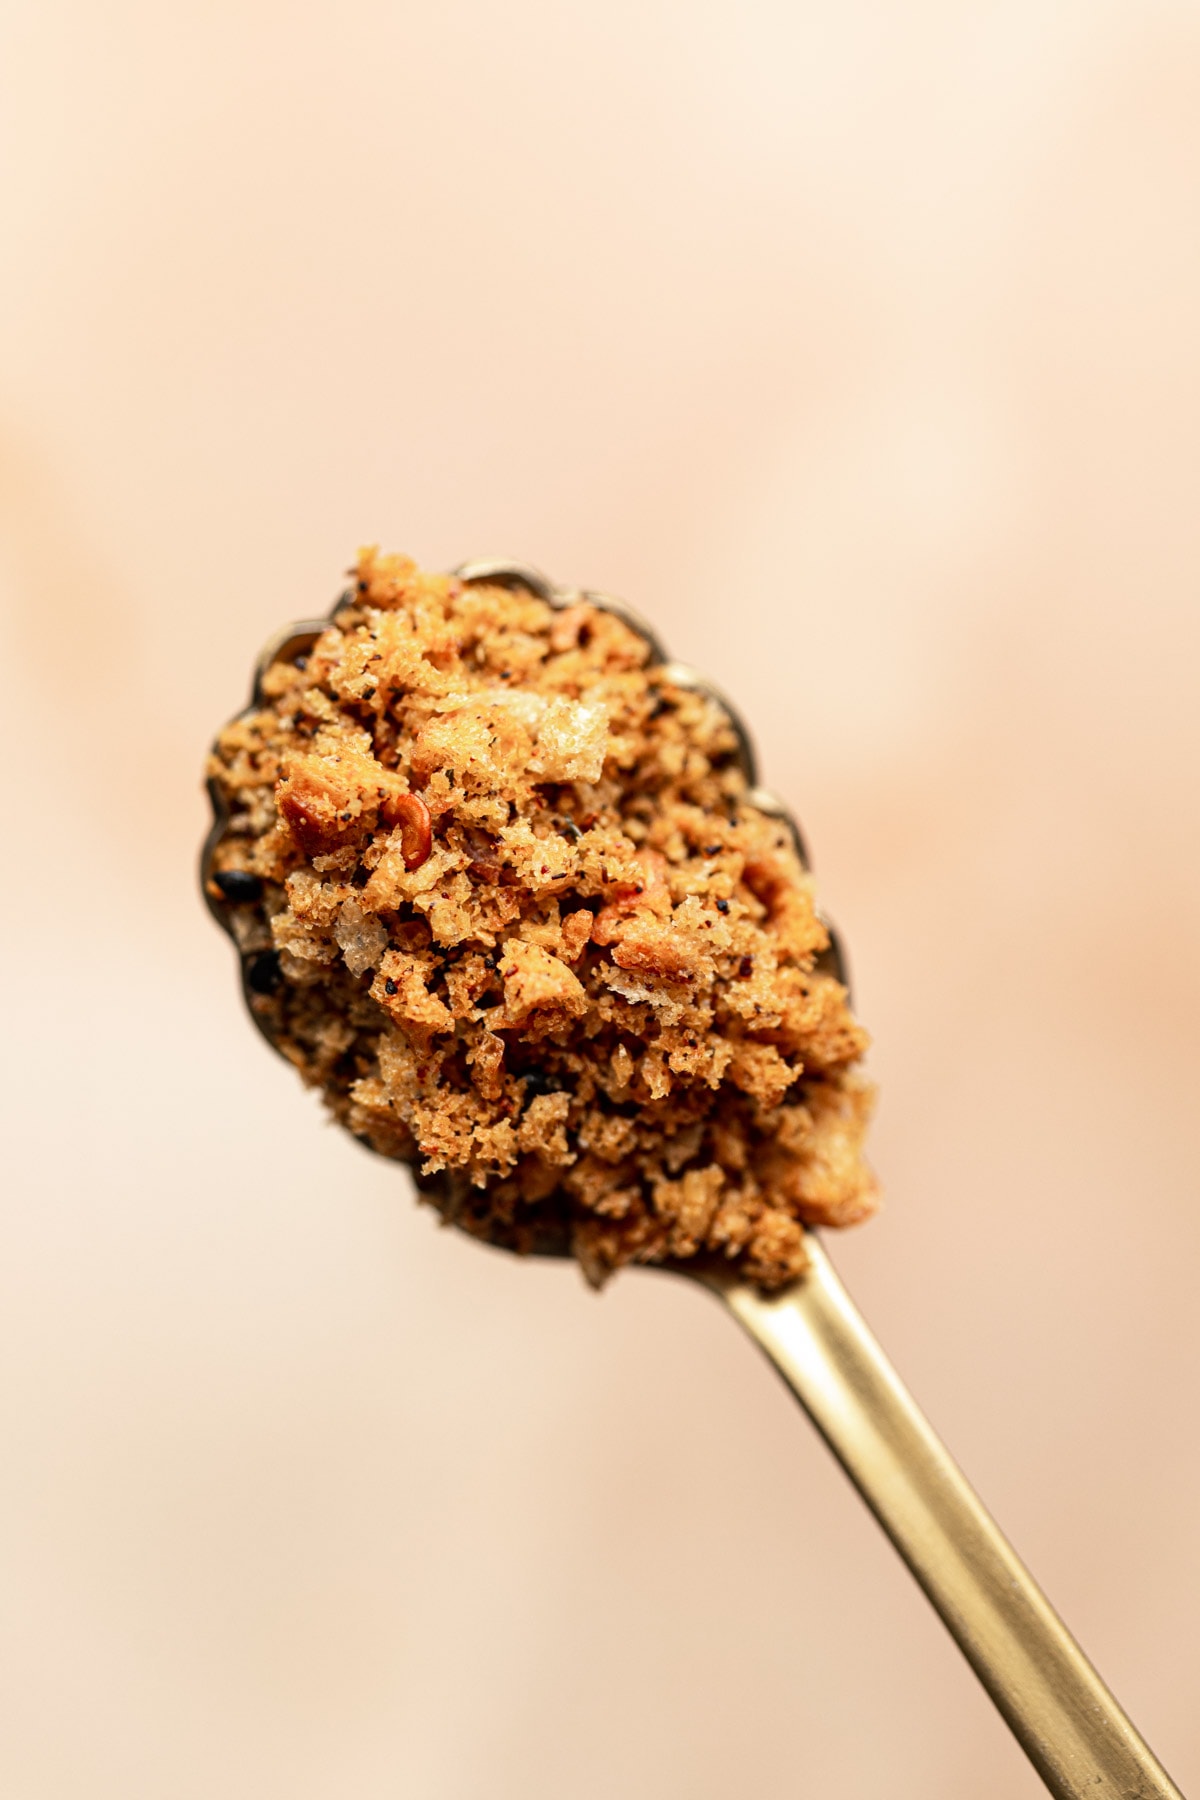
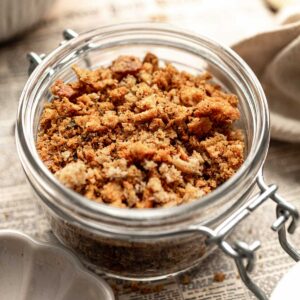
These 3-ingredient crunchy za'atar breadcrumbs are baked in the oven to reach crispy perfection in under 15 minutes. SUPER zesty, satisfying & an easy way to pack more flavor into just about any dish.
Are you looking to add a burst of Middle Eastern flavor and a satisfying crunch to your dishes? Get ready to meet your new addiction: Za'atar Breadcrumbs!
💌 Why I Love This Recipe
Plain old breadcrumbs are so last season. You'll be coming back for seconds with these golden za'atar breadcrumbs.
- A simple way to upgrade any meal
- An actual flavor explosion with tangy sumac and aromatic herbs
- The perfect DIY gift for your friends & family
- So versatile: from salads to pasta, risotto & roasted veggies, they play well with almost any dish.
- A great way to use up stale bread
- Quick & easy, made in just 10 minutes
- A real party pleaser for all your social gatherings
🛒 Ingredients
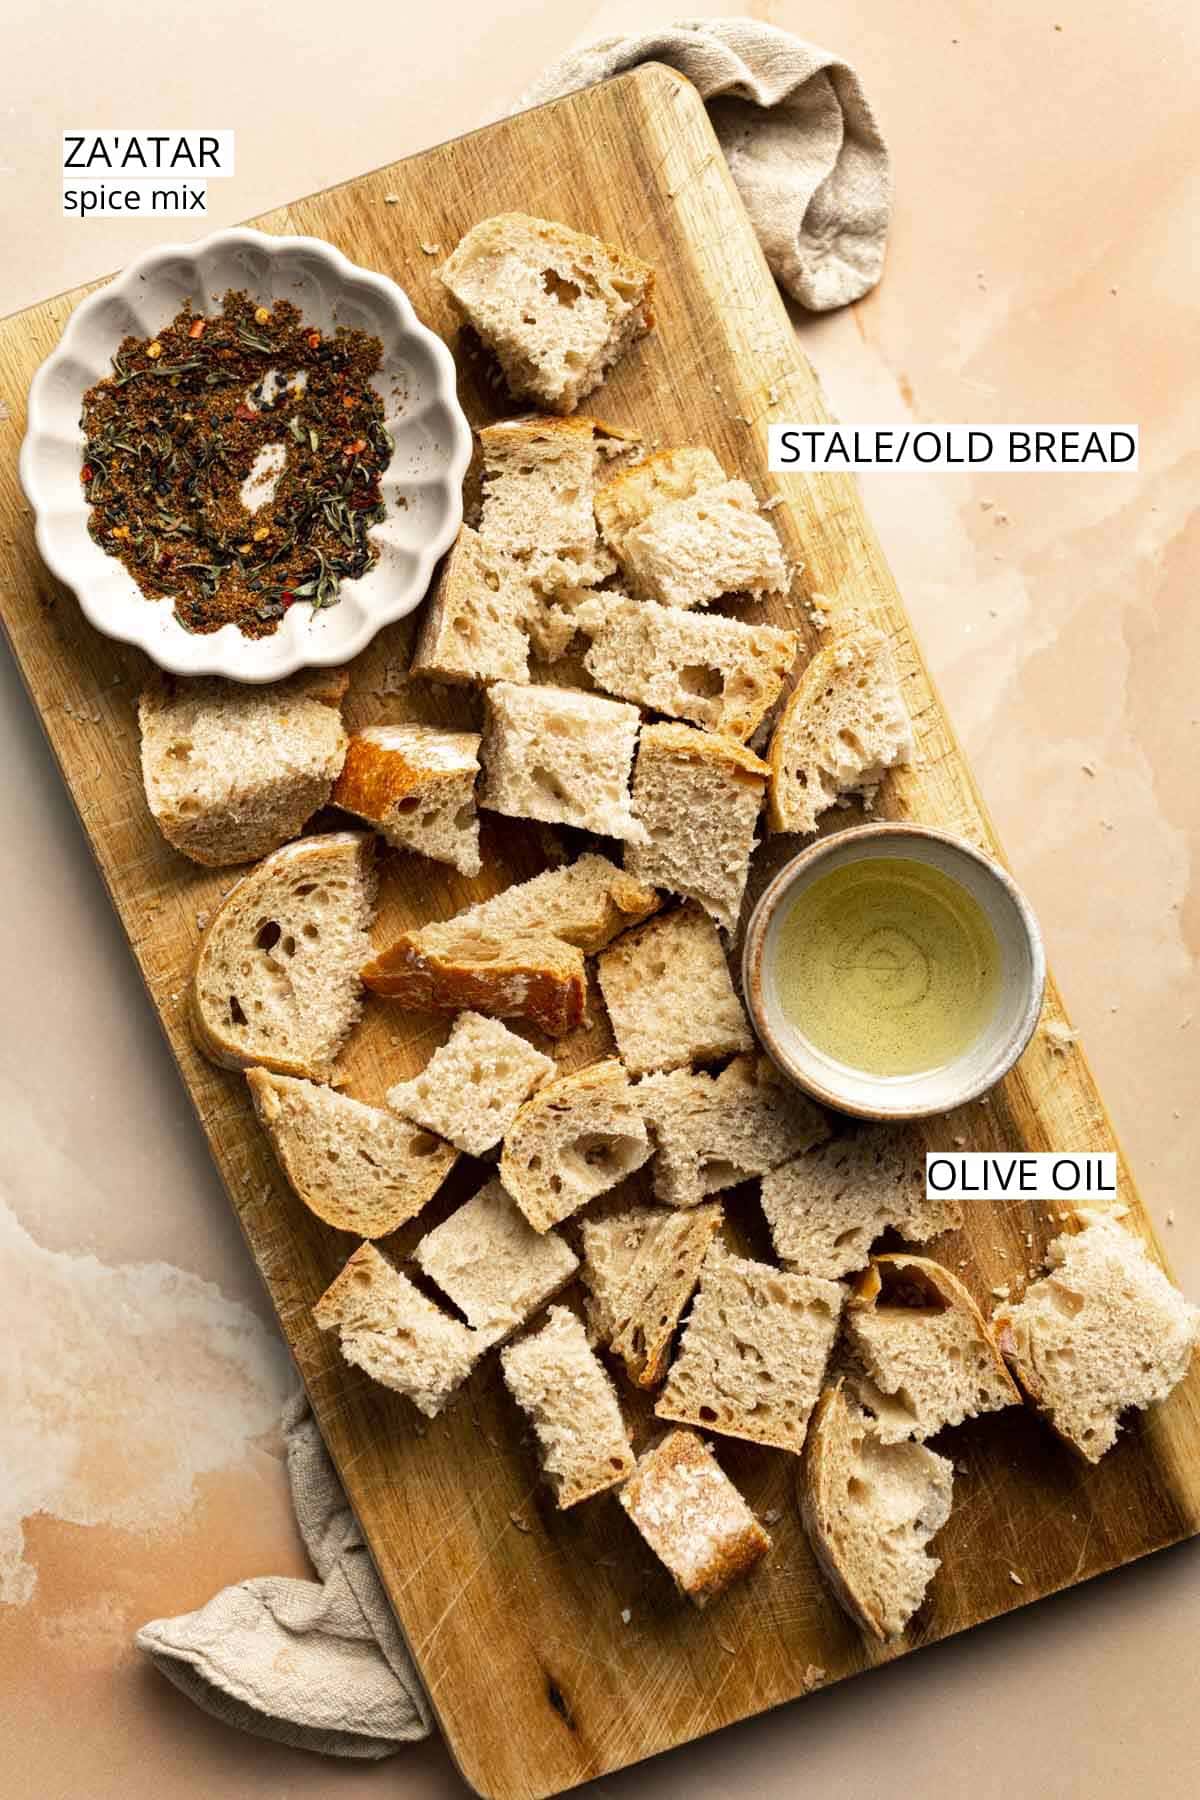
- Bread: Use a slightly old, stale bread (1, 2, or 3 days). The drier, the better! I used a day-old white sourdough from my local bakery. Opt for gluten-free bread for a GF version of these breadcrumbs.
- Za'atar spice blend. Find it in the spices section of your local supermarket. You can also make your own (check out the FAQ section below for instructions).
- Olive oil: I used light olive oil - you mustn't skip adding it because it adds that signature crunchiness.
🔪 Equipment
- Food processor (optional)
- Lined baking sheet
- Oven
- Knife & chopping board
Don't have a food processor? No worries! Place the toasted bread chunks into a sealable freezer bag. Seal the bag tightly and crush the chunks with a rolling pin or another heavy object until you reach a crumb-like texture.
👣 Step-by-step
Remember - This is just a quick visual overview. You can find the detailed recipe with exact measurements & instructions at the bottom of this page.
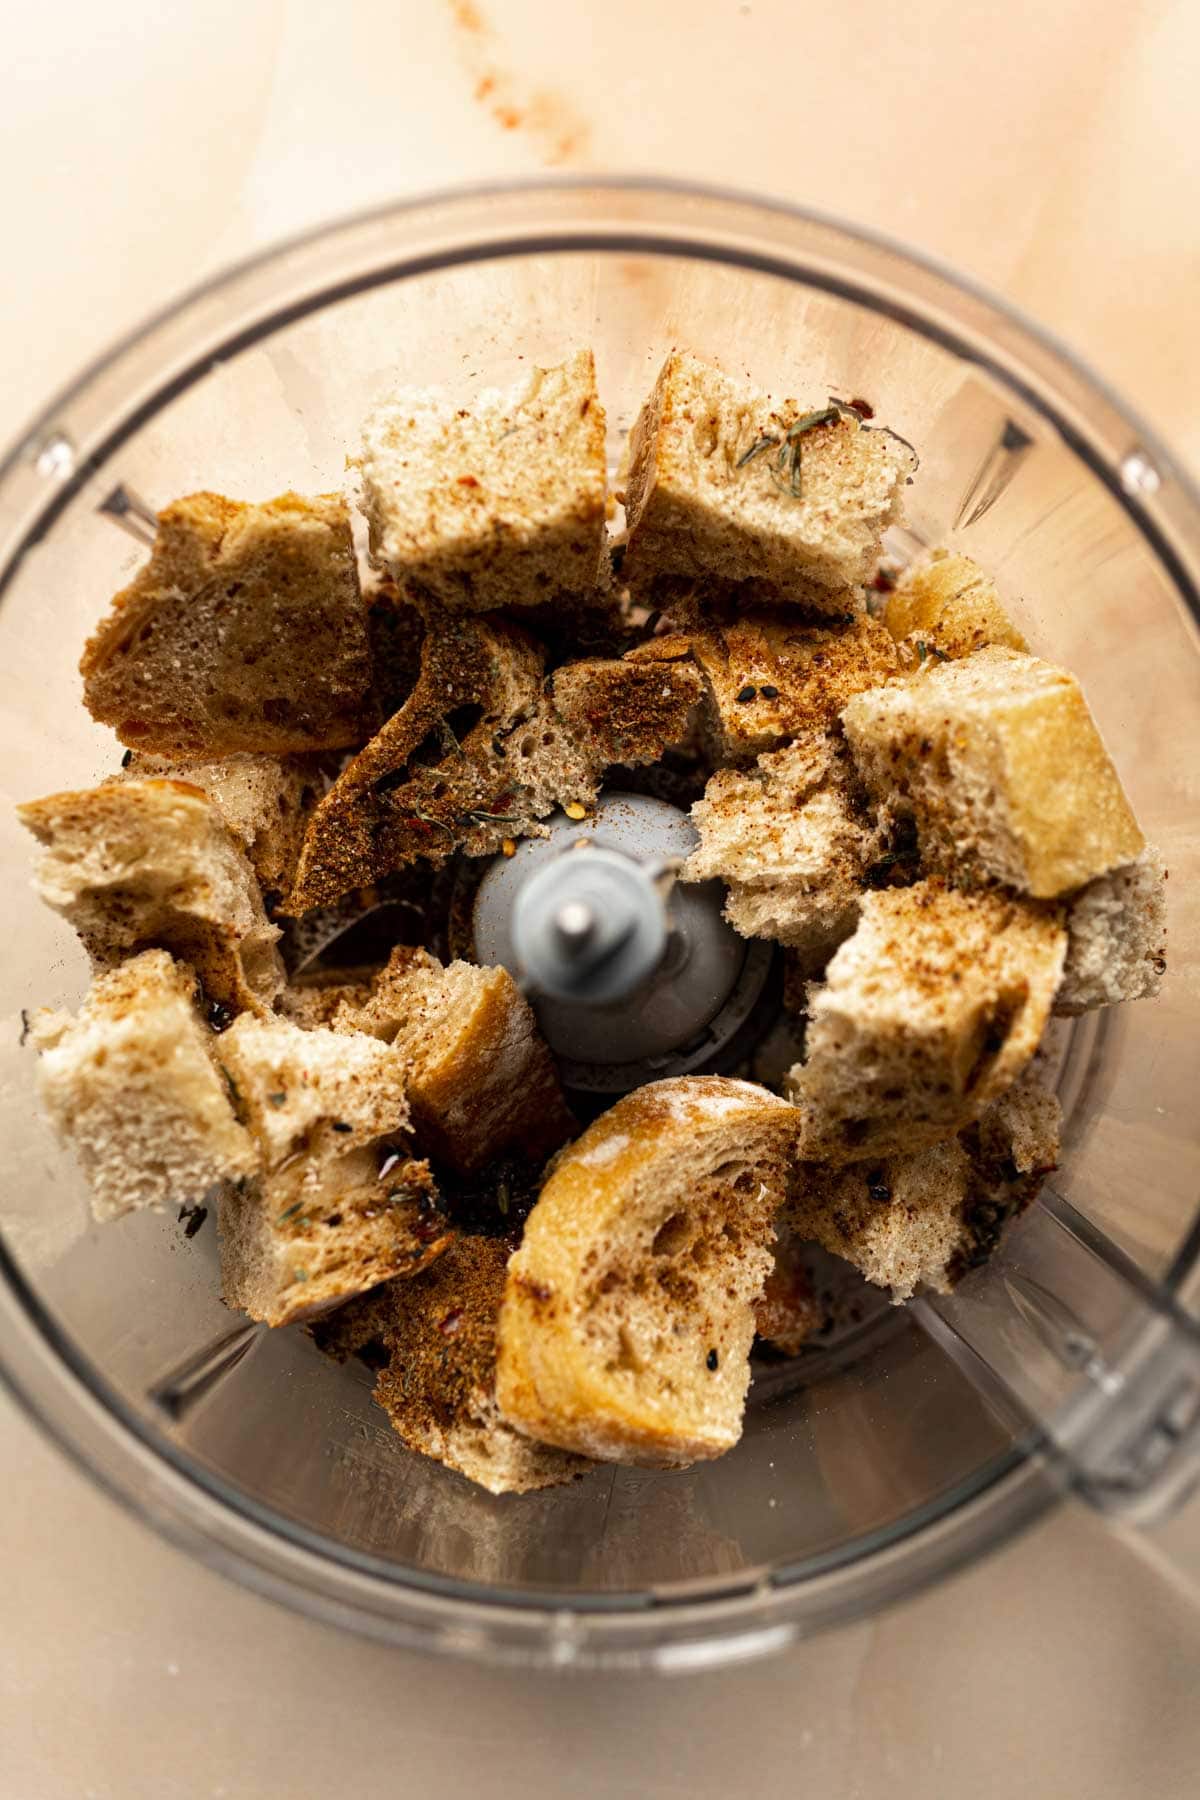
Prep Your Bread: Toast your bread slices and slice them into large chunks. Then add bread chunks, za'atar mix & olive oil to a food processor.
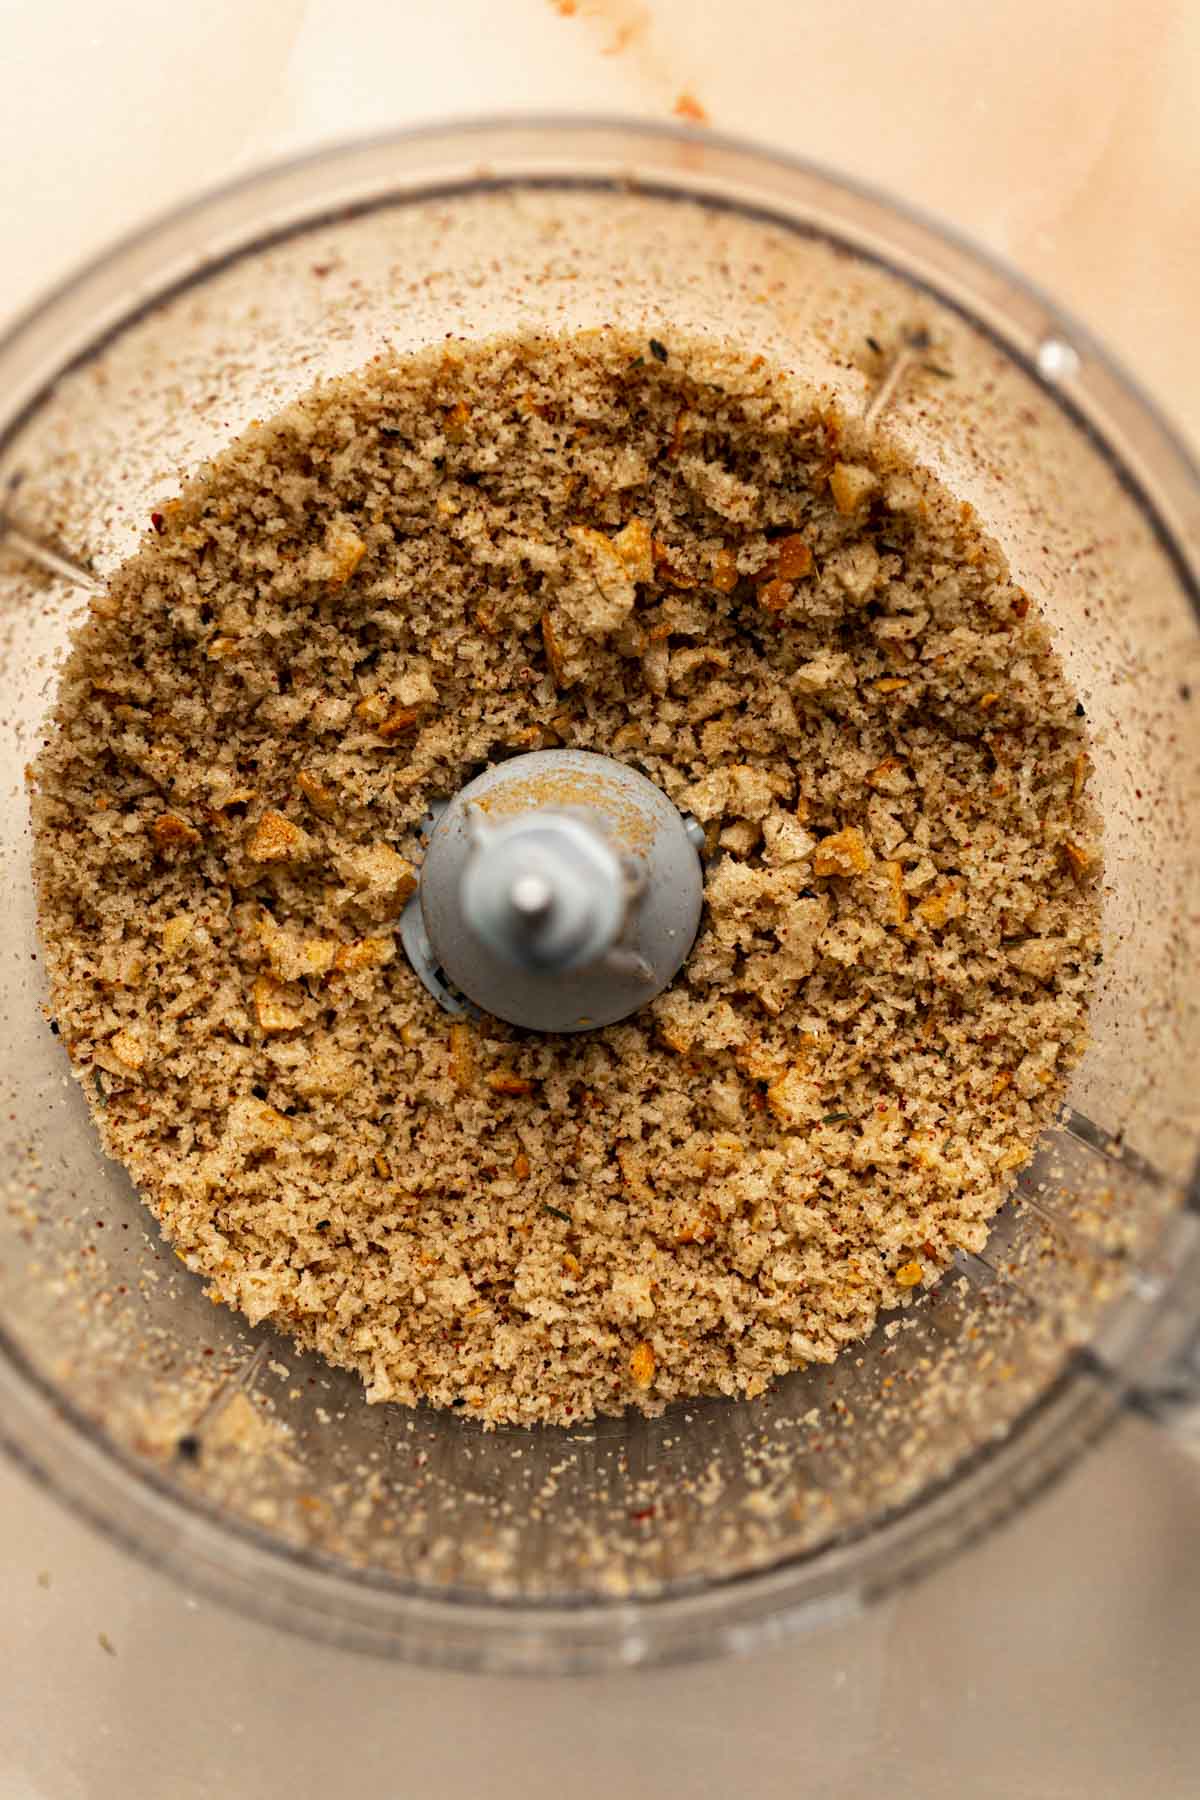
Blend, blend, blend: Pulse the mixture until it reaches a crumb consistency. It shouldn't be completely smooth or powdery.
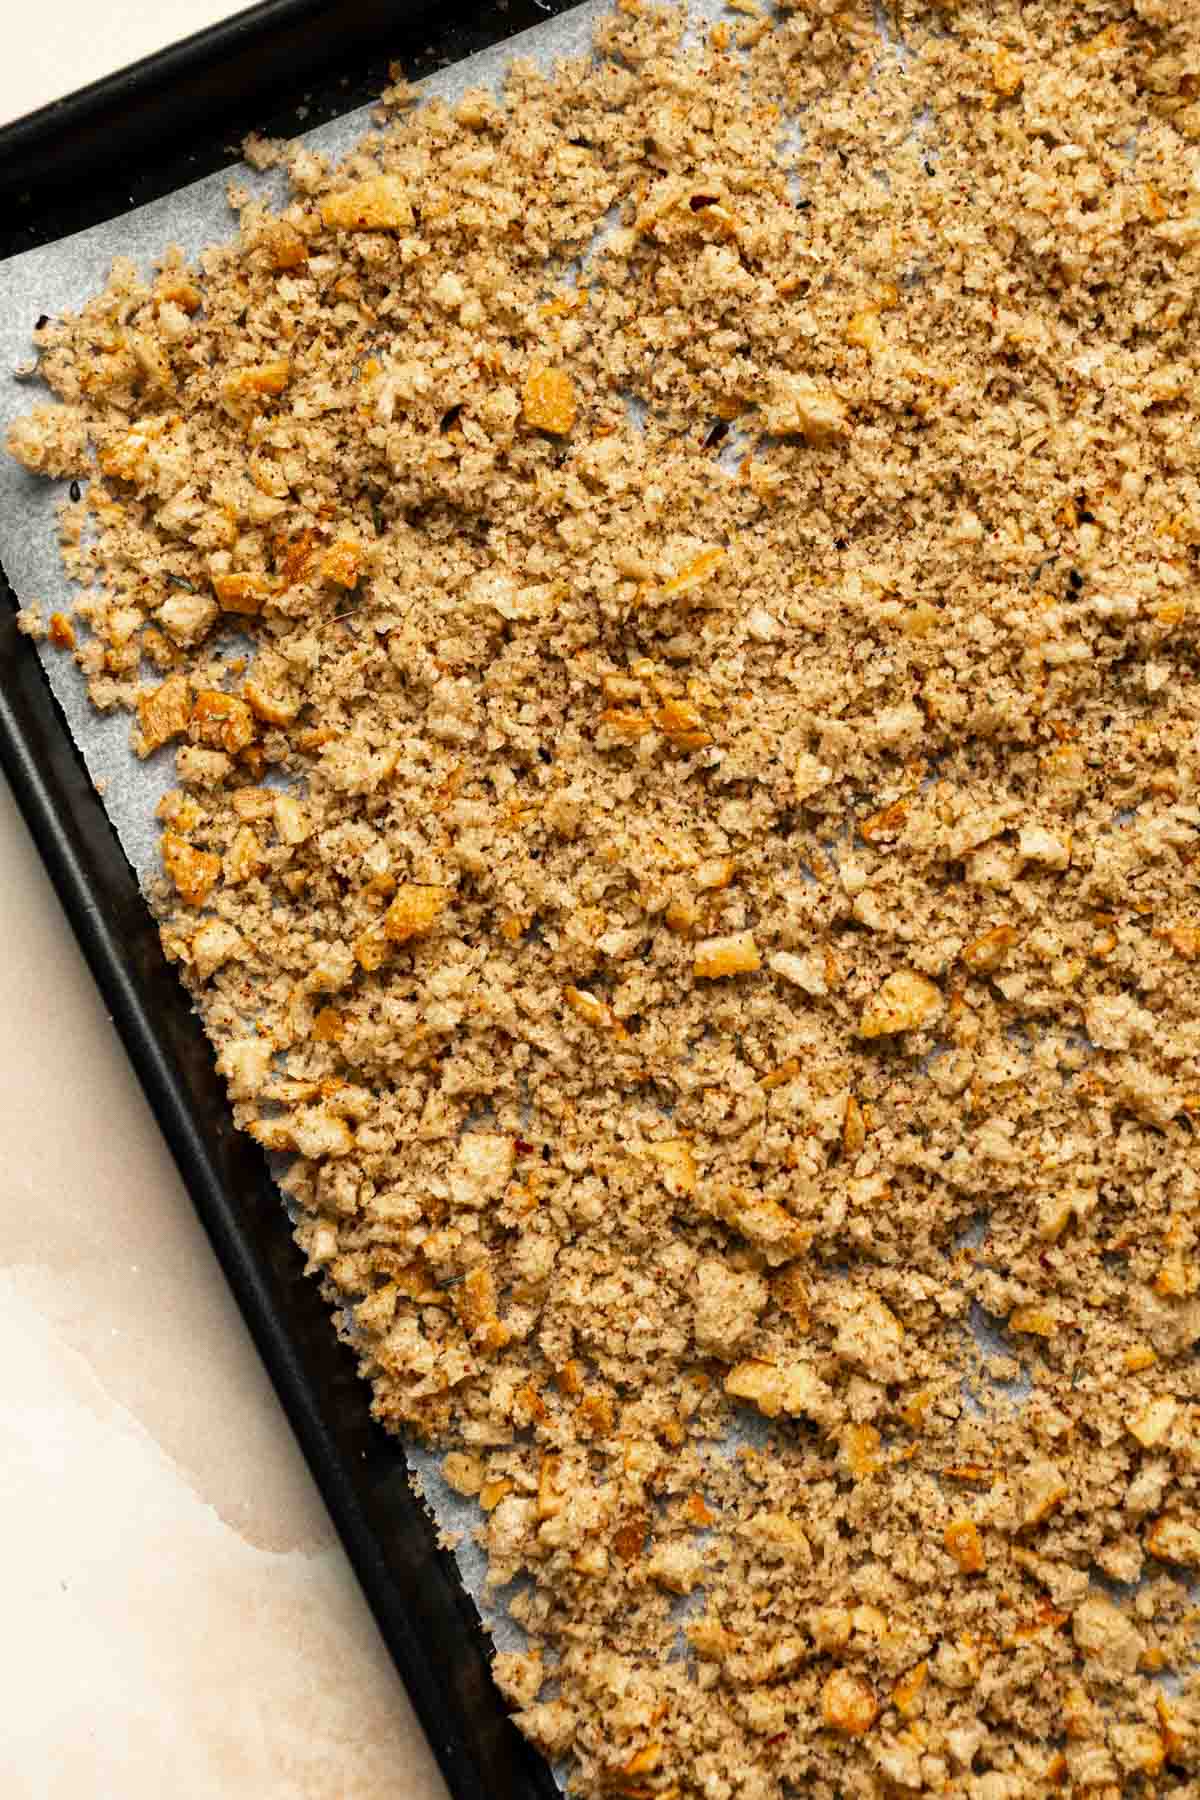
Spread Them Out: Next step, line your baking sheet with parchment paper (for easier cleaning). Spread your breadcrumb mixture out in an even layer.
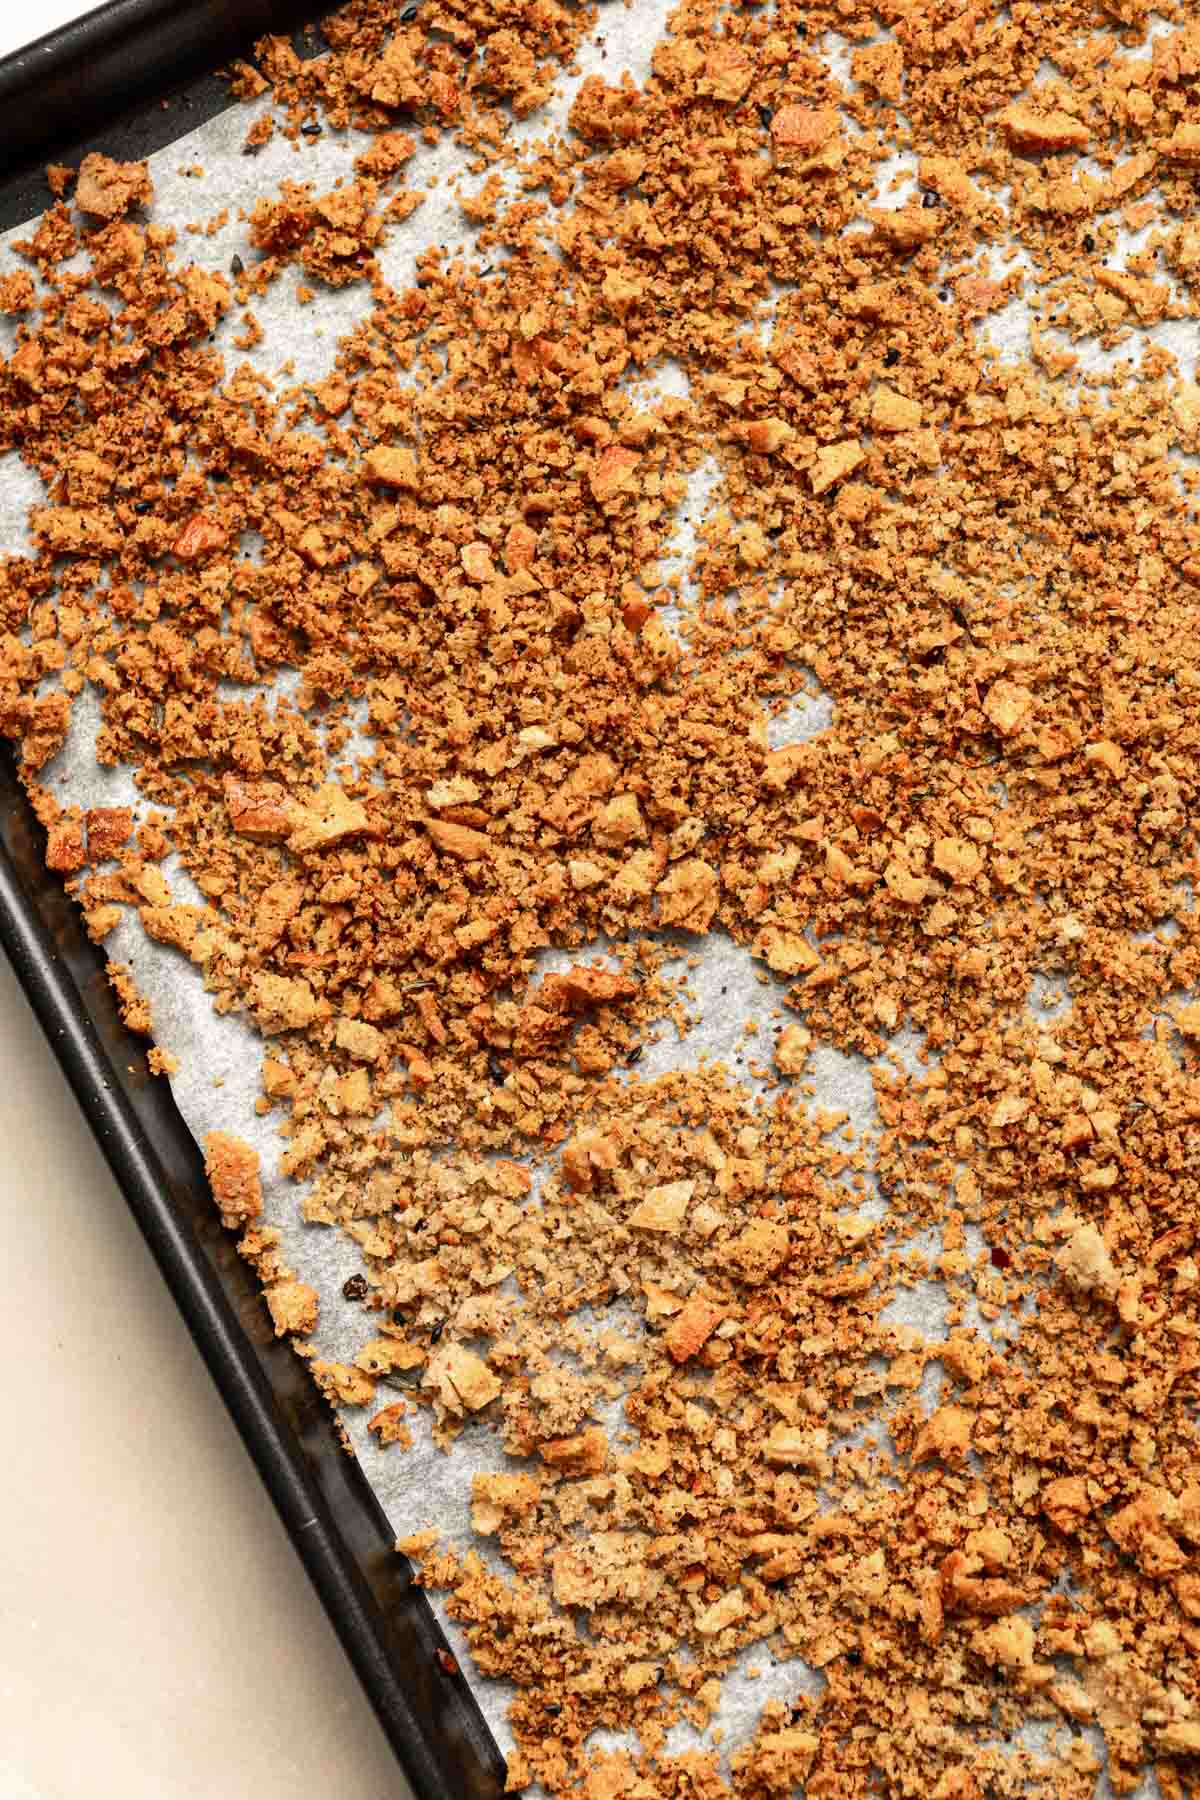
Bake to Perfection: Pop your breadcrumbs into a preheated oven at 350°F (175°C). Bake for 10-12 minutes until they turn a gorgeous golden brown color. Remember to stir the mixture about halfway through!
Remember to keep an eye on them-they can go from fab to burnt quickly! Baking time varies depending on how stale your bread is (the drier, the quicker).
👨🍳 Chef's Tips
- Customize Your Crunch: Experiment with different types of bread for your breadcrumbs-such as whole wheat, sourdough, pita, or even multigrain. Each adds its unique texture and flavor.
- Za'atar Zest: If you're a fan of all things zesty, add a pinch of lemon zest to your za'atar mix. It'll give your breadcrumbs an irresistible zesty zing. You can also add orange zest.
- Spice it up: I deliberately kept this recipe as simple as possible. However, there's no reason why you shouldn't play around with additional seasoning. I like adding black pepper, garlic powder, or red chili flakes.
- Double Up: Trust me, you'll need a bigger batch than you think. These store well, so save yourself some extra prep time and double or triple the batch if desired.
❓FAQ
It's super easy! Simply mix equal parts dried thyme, coriander, cumin, sesame seeds & sumac. Add salt & chili flakes to taste.
You can absolutely use oils like avocado, sunflower, or rapeseed oil.
Each will impart a slightly different flavor to your breadcrumbs. Avoid coconut oil due to its overpowering taste.
Keep a close eye on them while baking, as they can quickly turn from golden to burnt.
Moreover, remember to turn them halfway through. Oven temperatures can vary, so adjust the baking time if needed.

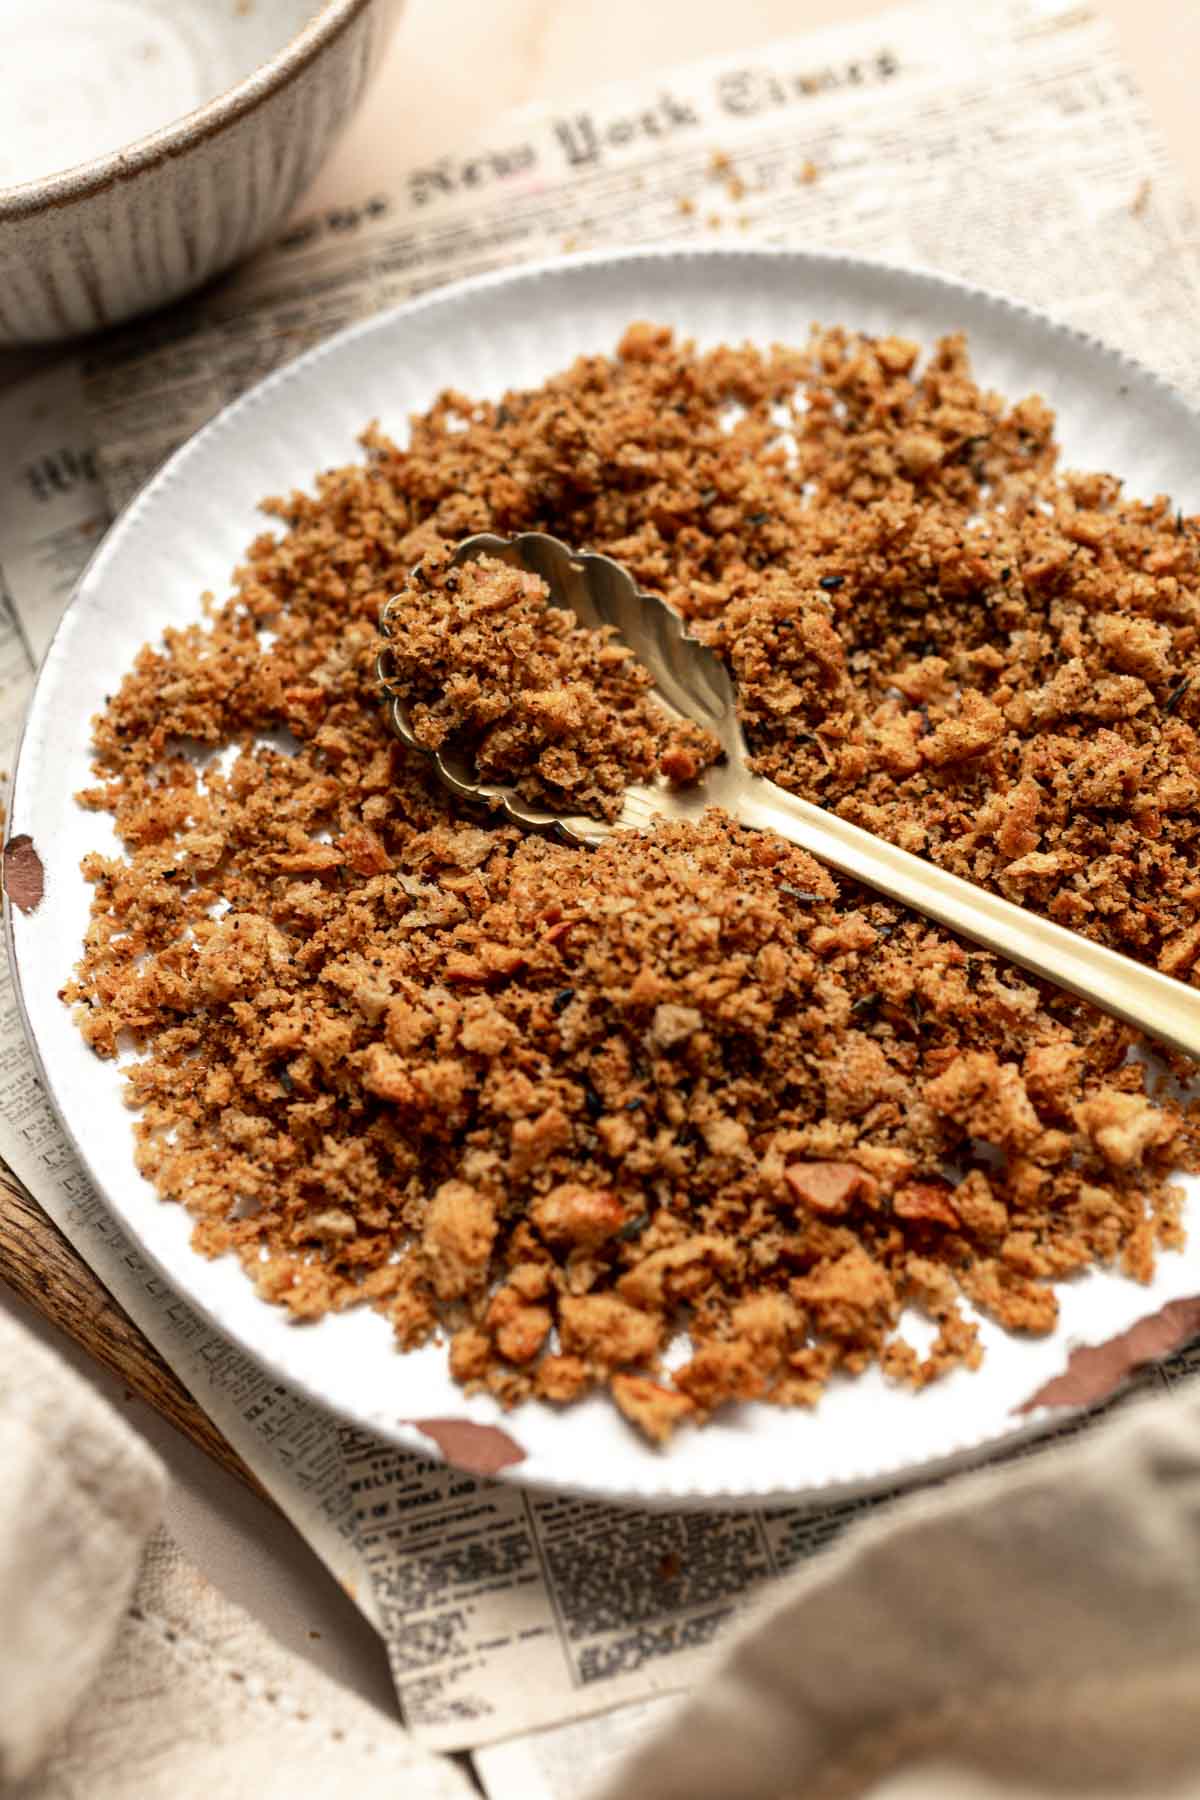
🍽️ Serving Ideas
- Salad Jazz: Toss these homemade goodies onto a fragrant tabule salad, green salad, or my go-to wilted spinach salad for an extra crunch.
- Pasta Perfection: Sprinkle over your favorite pasta dishes for an extra layer of texture and flavor. Try it out with my rainbowy pasta fresca, simple roasted tomato pasta, roasted red pepper pasta, baked mac & cheeze, or nutrient-packed cavolo nero pasta.
- Vegetable Medley: Roasted veggies transform into a gourmet experience with just a sprinkle of these breadcrumbs. Think tenderstem broccoli, carrots, spring onion, bell peppers & more.
Remember - These breadcrumbs have already been double toasted (once when we toasted the bread & once in the oven). If you're adding them to an oven dish (like baked pasta, ratatouille, etc.), sprinkle them on top just before serving (after baking).
📦 Storage Tips
Keep your za'atar breadcrumbs in an airtight container at room temperature.
They never last very long in my household, but they should stay crispy & flavorful for about a week.
Freezing will affect the crunchiness and texture, so it's generally not recommended.
👋 Conclusion
This brings us to the end! With just a few simple ingredients and a dash of za'atar magic, you can transform everyday dishes into extraordinary delights.
Got questions about this recipe? Don't be afraid to ask in the comments section below.
Made these za'atar breadcrumbs? It helps me tremendously if you leave a 5-star review if you like this recipe, and even more so if you leave a comment below!
🍴Recipe
Crunchy Baked Za'atar Breadcrumbs (Oven Roasted)
EQUIPMENT
- Food processor (optional)
- Lined baking sheet
- Oven
- Knife & chopping board
INGREDIENTS
- 2 cups stale bread (about 4 slices}
- 2 tablespoon za'atar spice mix
- 1 tablespoon light olive oil
INSTRUCTIONS
- Toast your bread slices and slice them into large chunks. Then add bread chunks, za'atar mix & olive oil to a food processor.2 cups stale bread, 2 tablespoon za'atar spice mix, 1 tablespoon light olive oil
- Pulse the mixture until it reaches a crumb consistency. It shouldn't be completely smooth or powdery.
- Line your baking sheet with parchment paper (for easier cleaning). Spread your breadcrumb mixture out in an even layer.
- Pop your breadcrumbs into a preheated oven at 350°F (175°C). Bake for around 10-12 minutes* or until they turn a gorgeous golden brown color (see photos for reference). Remember to stir the mixture about halfway through!
- Keep an eye on them-they can go from fab to burnt quickly!
Notes
Nutrition
Disclaimer: The nutritional information above is calculated automatically. The author of this post cannot guarantee 100% accuracy of this data.


Leave a Reply