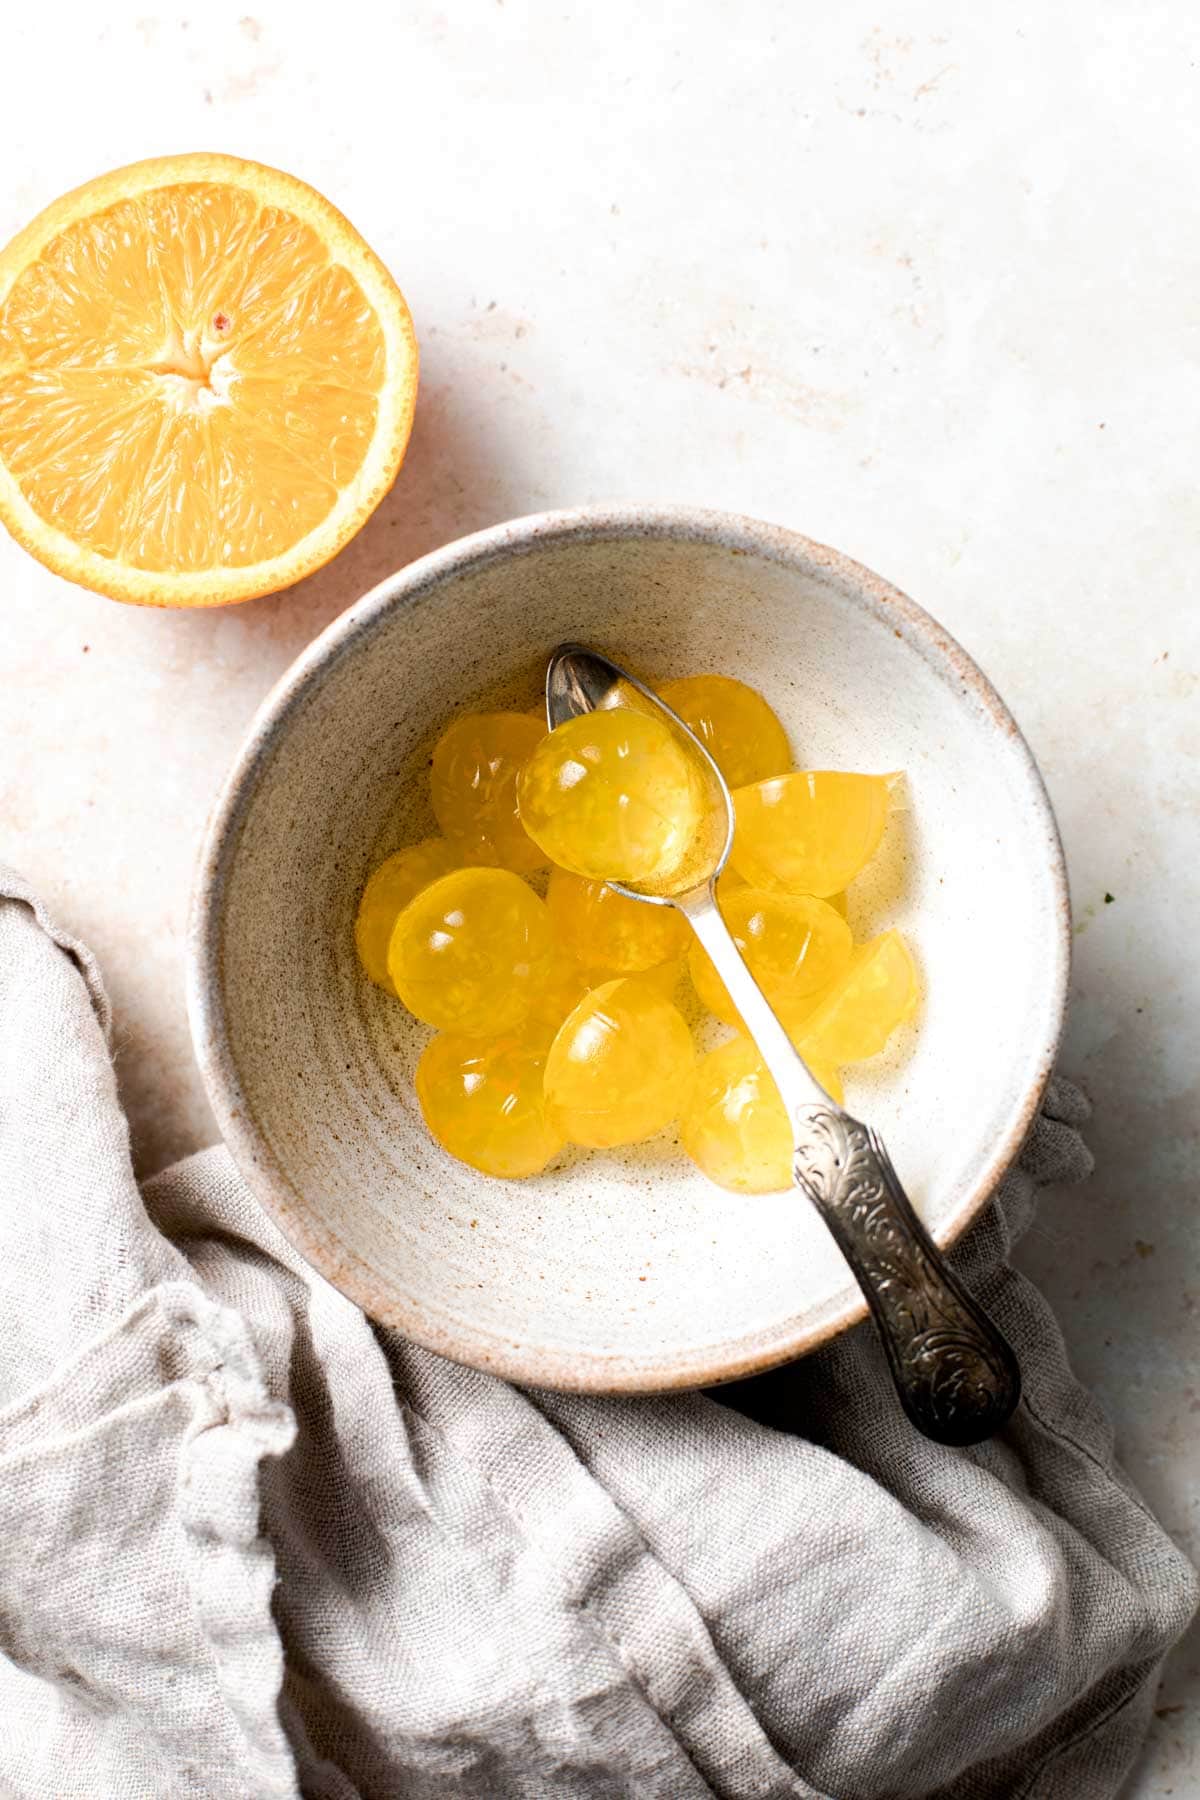
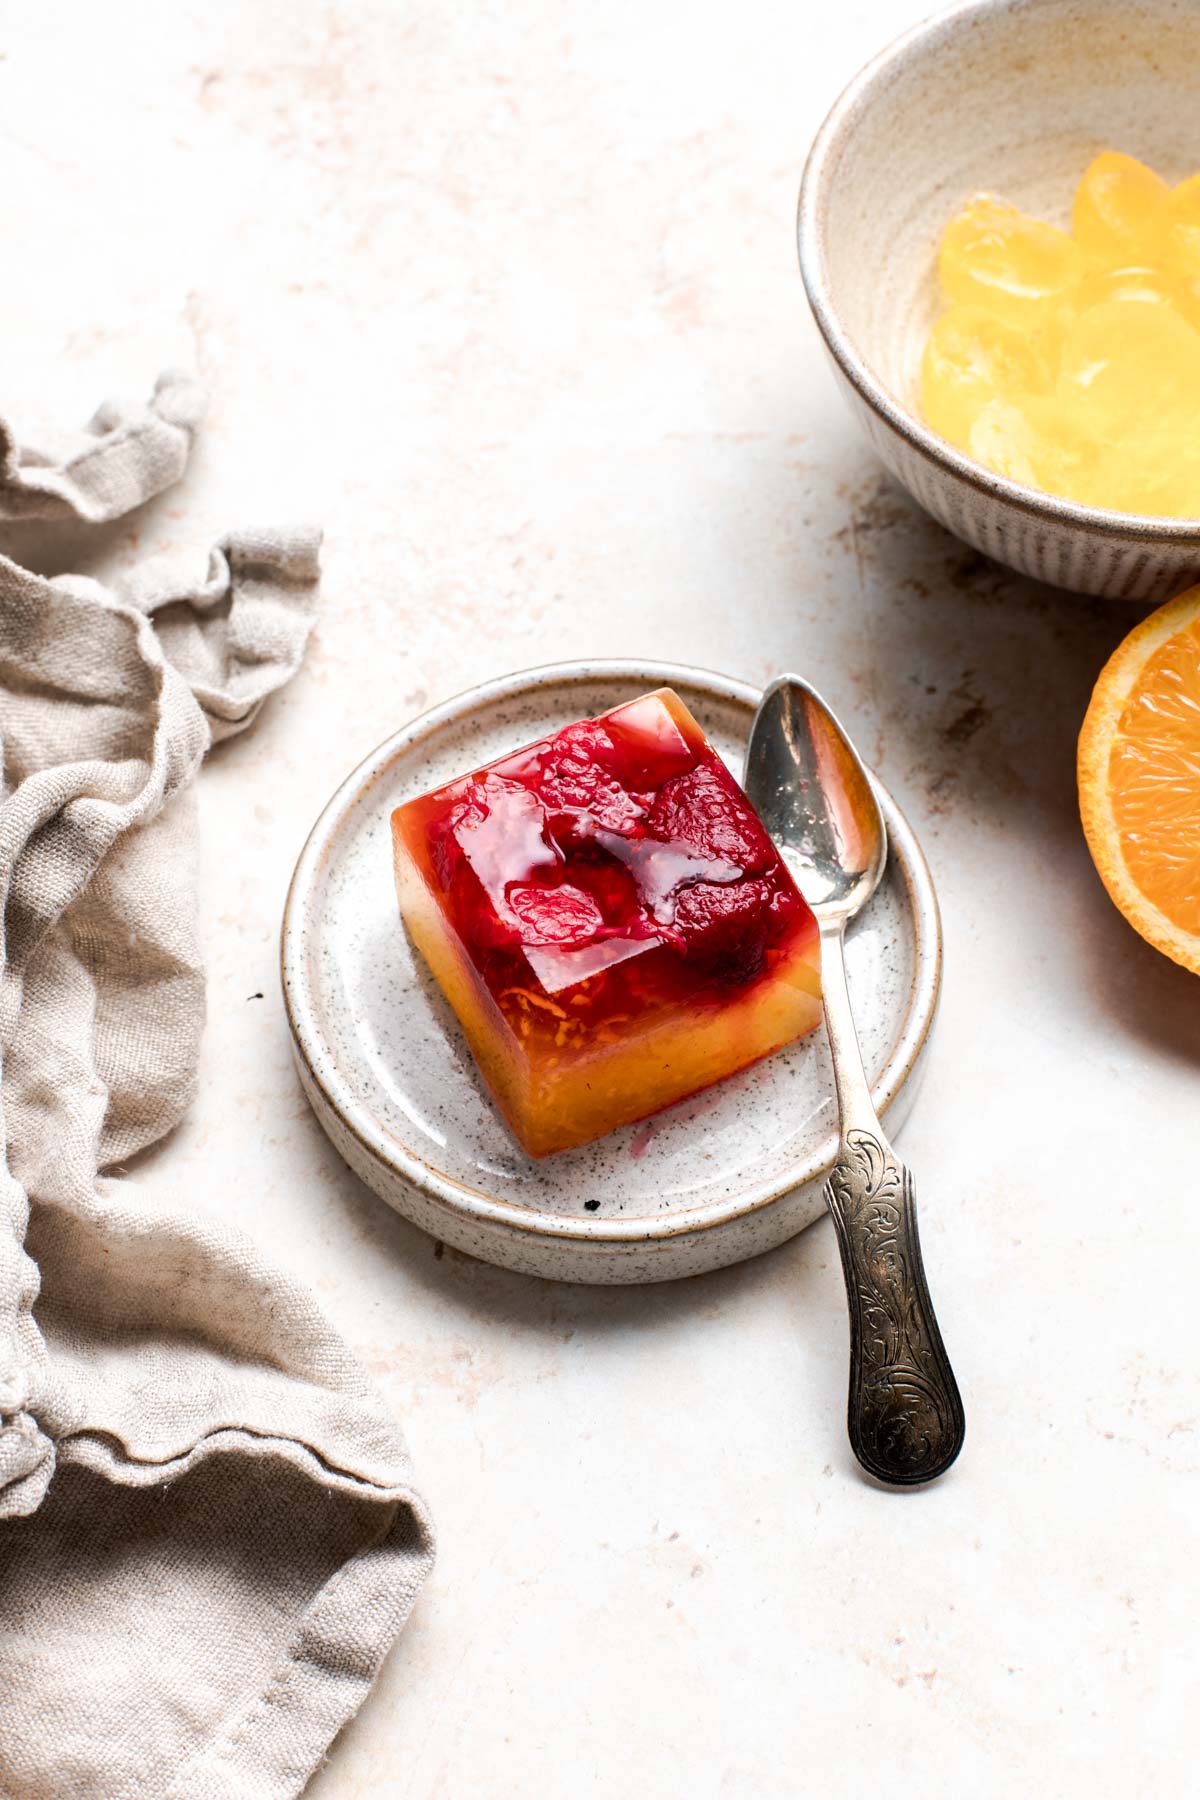
This konnyaku jelly is PACKED full of flavor and made with only 3 ingredients. It's a super easy candy that anyone can make at home!
Tip: If you've never used konnyaku jelly powder before it can seem a bit scary! But take my word for it - it's ULTRA easy & works like a charm every time.
Jump to:
💌 Why I Adore This Recipe
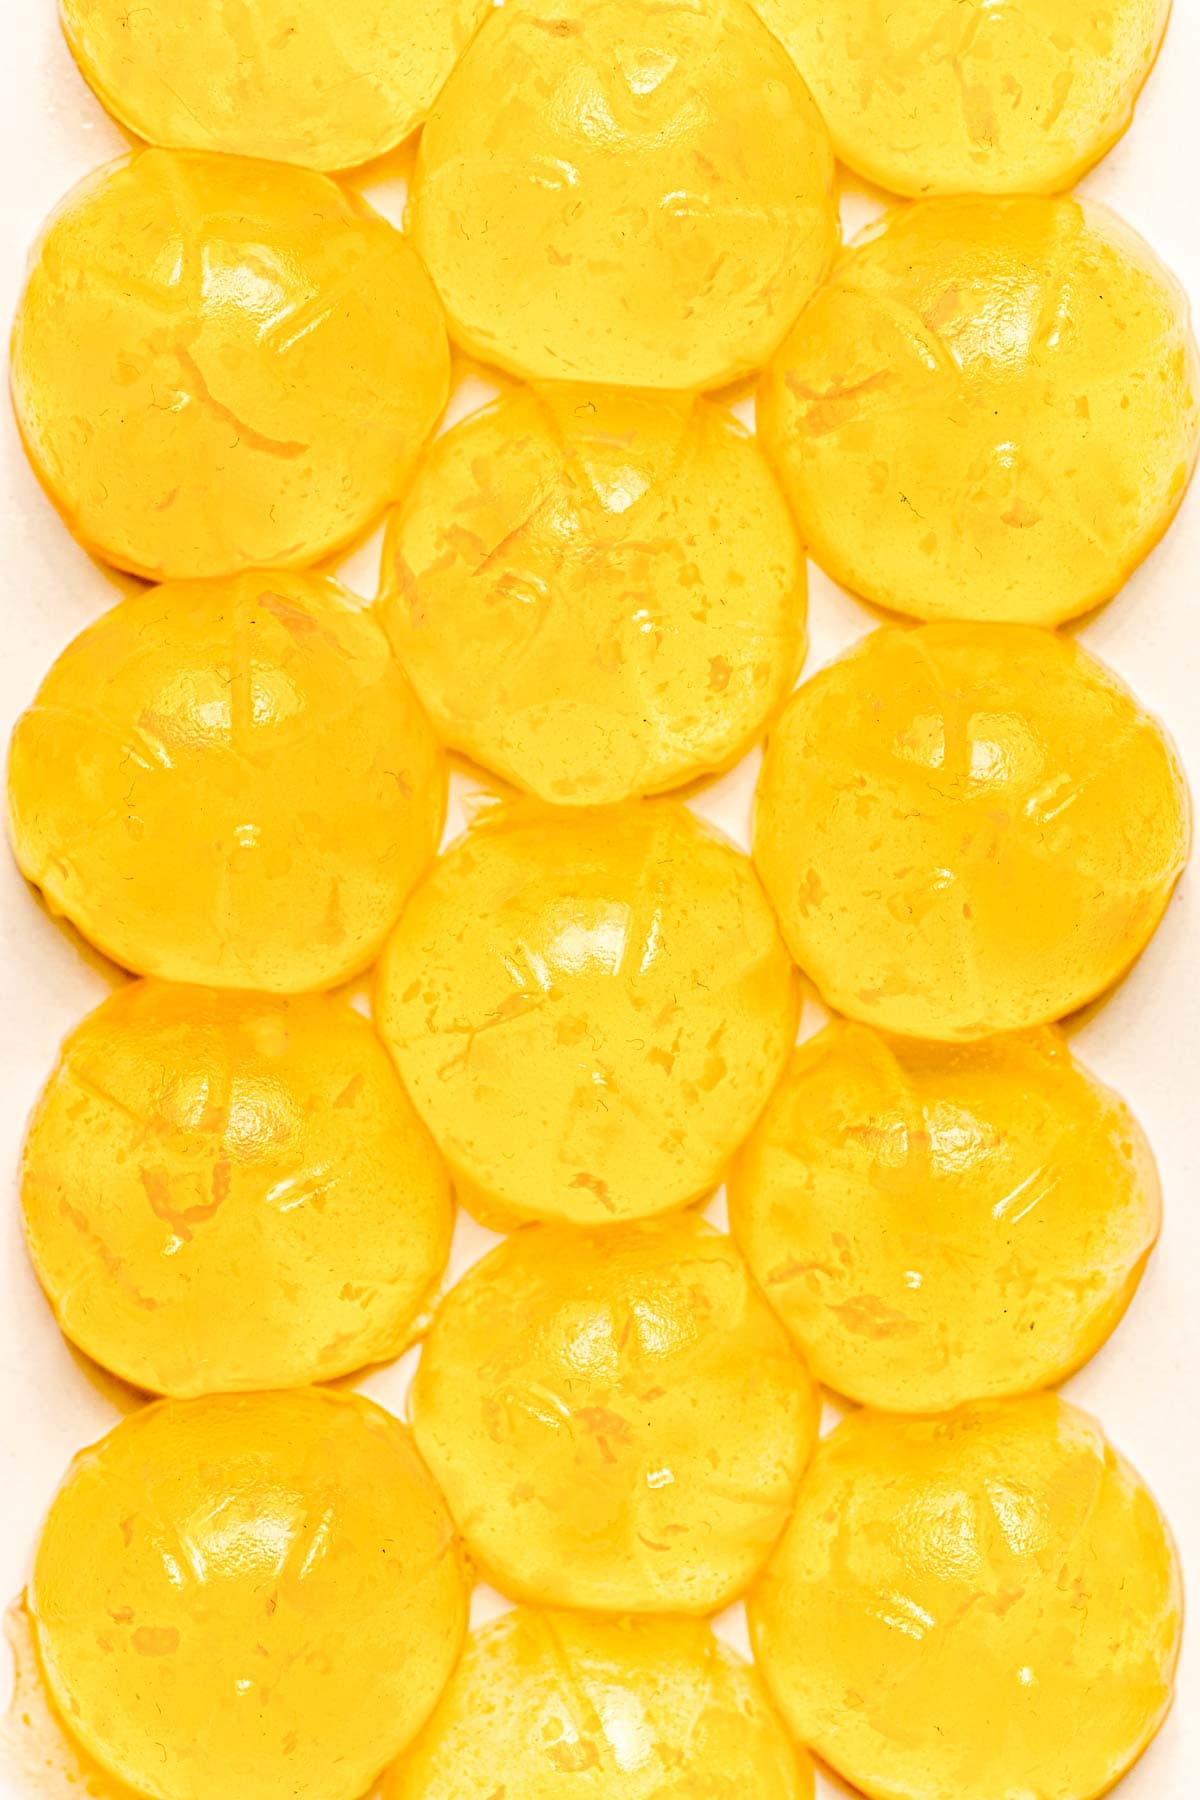
- So jiggly!
- Fun for kids to make
- Requires only 3 ingredients
- SO customizable
- Great for many diets - vegan, gluten-free, halal
- No special equipment required
- You can use an ice cube tray as a mould
Plus, I've even got step-by-step photos & brilliant expert tips for you! This way you truly can't mess it up. Let's go!
🍊 Ingredients
You would NEVER guess it's so simple to make this Japanese-style candy!
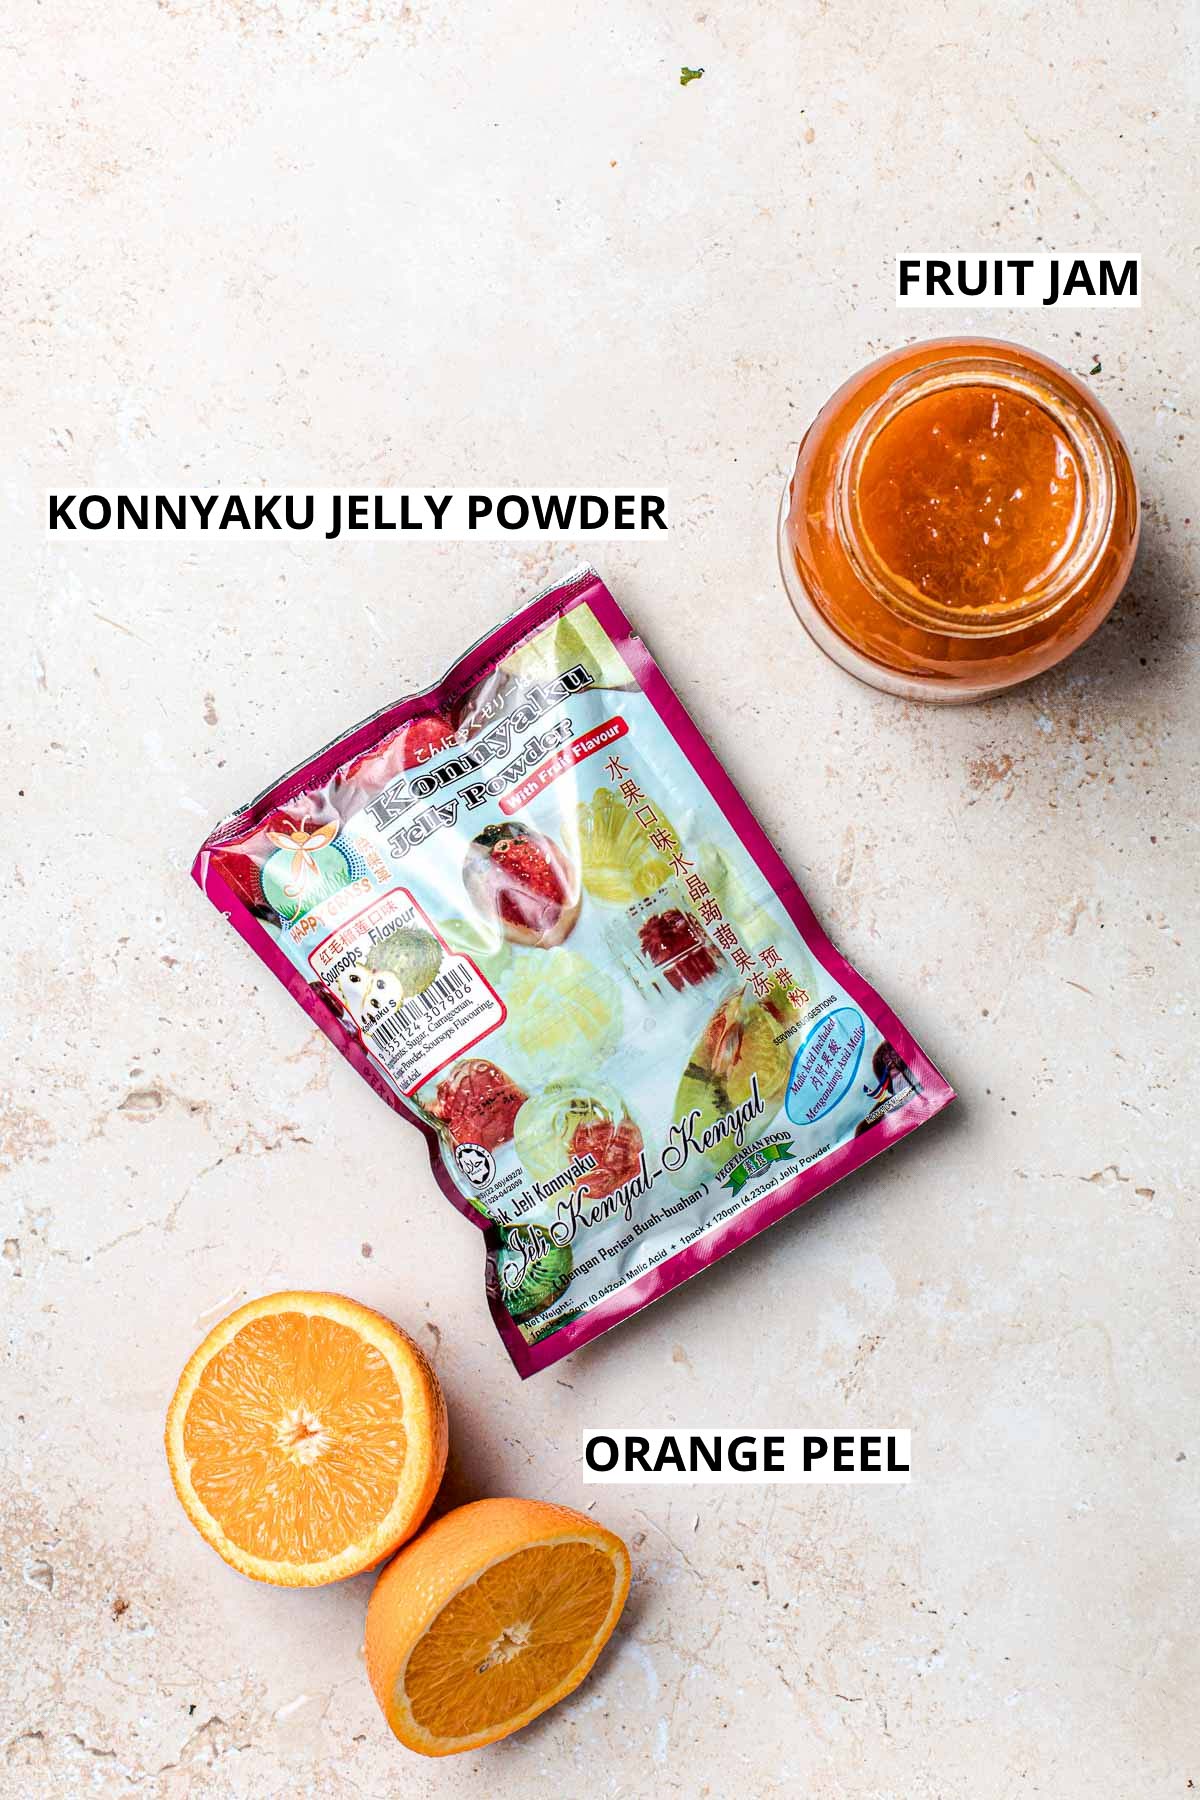
Ingredient Details:
Konnyaku jelly powder - You'll probably need to buy it online. It comes in a packet and usually contains a separate small packet of malic acid.
Orange peel - This will add both flavors, as well as scent & texture. Other citrus peel/zest works too.
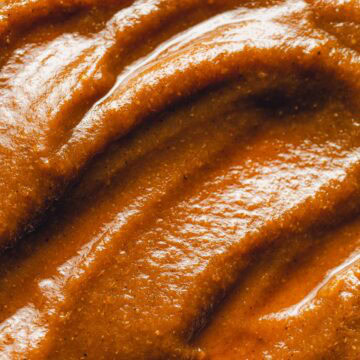
Jam/marmalade - I went for my mum's homemade apricot jam. Any jam will do!
Optional - fruit or other toppings. More about that below!
TIP - Almost every konnyaku jelly powder I've tried was already sweetened. If yours isn't, you can simply add any type of sugar to the mixture.
🥄 Equipment
- Grater/zester to zest the citrus
- Measuring cup to measure the liquid
- Saucepan to boil the mixture in
- Spoon/spatula to stir
- Moulds or ice cube trays
⏲️ Steps
There are just a few simple steps to this recipe.
PS - This is a quick overview - all the detailed instructions are at the bottom of this post!
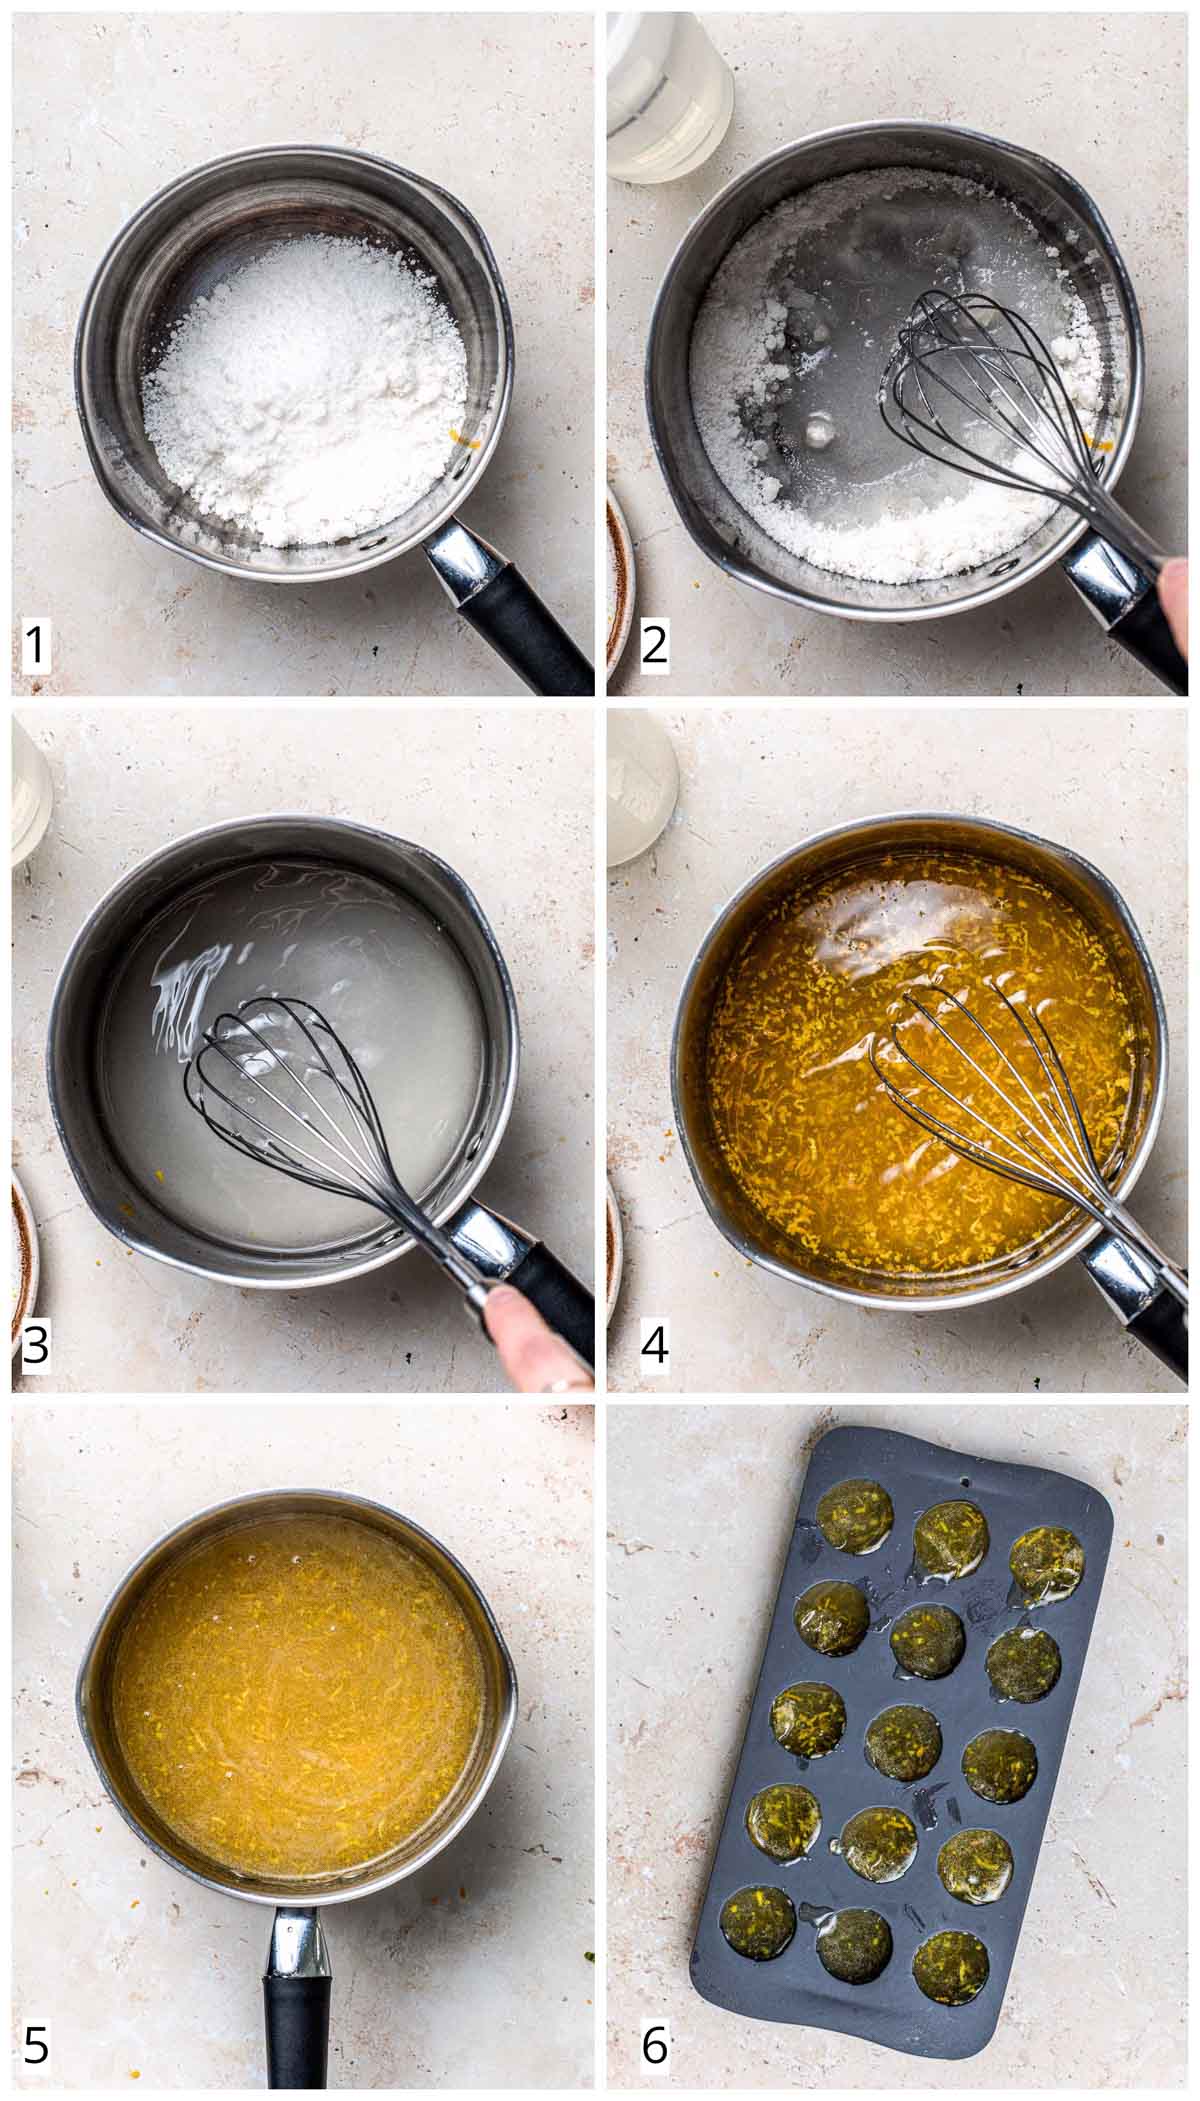
- Photo 1 - Pour konnyaku jelly powder into a medium-sized pot.
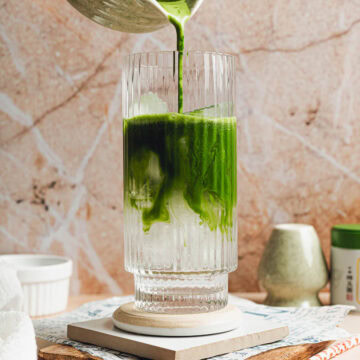
- Photos 2 & 3 - Slowly water and stir continuously to prevent clumps from forming.
- Photo 4 - Add orange zest & jam. Bring to a boil.
- Photo 5 - Remove from heat, and add malic acid. Stir well.
- Photo 6 - Place any optional toppings into the molds (or leave them empty). Pour the mixture into the molds until full.
Let the mixture come to room temperature before placing it in the fridge for 3 hours to set. You can also leave it to set overnight.
💡 Top Tips
- If you're adding fruit toppings, make sure the fruit isn't too watery!
- Konnyaku usually sets SUPER fast - but if you want to, you can leave it to set in the fridge overnight.
- Because it sets so fast, make sure you pour it into the molds quite fast - don't let it stand for more than a few minutes or it will start to set.
- I love serving it cold straight from the fridge. So refreshing!
Did you know? Konnyaku jelly originates from China but is most popular in Japan. It's made from konjac (also called devil's tongue starch).
❓ FAQ
Head to your local Asian supermarket and ask for it there.
Keep in mind that not all Asian stores will stock it. My local stores don't, which is why I always buy it online (simply Google konnyaku jelly and your location).
You can even buy it in larger batches as it stays good for a very long time.
Konnyaku jelly is typically firmer, bouncier & chewier.
You'll really need to bite it as it doesn't automatically dissolve in your mouth. This is something to keep in mind when you eat it.
Always start with small bites and chew them properly.
How much water you need to add to your powder depends on the brand.
The ratio used in my recipe should work well for most brands, but I do always recommend you read the instructions on the back of your packet.
This will state exactly how much water you need to add per packet.
Agar agar and konnyaku are not the same thing.
While agar agar is made from a type of red algae, konnyaku is made from a root vegetable called konjac.
In terms of their texture, agar is a lot firmer, while konnyaku is wobblier & chewier.
🥥 Substitutes
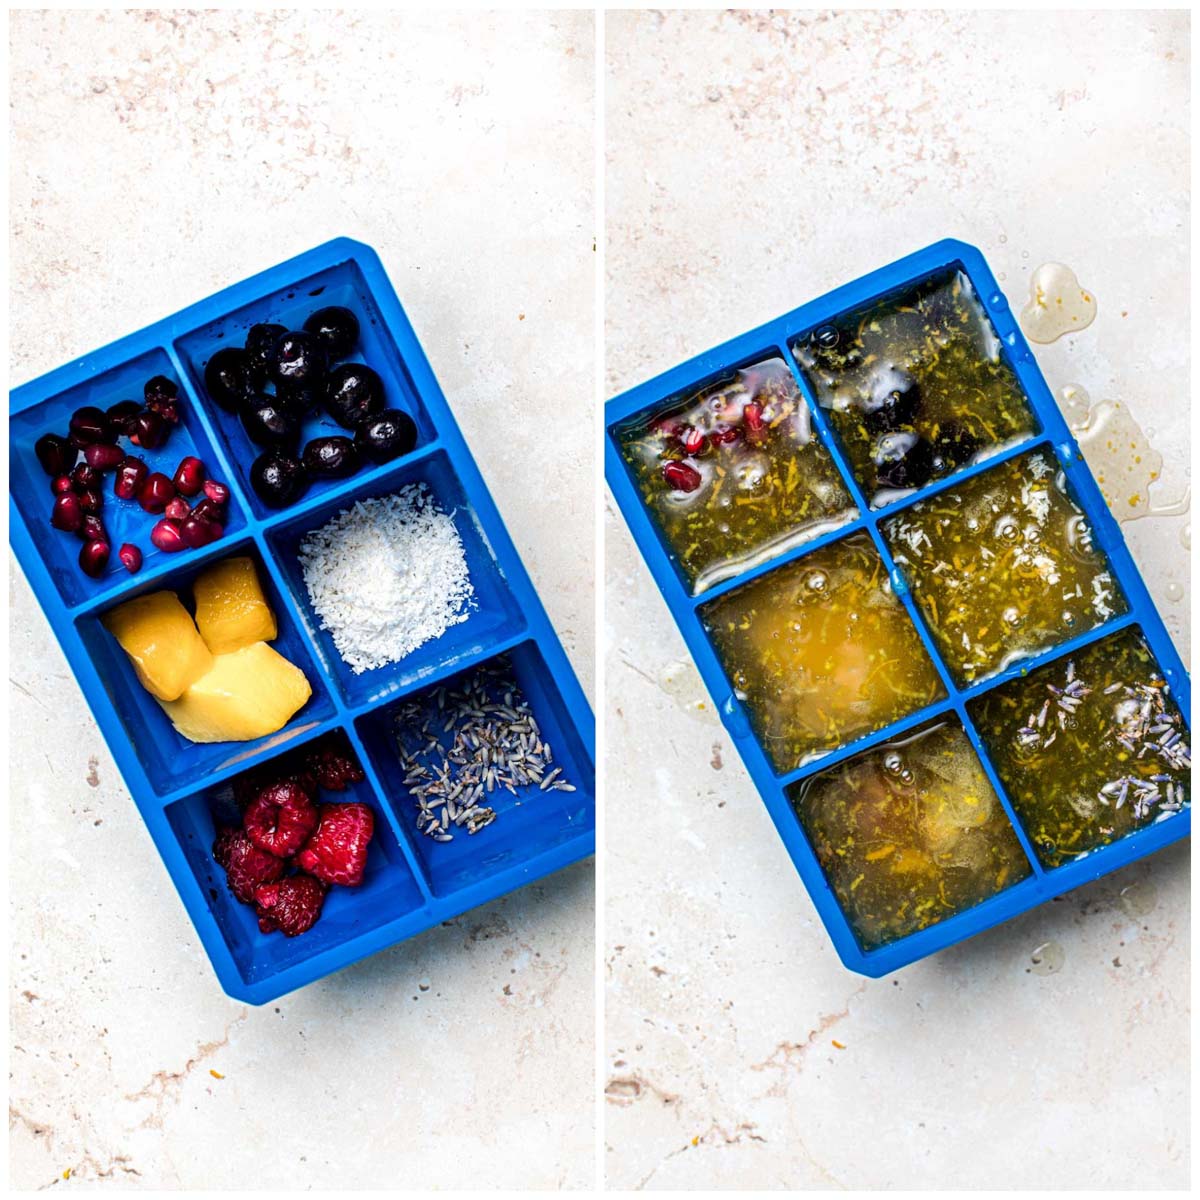
I could talk about variations of konnyaku jelly for days, but here are some of my favorites.
Needless to say, go ahead & be creative! You can add so many different things and each mold can be something else.
- Coconut - Any type of coconut will do - I previously tried a version with shredded coconut, coconut shavings, or even coconut water.
- Lavender - It might sound strange, but lavender & citrus actually work together SO well.
- Other jam - I used apricot jam, but any jam will do. Think orange, strawberry, peach, forest fruit, raspberry, yuzu, etc.
- Lemon zest - Could be used instead of orange. You could also use other citrus zest like grapefruit, mandarin, etc.
- Edible flowers - Needless to say, these will look AMAZING in your jelly.
- Food coloring - Another fun way to customize these is with food coloring! Go for bright & bold!
🍬 Serving
You might be wondering how to serve this.
The answer? Serve it like you would any other sweets!
Important: Make sure you chew the jelly very well! It's super smooth & slippery. Don't take massive bites and don't eat it too fast to avoid choking.
📦 Storing
Keep the jelly in the molds.
Cover the molds with cling film and keep them in the fridge for 4-5 days.
👩🍳 Similar Recipes
Looking for more FUN desserts that are just SO incredibly easy?
Well, you've certainly come to the right place.
And this wraps it up! Hope you enjoyed it.
If anything didn't make sense or if you have any questions, simply comment below.
And in case you made this recipe, I would appreciate it SO MUCH if you could leave a comment or review below.
It truly helps me reach more people (and always improves my mood!).
🍴Recipe

Konnyaku Powder Jelly (3-Ingredient Candy)
INGREDIENTS
- 1 packet konnyaku powder 125g
- 2¼ cups water 500 ml
- 2 tablespoon jam apricot, orange, strawberry, etc
- 1 orange zest only
Optional
- malic/citric acid 1 packet of this should come with your konnyaku powder
- lavender, shaved coconut, edible flowers, more citrus peel, fruit, etc.
INSTRUCTIONS
- Pour konnyaku jelly powder into a medium-sized pot.
- Slowly add water and stir continuously to prevent clumps from forming.
- Add orange zest & jam. Bring to a boil.
- Remove from heat, and add malic acid (optional). Stir well.
- Place any optional toppings into the molds (or leave them empty if you don't want any toppings).
- Pour the konnyaku powder mixture into the molds until full.
- Let the mixture come to room temperature before placing it in the fridge for 3 hours to set. You can also leave it to set overnight.
Notes
- If you're adding fruit toppings, make sure the fruit isn't too watery!
- Konyakku usually sets SUPER fast - but if you want to, you can leave it to set in the fridge overnight.
- Because it sets so fast, make sure you pour it into the molds quite fast - don't let it stand for more than a few minutes or it will start to set.
- I love serving it cold straight from the fridge. So refreshing!
Nutrition
Disclaimer: The nutritional information above is calculated automatically. The author of this post cannot guarantee 100% accuracy of this data.


Natalie says
ooh! This looks GOOD! Excited to give it a try now that the weather is so lush!
Tajda Ferko says
Thanks Natalie! It's so so good!
Ella says
I didn't believe this would turn out as well as it did! Actually surprised at myself for being able to make somethign that looks as cool as this. Thank you for making me look awesome in front of my friends haha!
Tajda Ferko says
Haha, I'm pleased to hear you enjoyed it so much!
Wuer says
Hi my jelly has turned liquid again after two days covered with film in the fridge, is this normal? Should I heat it up a little and add more konjac?
Would you mix konjac with other thickeners or gelling ingredients like xanthan or agar?
Tajda Ferko says
Hi lovely! I've never had that happen to me - I would heat it up again and add some more thickening agent like agar agar - make sure to dissolve it in a tbsp of water before-hands. Hope this helps! xx
Jay says
if i remove from mould to be kept in fridge will it lose shape? i want to make a few batches.
Tajda Ferko says
You should be fine 🙂 Once set, they should retain their shape if kept in the fridge.