The most in-depth review of the original Foodtography School course by Sarah Crawford. Including DSLR camera recommendations, discount codes, and a bonus FREE personalized photo critique from me! Updated in 2024.
Disclaimer: This article contains affiliate links, meaning I earn a portion of every sale using my discount code. This helps support my blog and allows me to provide more free recipes and photography resources.
Use the coupon code 'MYVEGANMINIMALIST' for 15% off everything on Foodtography School (including presets, courses, templates, guides, etc). Plus, you'll get a FREE photo critique from me (scroll down for details).
Foodtography School is an online food photography course created by Sarah Crawford (formerly Fennel) of Broma Bakery.
Its easy-to-digest videos cover 7 crucial units that serve as a base for anyone trying to break into the food photography industry, food bloggers looking to take their food photos to the next level, or anyone else looking to pick up an exciting new hobby.
Jump to:
I’ve been raving about this information-packed course since I first took it in 2018. Back then, I had just moved from the Netherlands to the UK, where I worked in my social media job, and I only took the course for fun, not knowing what it would bring.
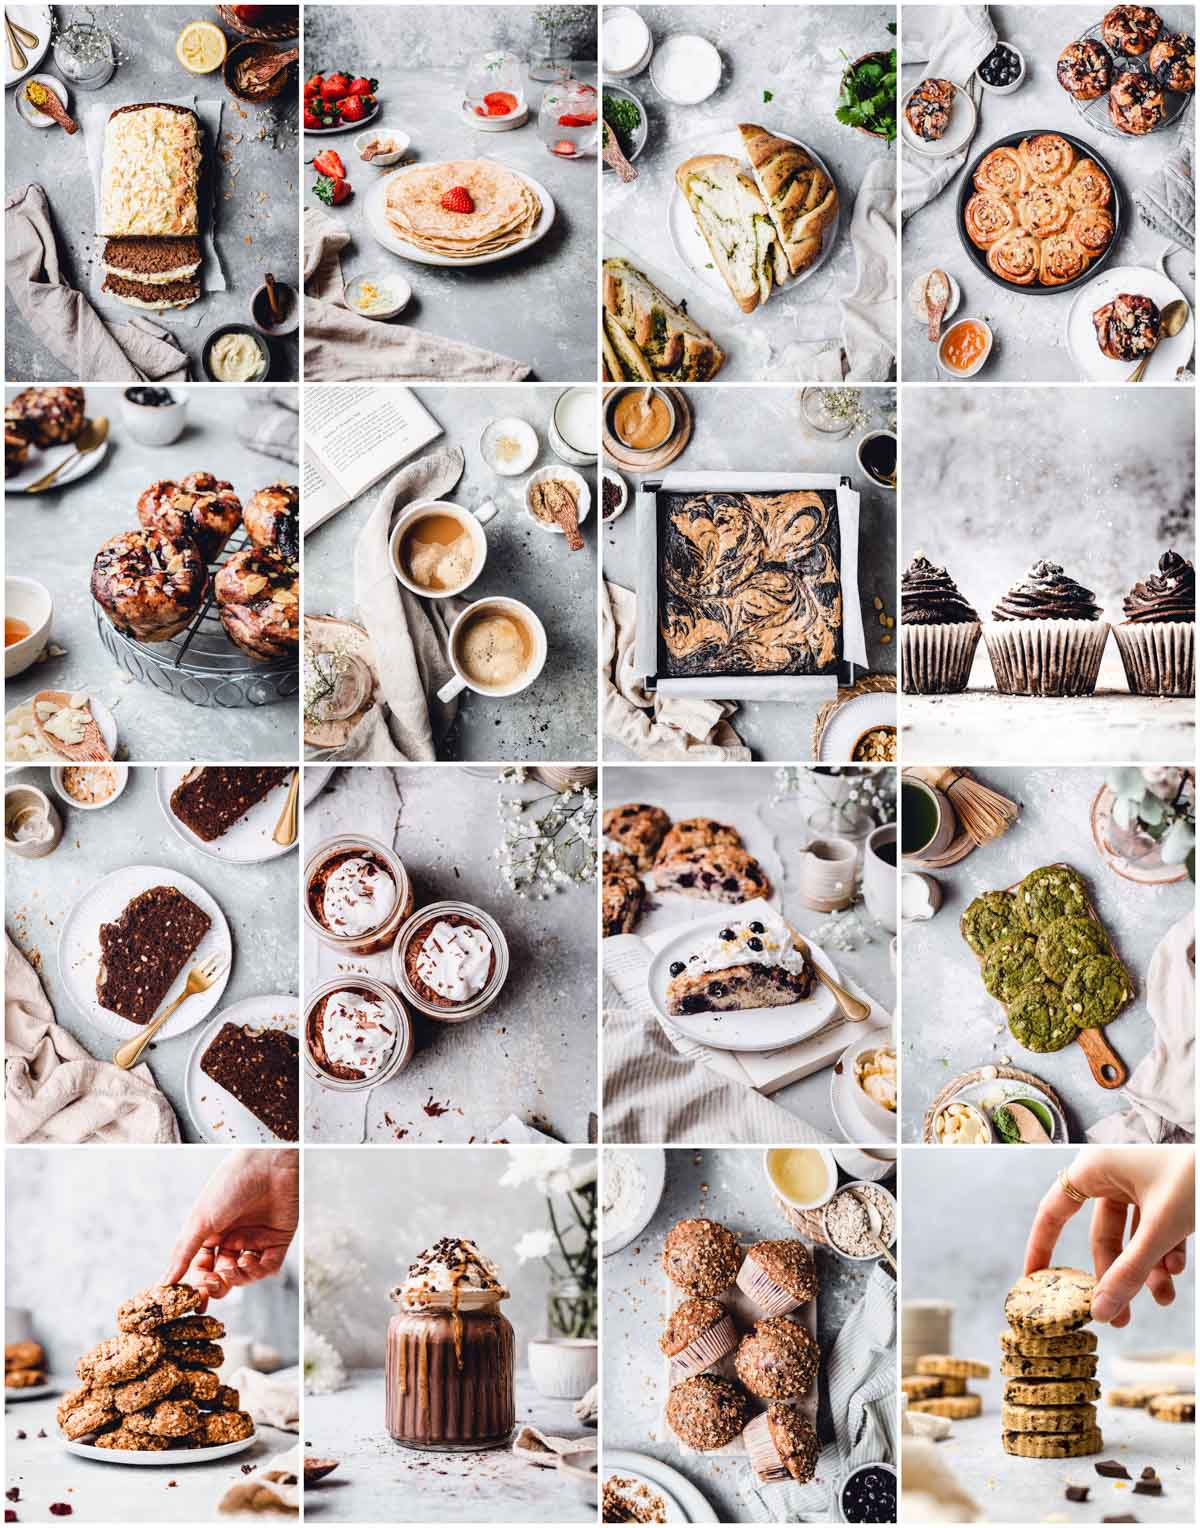
Fast-forward to today, I’m enjoying a fulfilling and successful career as a food photographer!
Wondering what makes my review trustworthy?
- I’ve worked in the food photography industry for years and know exactly what it takes to launch and grow a photography business.
- My experience of taking (many!) other similar online courses allows me to see the advantages and disadvantages of each one.
- This review answers every question I’ve been asked about the course, both in person and through my Instagram Q+As.
- I wrote this review not just based on my own experience but also from having connected to dozens of other students of this course (some of them are now my best friends!)
- It is entirely up-to-date (as of 2024) and covers the new course update from 2022!
Intro
Let's first cover some of the most frequently asked questions.
1. When you purchase this course, you gain lifetime access. This means you don't have to complete the course straight away after purchasing it.
2. Ideally, you will need a DSLR/mirrorless camera to take this course (if you don’t have one, iFoodtography School might be better for you). Their official website says you can take it with a smartphone but I think you can get far more out of this course if you do use a proper camera.
3. You can take this course completely at your own pace.
Course Options
If you've ever checked out the Foodtography School website, you'll probably see that they offer more than just one course.
- Foodtography School (FS): The OG. Their most popular course. The one I took and the one that's reviewed in this post.
- iFoodtography School: A cheaper version of FS for those who don't want or can't invest in a camera, but still want to improve their food photography. You can also find this one reviewed on my blog.
- Advanced Foodtography School: A step up from the regular FS course. This advanced course is aimed at those with some experience with food photography. More in-depth, but still suitable for various levels.
- Restaurant Foodtography School: A food photography course that teaches you how to dive into cafe and restaurant photography (great for diversifying your income).
The Curriculum
The course starts off with a quick introduction which gives you access to FS's wonderful Facebook group. This is a community of your fellow students and a place where you can ask any questions that might pop up while studying.
It is then followed by these units:
- Unit 1: Fundamentals of Food Photography
- Unit 2: Composition
- Unit 3: Light
- Unit 4: Branding
- Unit 5: Editing
- Unit 6: Social Media
- Unit 7: Business + Marketing
Each unit is then further split into several sub-units. For example, in Unit 1, you will learn about the history of photography, camera settings, the basics of setting up a scene for your shoot, and props & background recommendations.
The beauty of this course for me is that you can take it completely at your own pace. There is really no right or wrong way to do it. Simply just go through it however fits your needs best.
You might be in a full-time job and can only devote time to learning photography on the weekends. Or you might be a parent or a carer and only have the time to work on it in the evenings. Perhaps you're someone who has cleared their entire schedule for the next few weeks.
Whatever your situation, you’ll have the opportunity to go through it exactly how you want. You can take a few weeks. You can take a few months. Or you could take years. It’s all up to you!
In addition to the 7 units, you can access an editable workbook & private Facebook group.
My Tips
My honest opinion? You’ll get out of this course exactly what you put in.
This might sound like a cliche, and you might be wondering how you can actually put that into practice. Here are my top tips on how I made the most out of my Foodtography School experience:
- Take excellent & diligent notes: I still keep the first notebook I used for note-taking while taking this course. Believe it or not, I refer to it regularly, whether during preparation for client shoots or when re-shooting old blog posts. Take notes the way YOU want to take them, print out photos for reference, or maybe even use the notebook to track your progress.
- Be as active as possible! The more active you are in the Foodtography Insiders FB group, the quicker you will notice the progress. Plus, you'll be adding value to the community around you. You can use the group to post your work and get feedback from your peers. Just as importantly, you can use it to comment on your peers' work. Critiquing other photographers' work is crucial to your early progress as a new photographer.
- Practice your craft. Last but not least, practice is everything. Watching the videos and taking notes won’t magically improve your photography. It won't do much at all. You'll be disappointed if you expect to improve simply from watching the videos. I know it can be intimidating or even downright scary, but the more you practice, the easier it will become. Practice, get feedback, analyze your work, and then repeat.
FAQ
Foodtography is an informal word combining the words 'food' and 'photography.' It's a shorter way of saying food photography.
You can enroll in the course for $997 (one-time payment). Alternatively, you can use the payment plan - 12 monthly payments of $97.
UPDATED: As of 2021, you can use the discount code MYVEGANMINIMALIS to get 15% off! This will reduce the price to $847.45, saving you almost $150.
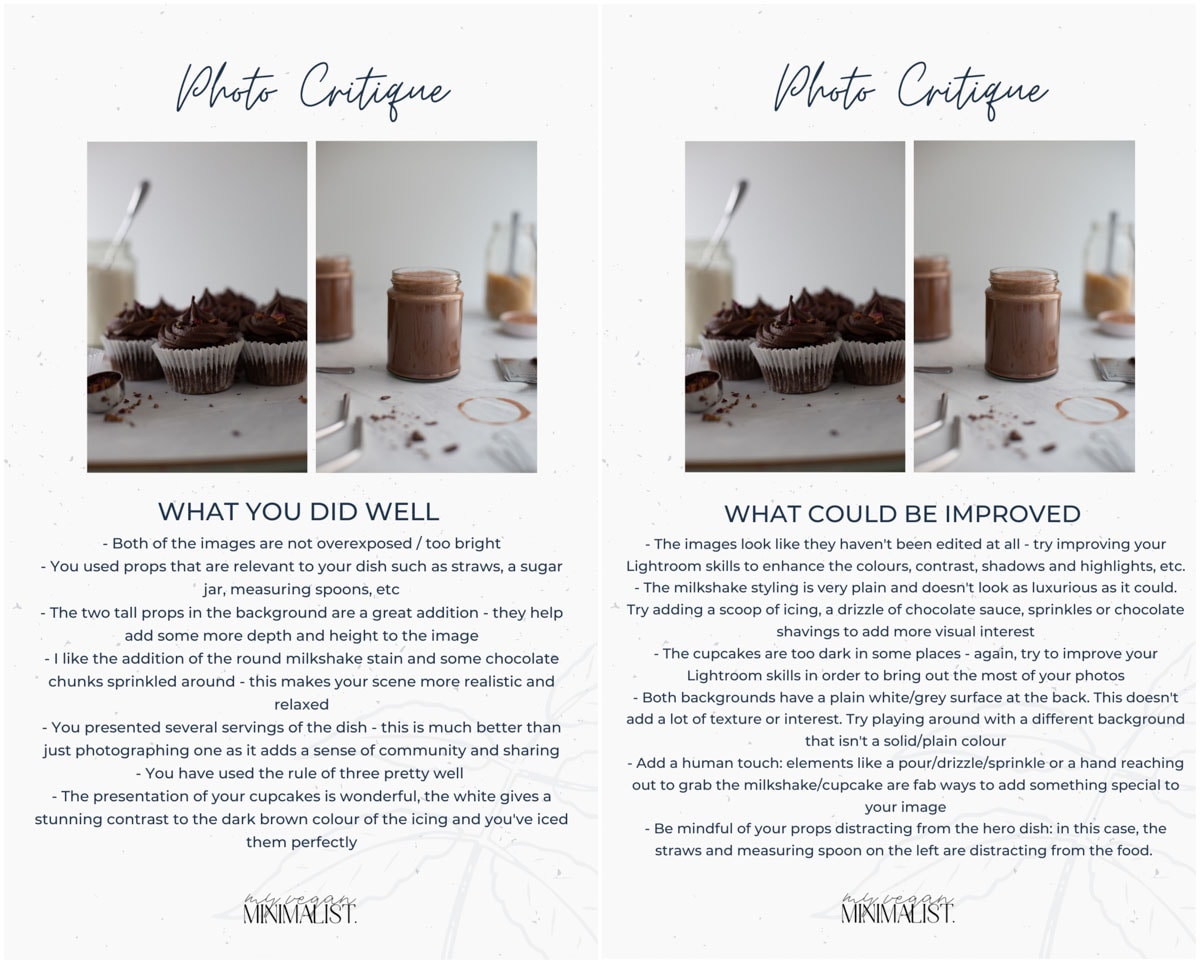
If you use this code, you also get a free bonus from me - a personalized photo critique to help you get through those tricky early days of being a new food photographer!
Remember that Foodtography School doesn’t offer discounts on any payment plans.
According to a survey, 94% of former Foodtography School students said the course was worth the investment.
For me personally, Foodtography School was definitely worth the money.
I earned back the value of the course when I landed my first paid gig just months after finishing the course (mind you, this was for several recipes/shoots, not just one). I’ve said that so many times before, but Foodtography School was the best purchase of 2018 for me.
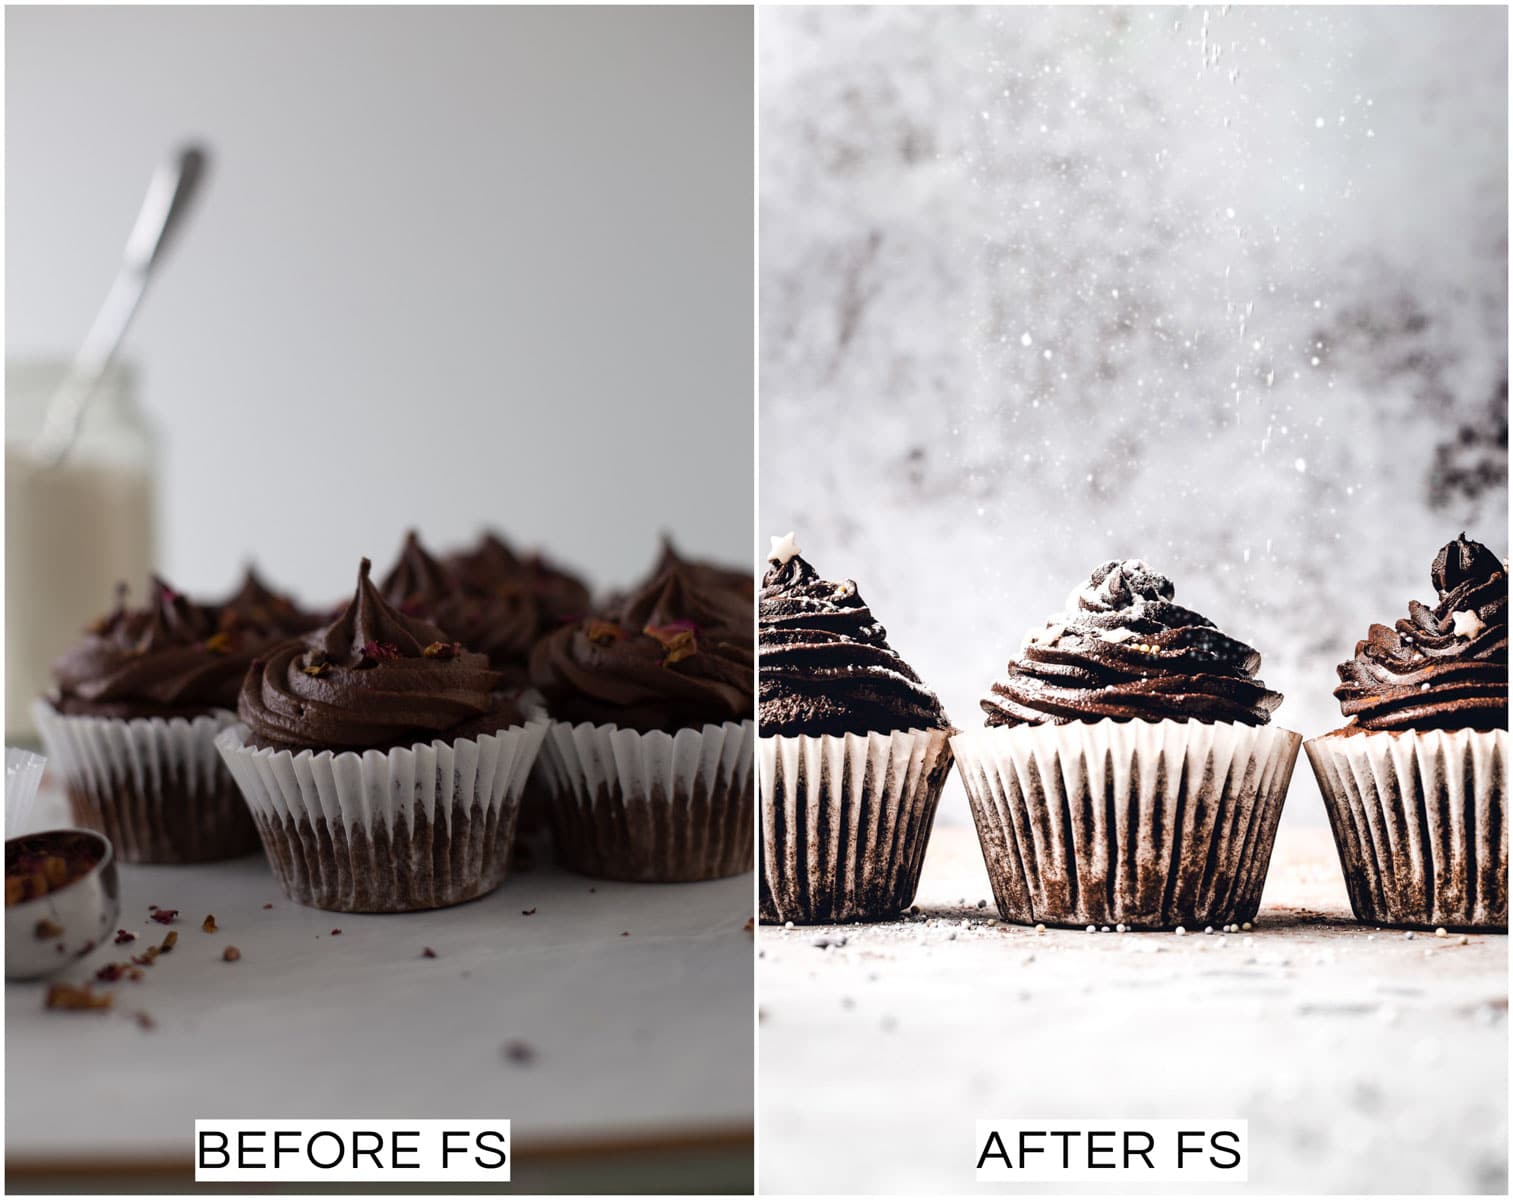
As a direct result of taking Foodtography School, I was offered many opportunities.
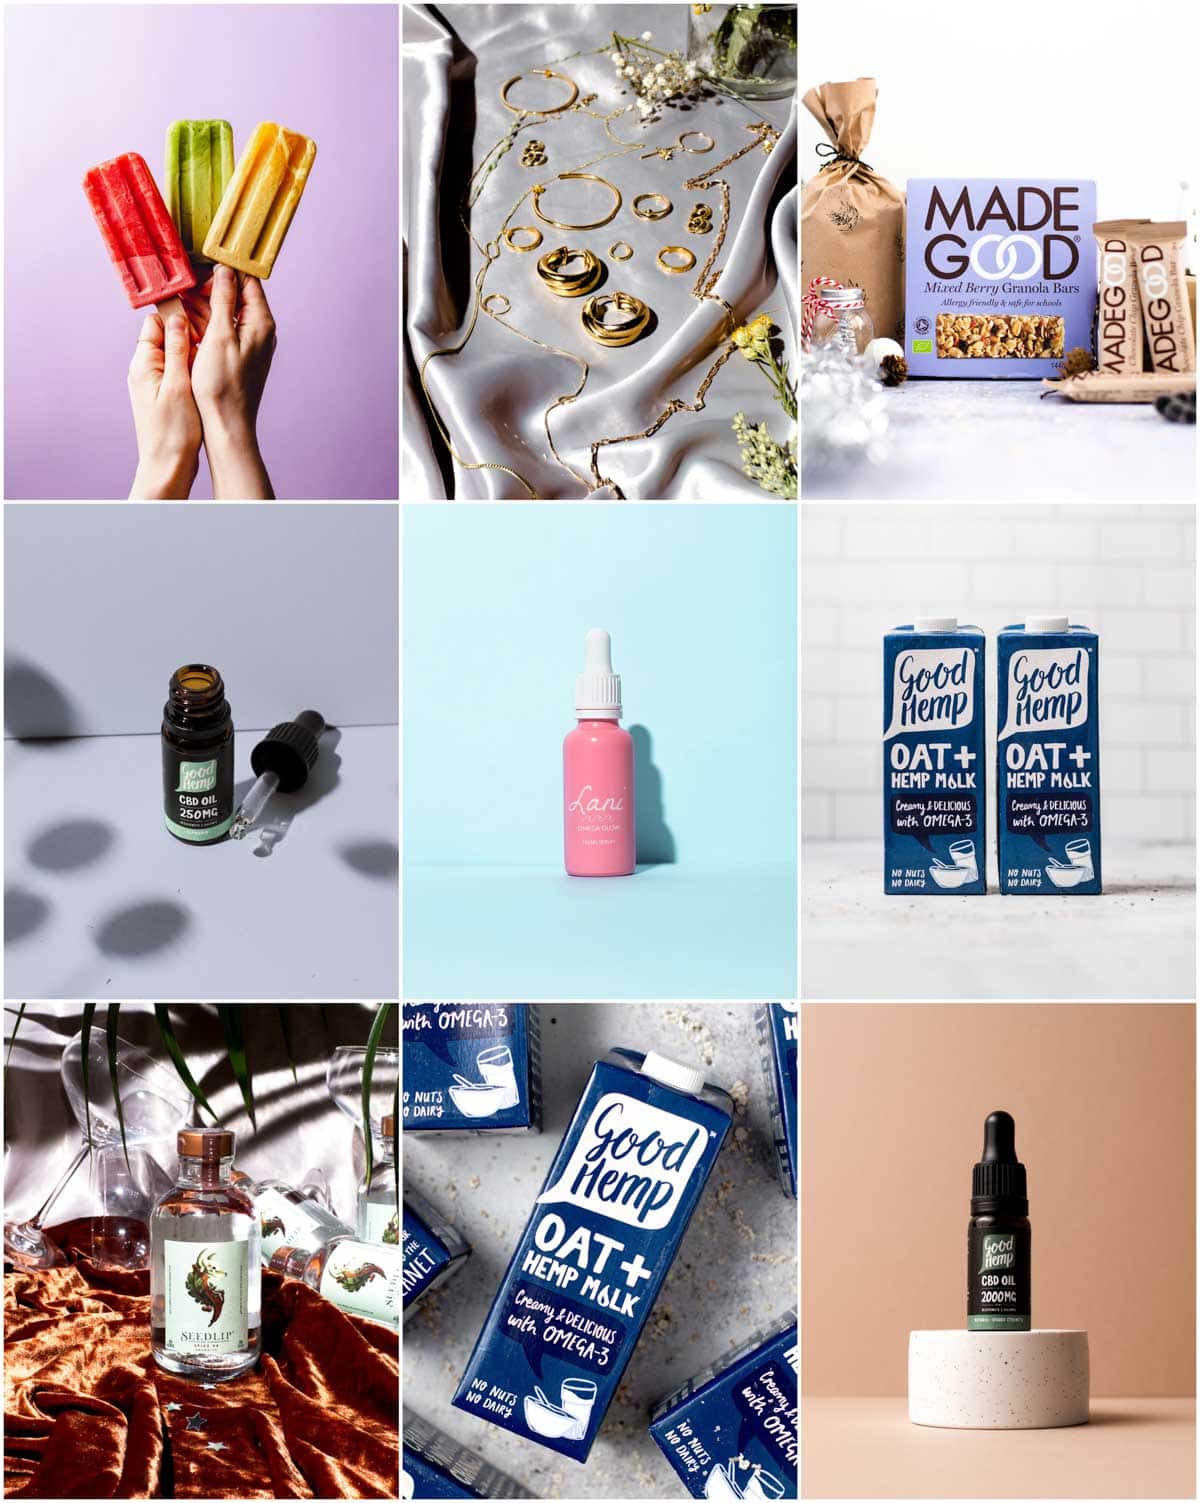
- I worked with amazing local and global brands,
- I won a food photography award,
- My work was featured in a large spread of Thrive Magazine,
- As my photos improved, my food blog qualified for Mediavine, earning me ad revenue each month.
- I earned long-term contracts with dream brands in my niche.
- I worked with restaurants, hotels, small brands, and huge international brands like Panasonic and Tala.
- I gained access to an incredible online community through the private FB group.
The FB community is super supportive, and there's something there for everyone. Whether you're excited about landing your first paid gig, struggling to find new clients or have any technical questions about cameras, lenses, Lightroom, etc., you will always get to know someone willing to help. I got to know Ana, one of my best friends, through that very Facebook group.
There is some debate about whether or not you need a DSLR camera.
Technically, you can go through most of this course simply by using your smartphone. If you’re super determined and prepared to work hard, you will most definitely get A LOT out of this course, even without a proper camera.
However, a camera is very much recommended.
If you’re just taking the course for fun and don’t seriously consider investing in a camera, I would recommend the much cheaper iFoodtography School (designed to be taken with a smartphone)
Time
As mentioned above, the time this course takes will depend on your own pace.
To give you a better idea, there are roughly 11 hours of video content.
What worked best for me was to take 1 week to complete each unit, bringing the total time spent on the course to around 7 weeks.
I would watch the course materials and make notes during the first days of the week, then finish my course homework and get feedback towards the end.
Another thing to remember is that some units might be less or more time-consuming, depending on your prior knowledge and experience.
To give you an example, the unit on composition was far more demanding for me than the unit on branding, which I was already very familiar with from my social media & marketing job.
Camera Recommendations
Will you need lots of fancy props and equipment? Absolutely not. A camera and a laptop are all you need (plus internet access).
Of course, you could go crazy and buy a few extra camera lenses, an expensive tripod, and artificial lighting and spend a fortune on fancy props. But that’s NOT what I would recommend at all.
In my experience, once you start spending money on gear, you will enter a vicious circle of never-ending purchases (trust me, I've been there).
More importantly, it will distract your attention from what matters the most - your craft! Many people ask me which camera I use, and I’m always happy to answer that. But remember, you are the one who makes the photos come to life, not your camera.
Photography is an expensive hobby/profession, but don’t forget how much you spend is entirely up to you. Examples?
Before taking the course, I owned an entry-level, second-hand DSLR camera. Because I’d previously worked in graphic design, I also had an Adobe Photography subscription, including both Adobe Lightroom and Photoshop, for about $10/month. This meant that there was absolutely no extra cost for me. I paid for the course in one go, and that was it. I was ready to dig deep into it.
I took the course with my Nikon D3300 which you can grab refurbished for less than $200/£200. If you’re looking to buy a second-hand camera and you’re in the UK, I recommend CameraJungle.
If anything, having a cheap camera only made me a better photographer. It made me work SO much harder to make my photos work and look good. It took me over a year of practice until I knew I had outgrown my camera and decided to invest in my Canon 6D and then a mirrorless Canon RP a few years later.
Simply put, don’t overthink your equipment; stick with the basics and focus on your skills. Don't rely on the camera to do the magic!
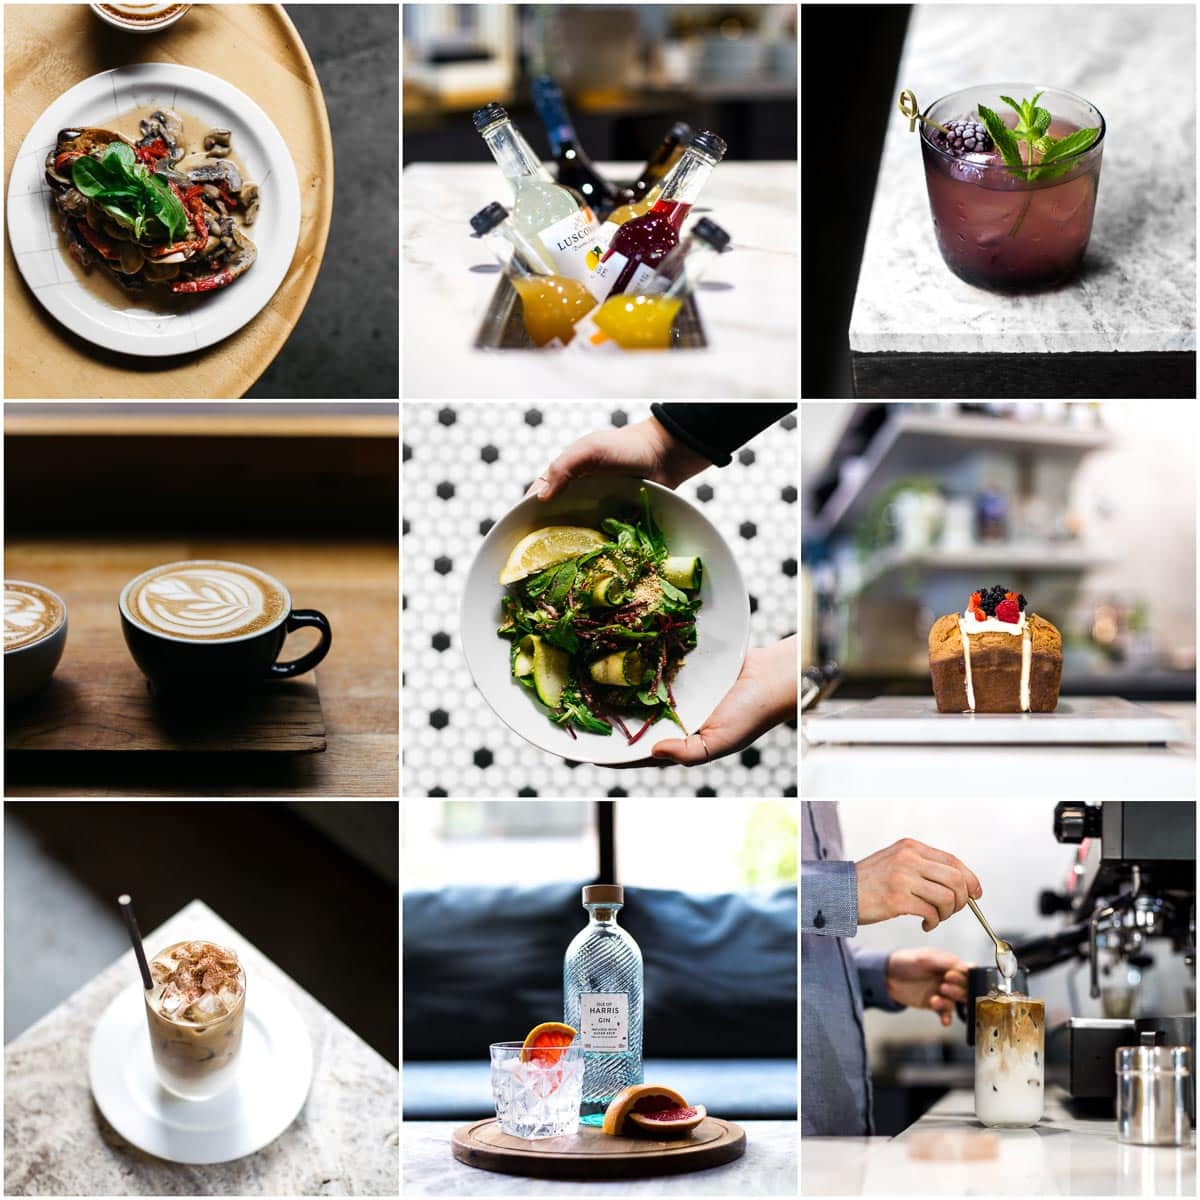
The Space
Wondering how much space you'll need to take this course?
Everything can be done from home.
You don’t need a studio or a restaurant. You genuinely only need a tiny amount of space.
If you’re a student living in a dorm, you can take this course. If you’re flat-sharing (like I was), you can take this. If you’re living with pets, you better get ready for them to knock over your entire set all the time. But still, you can definitely take the course.
As someone who loves working alone (hello, fellow introverts), I loved that aspect of the course.
Fundamentals of Photography
The course taught me how to use a camera in manual mode (I had no idea what that even meant before taking this course).
It taught me all the core composition principles and practical examples of how to shoot with perspective, capture movement (actual and implied), textural and contrast layering, and the importance of working in multiples.
I learned about the psychology behind colors and shapes, diving deep into what our eyes are naturally attracted to.
Despite already being familiar with Lightroom, I learned a whole lot about editing, including how to get the white balance right and how to edit both light and moody images, and I got familiar with the concept of color stories.
The most surprising thing I learned? It’s always better to underexpose than overexpose your photos!
The Instructions
The course was very easy to follow and in case you miss anything, you can replay the videos as many times as you wish.
Sarah Crawford is a great teacher – she’s straightforward and confident but also keeps the content light, entertaining, and funny when needed! This is something to keep in mind.
If you prefer very sophisticated & serious teaching styles, this might not be the course for you. Sarah is known for her down-to-earth approach, which might not work for everyone.
To understand what I mean, head over to her Instagram and check out some of her Story highlights. Have a look and decide if her teaching style and personality fit you.
For someone who’s not a native English speaker (like me!), the great thing about the course is that it has English subtitles. Seeing & reading the words can be a lot easier for many non-natives than just hearing, so this is a huge perk! Not to mention it makes it far more accessible for people with hearing loss.
Business
The course covers a very important part of setting up a business - branding.
Branding is a word that gets thrown around quite a lot these days. I feel like it’s one of those words you hear a lot, but many people don’t know what it truly means.
To put it simply, branding is what makes your business unique, what makes it stand out from the rest. It’s a combination of many things that define the business such as logos, colors, slogans, mascots, tone of voice, etc.
Branding is a vast umbrella that helps define any activities your business is doing but also serves as a must-have base, the foundation of your business. If your brand isn’t clearly defined, your work won’t be recognized as unique.
This is where Foodtography School comes into play - with the help of a fun branding exercise, you will be able to define (or redefine) your brand and find a recognizable visual voice.
However, remember that the course is not enough to single-handedly fast-track you into a foodtography superstar!
As someone who’s been self-employed for almost 6 years and comes from a family of people who started their own business, I know that it takes a whole lot more to get everything up and running, let alone to ensure the long-term profitability of your business.
I wouldn’t want you to go into this course with false impressions. I wouldn’t want creatives out there to spend their hard-earned money on a course that promises something but does something else! This is why I’m frank & up front - to run a successful photography or blogging business, you must go beyond what this course offers.
If you’re looking for more (free) resources on business, I recommend Skillshare. They offer different courses on freelancing and setting up your business. Plus, they are a great extra photography, pitching, and editing resource!
It's also worth searching for local initiatives helping small businesses and creatives. You'd be surprised how many are out there. This made a crucial difference in my early days as a business owner - I started clueless, in a foreign country with zero connections to anyone running a successful business.
Through fully-funded projects, I participated in two 6-month business programs run by The Growth Hub in Manchester (UK) and took a 12-week business accelerator course FreelanceHER. Make sure to Google what's available in your local area - these programs were so important to me.
Artificial Light
This course is aimed at people who shoot in natural light. As such, it doesn’t cover artificial lighting, so don't expect to learn about flash, reflectors, modifiers, etc.
This might not be the best course for you if you live somewhere with very bad natural light conditions (such as if your apartment doesn’t have large windows or faces a huge building).
Instead, you could try out Bite Shot's Artificial Academy or learn about artificial lights FOR FREE on Youtube. Joanie Simon from The Bite Shot offers incredible free tutorials on her YouTube channel, helping you understand flash and other artificial lights.
Using Lightroom
I had no formal training in Lightroom before taking this course, but I was very familiar with its interface.
The course delves deep into Lightroom, teaching you all the basics on how to get familiar with the software. It also covers different editing styles and gives you handy tips on checking that your images all have a similar signature look.
Dislikes
Being based in gloomy Manchester (UK), I found that taking photos in natural light wasn't working for me long.
At the time, I was living in the heart of a big city, with all the windows in our apartment facing a brick wall of another building. While this feels very New York, it gets frustrating if you're trying to be a photographer.
For me, shooting in natural light was just not an option. This means I had to invest more time and effort in furthering my skills and eventually switching to artificial light.
This was the main drawback of the course for me. Having said that, my situation is very unique, and many photographers work exclusively in natural light (including Sarah).
Struggles
What remained a struggle for me was the journey after Foodtography School. I rapidly grew my social media audience and got brands to notice me, which led to my first work opportunities.
How do you negotiate brand deals? How do you write a contract that protects your work? How do you go about offering different types of photo licensing? And how do you ensure you're getting paid what your work is worth?
This is not covered in Foodtography School, so you will either need to a.) figure it out on your own b.) get a professional to help you (e.g. a lawyer, a coach, a business advisor) or c.) take a different course specific to the business side of things, such as Advanced Foodtography School.
Having said that, all of those were quite pleasant problems to have! Like many fellow students, one of my biggest worries before taking the course was that my images would never be good enough to get brand deals.
To know that they are and that others out there love my work was a huge relief.
Discounts
Are there any discounts available? Yes!
To save 15% off everything by Foodtography School, you can enter the code MYVEGANMINIMALIST at checkout.
Alternatively, you can also choose to pay for Foodtography School in installments. This way, it won’t cost you a big chunk of your budget all at once.
Post-course
What were my biggest wins after taking the course?
- Launching my food and product photography business Bloomlight Creative.
- Becoming a member of The Picture Pantry, a premium food photography stock library that only opens up to new applicants a few times a year and has strict admission requirements.
- Winning a food photography award by One Bite Vegan
- Signing 5-figure contracts with brands
- Reaching over 10k followers on Instagram
- Launching my OWN free 5-day food photography course
- Largely due to my photography, I managed to grow my food blog to 50k monthly sessions (and growing!) and qualify for Mediavine to earn monthly income from my blog.
Having said that, I do want to note the following. My story looks like a success but doesn't necessarily reflect everyone's journey.
I know several other students who have not (yet) earned back their money or ended up taking other courses to kick-start their careers.
Some students couldn't make food photography their job despite putting in all their best efforts. It’s not a winning formula that will yield results for everyone and anyone.
Many factors come into play: your location (the US market is more prominent and offers many more opportunities compared to some other places), your current skill level, luck, your patience, and your background in marketing and social media.
FREE Bonus
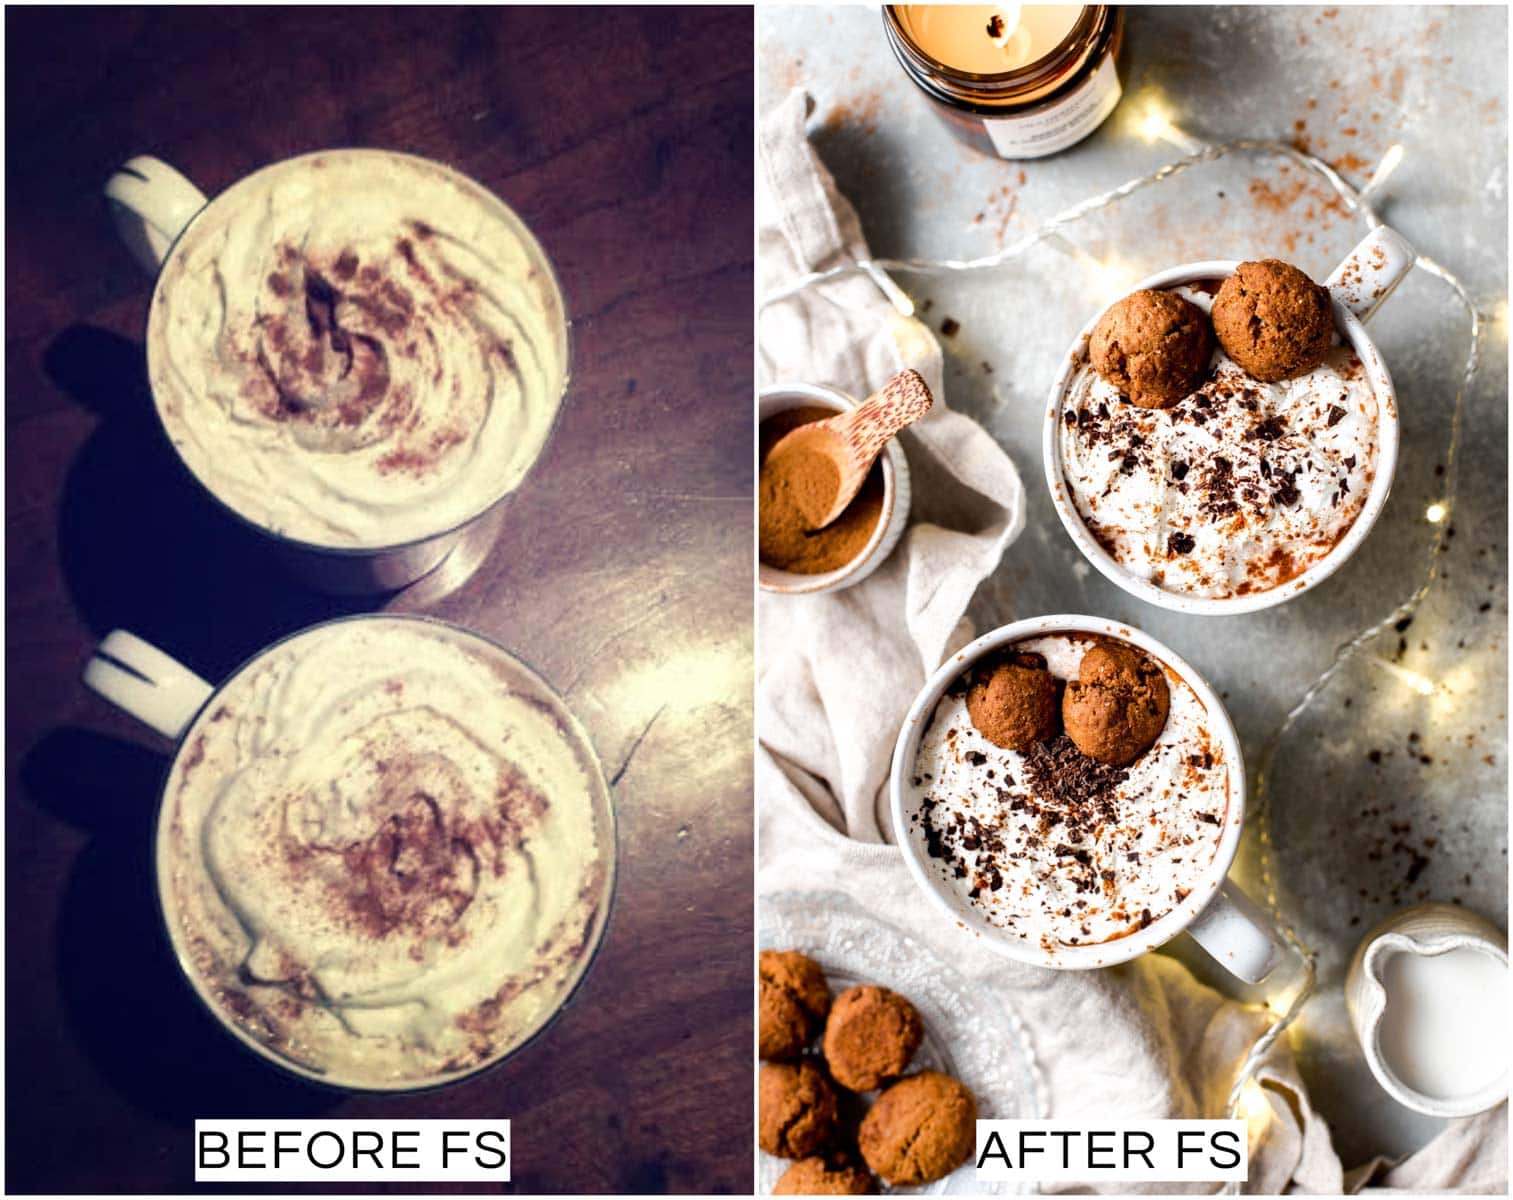
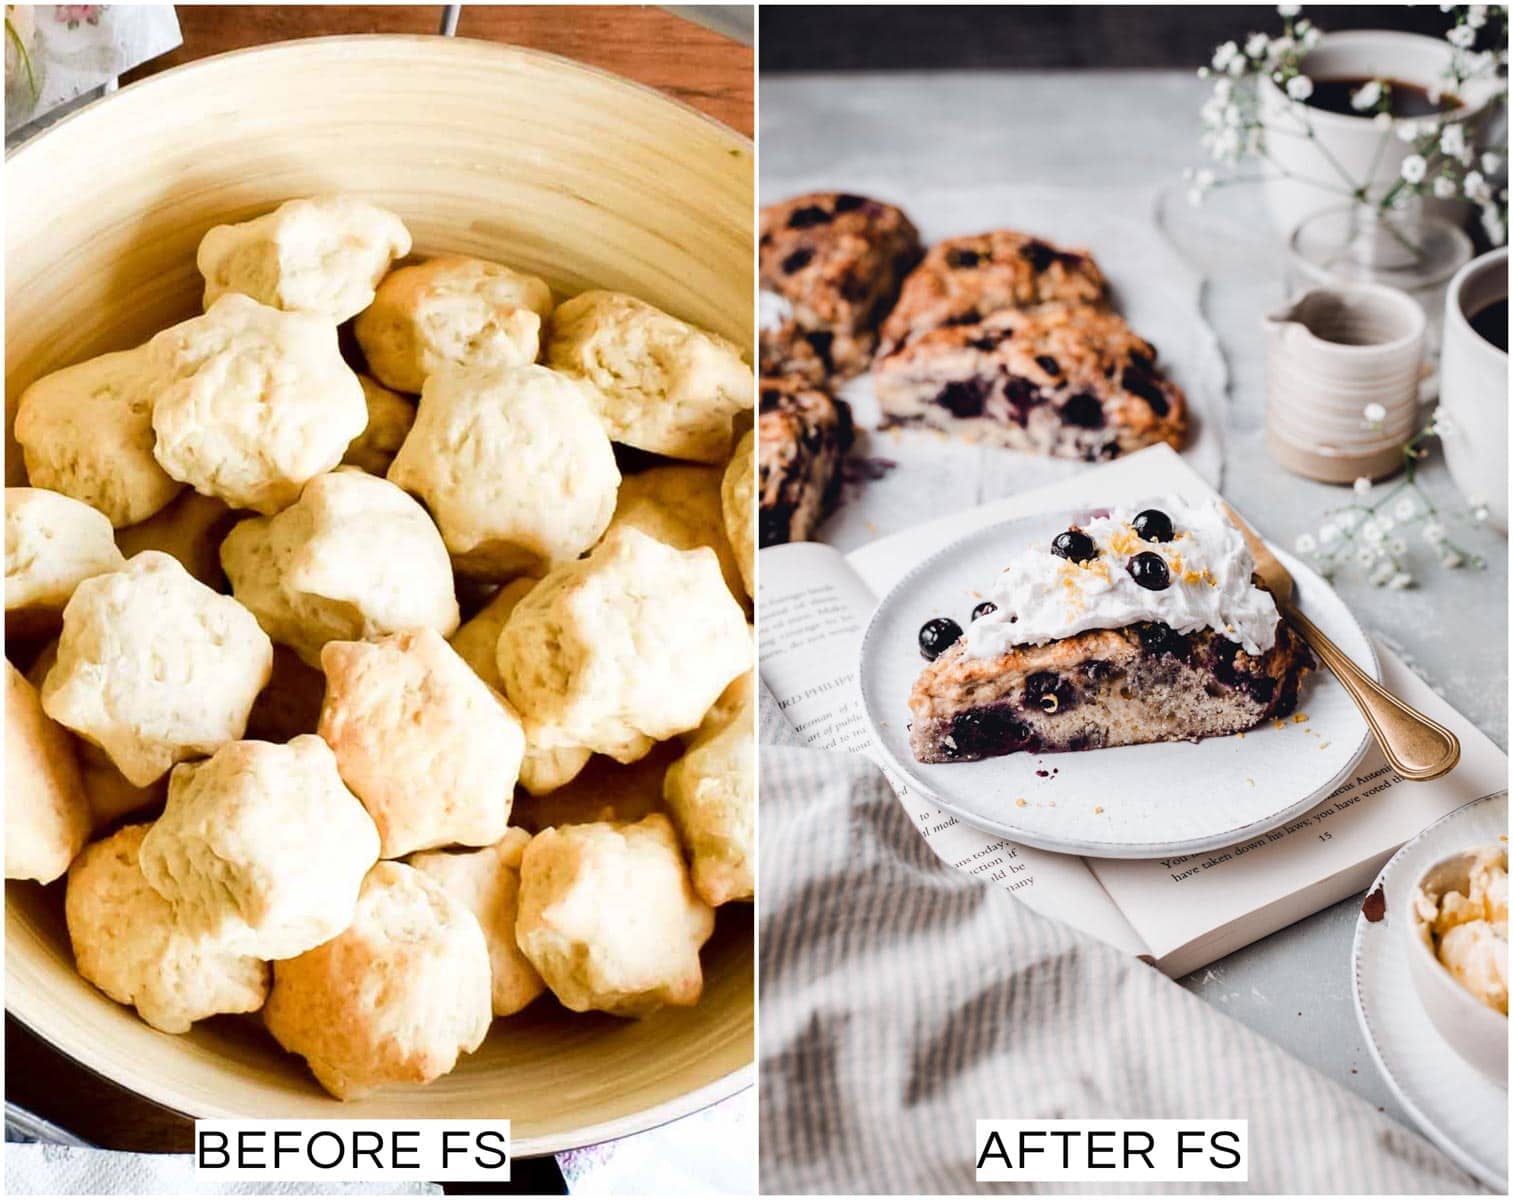
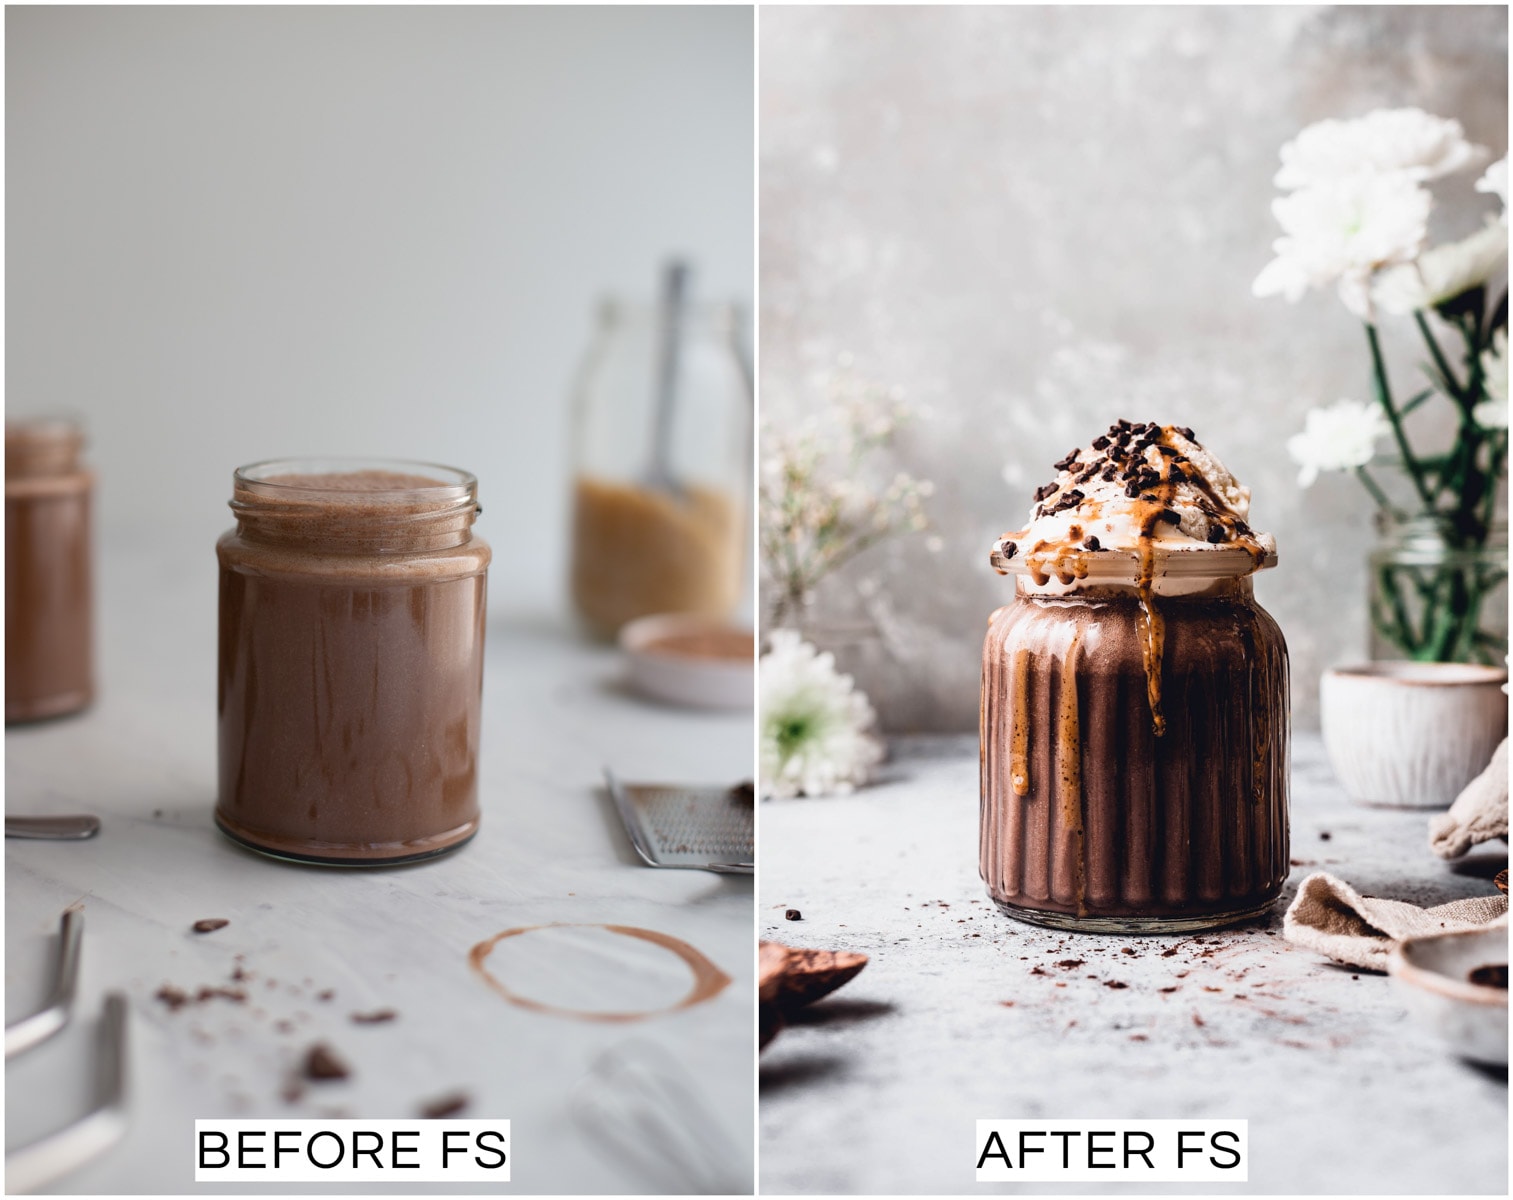
If you sign up for Foodtography School using my discount code MYVEGANMINIMALIST you will receive a free 2-page photo critique from me. See the photos below for an example of what a photo critique from me would look like.
All you need to do after signing up is email me with:
- Your name
- Two images you want feedback on.
I’ll get back with my in-depth photo critique within two weeks. My email is hello (at) myveganminimalist (dot) com.
If you have any questions, please leave them in the comments section below!
Conclusion
I hope this review answers most of your questions about FS - I tried to make it as comprehensive as possible, so congratulations if you made it to the end.
If you have any further questions, let me know in the comments below or contact me directly via email or Instagram. I’m always happy to connect with fellow creatives, so don’t be afraid to ask.
I would also love to invite you to check out some of my fellow Foodtography School students. My favorites are Ana's Baking Chronicles, Cupful of Kale, Butternut Bakery, and Cravings Journal!
Don't forget you can get 15% off everything on Foodtography School by entering the code MYVEGANMINIMALIST at checkout.
This includes all their courses and everything in their shop - Lightroom presets, brand style guides, media kit templates, sponsored post-pricing guides, and more.
Did you know? I recently started a series of free Food Photography Tips! You can find them all HERE. If you don’t want to miss out, make sure you’re subscribed to my email list (scroll to the bottom of this page) and receive all the tips straight to your inbox!

Shivani Raja
So I was just reading this post and saw you mentioned me at the end - how sweet of you Tajda! I really enjoyed reading this, definitely agree with everything you said (though I haven't made my money back yet - one day!) and also agree on the part about pricing varying between here and the US. But I definitely recommend the course too, if not for the amazing community of creatives!
My Vegan Minimalist
Awww that's so sweet Shivani! You more than deserve to be mentioned - love following your photography journey!
AlBa
Hello Ty,
I found out about the Foodtography school during the 4 month quarantine and with all the time spent at home baking and experimenting i thought It could be interesting and helpful to take the course. However before deciding to enroll I wanted to make sure I knew what I was getting myself into and that’s how I came across this article.
Im debating wether to take both courses or just one. I wouldn’t call myself a complete beginner as I have taken a general photography course back at university and I practice/ experiment a lot during my travels and for my home baking business account on Instagram _ hybrid_delicacies. (feel free to check it out and let me know what you think).
Since I’ve learnt most of the food related photography, editing, styling, etc.... on my own and dont know much about business I thought taking the beginners course would be useful to improve my account and “business” since there are units that focus on the business and marketing side of things.
What would you recommend?
Also, is there a certificate or a letter of completion at the end?
Thank you in advance.
Tajda Ferko
Hi lovely! Thanks for reaching out! To answer your questions. 1.) When you say beginners course, are you referring to iFoodtography course? This one is iPhone/mobile only and if you're looking to learn more about the business side of things I wouldn't necessarily go for that one. What I would probably recommend is the Foodtgraphy School course which features some business-related material as well. There's also a brand new Advanced Foodtography Course, which is meant for people that have already taken the Foodtography School course or another similar course. 2.) There is no certificate. Any other questions, let me know! x
Rebecca
Thank you so much for a thorough review! It’s inspiring to see the journey you’ve been on after finishing the school.
Tajda Ferko
Thank you so much lovely, that means a lot! It's been a fun & rewarding journey! x
Silvia
Love this review! I was wondering where you get your props and background from? Thanks so much!
Tajda Ferko
Thank you so much lovely! I get my backdrops from Capture By Lucy or I paint them myself. Some of my favourite places to buy props are Nom Living, West Elm, Crate and Barrel, Habitat, Etsy, M&S, Søstrene Grene etc.
Coco
Thank you for this thorough review, wow! Could you perhaps tell us a little bit more about the Facebook group for Foodtography School students? Would love to know how that works. Thanks!
Tajda Ferko
Hi Coco, sure! The Facebook group is an exclusive group available to all students of Foodtography School. It's a place where students can come together to share their course assignments, ask any questions, seek feedback on their photography, and connect with others. It's a great little community where you can just ask anything that might pop up whilst you're taking the course and share your struggles or wins throughout your food photography journey. Hope this helps! If you have any other questions, let me know xx
Maddie
Ohhh thank you for the big review! Do you still offer the free bonus photo assessment for everyone that signs up? I read about it on Instagram but not sure it's still active.
Tajda Ferko
Hi Maddie, yes, absolutely! If you sign up to Foodtography School using my discount code you'll get a free photo critique from me. All you need to do is just drop me an email for DM on Instagram.
Amanda
hi Tajda! Thanks so much for this informative review. I have been thinking about diving into food photography more seriously and finally decided to bit the bullet. I'm tired of trying to improve all by myself and cant wait to get started!