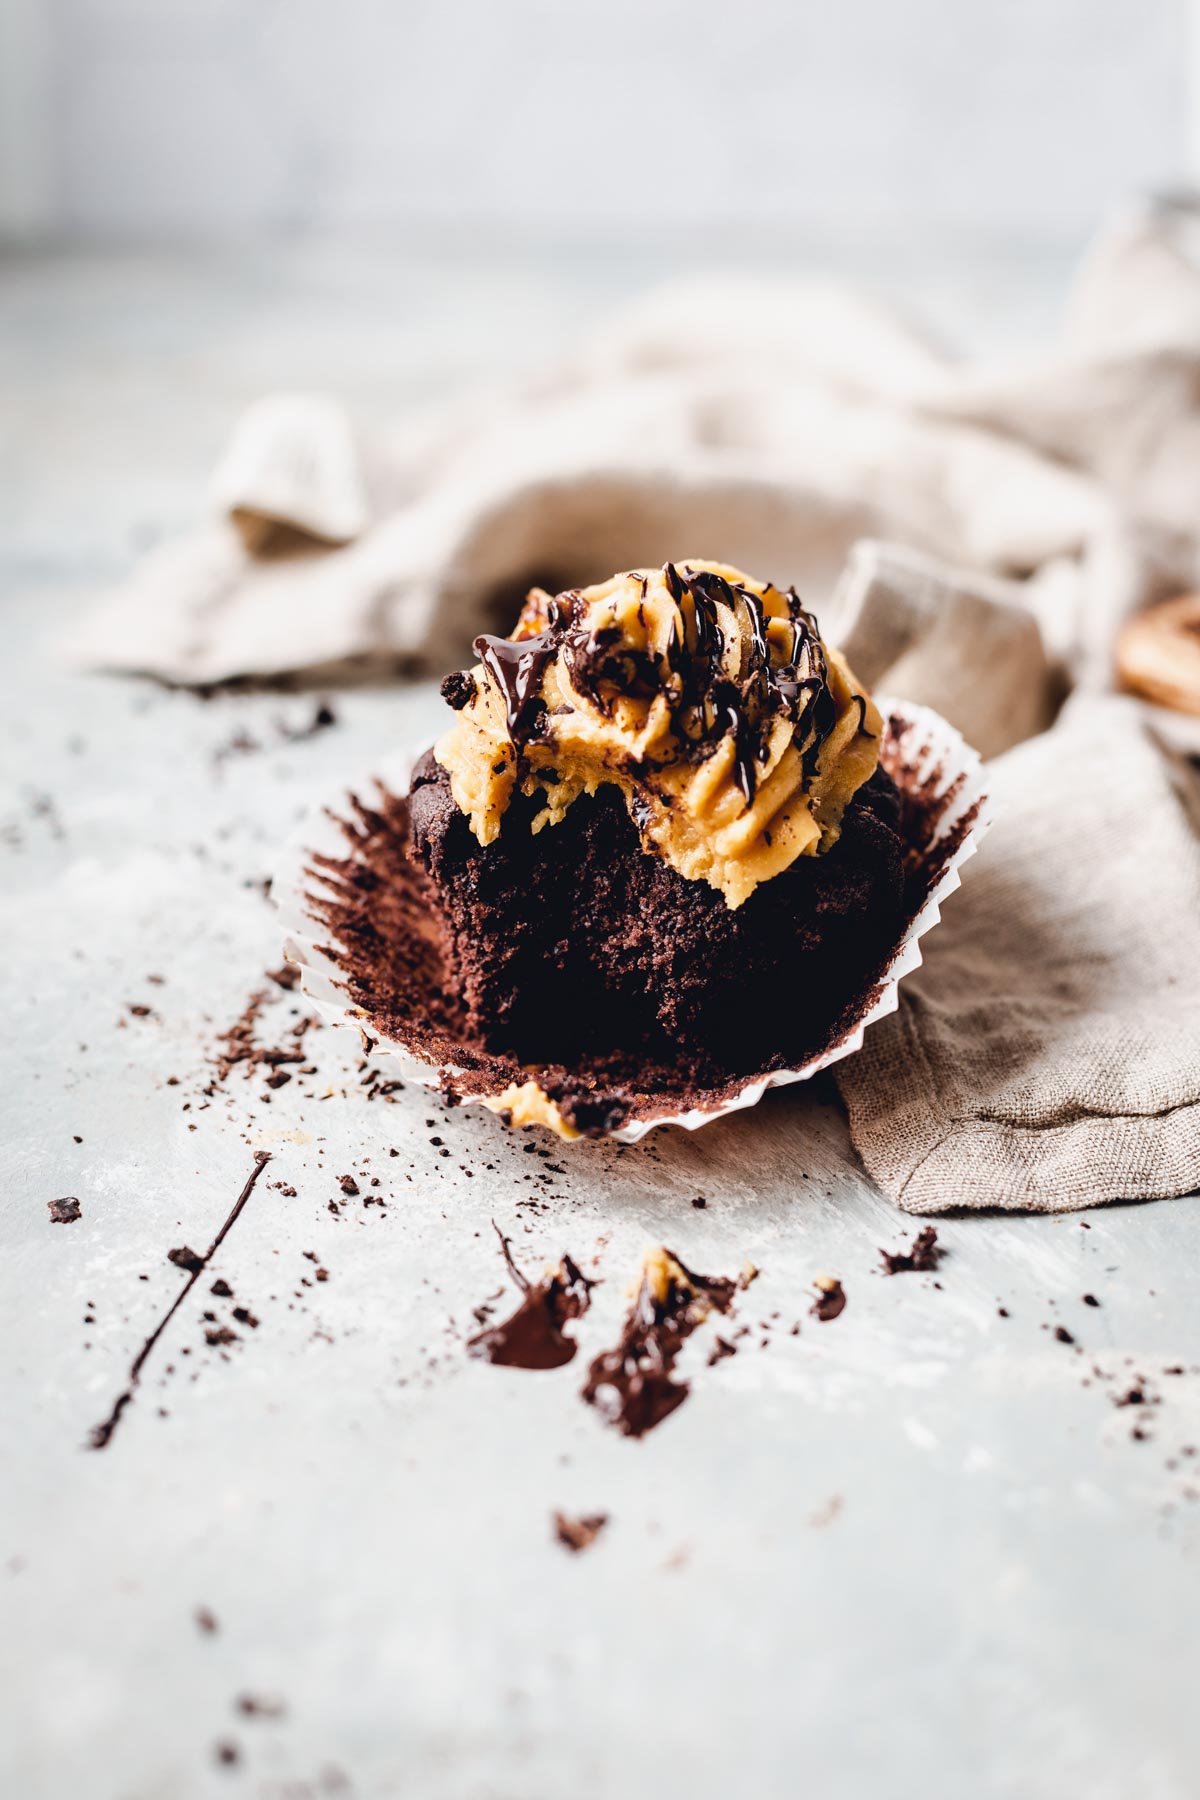
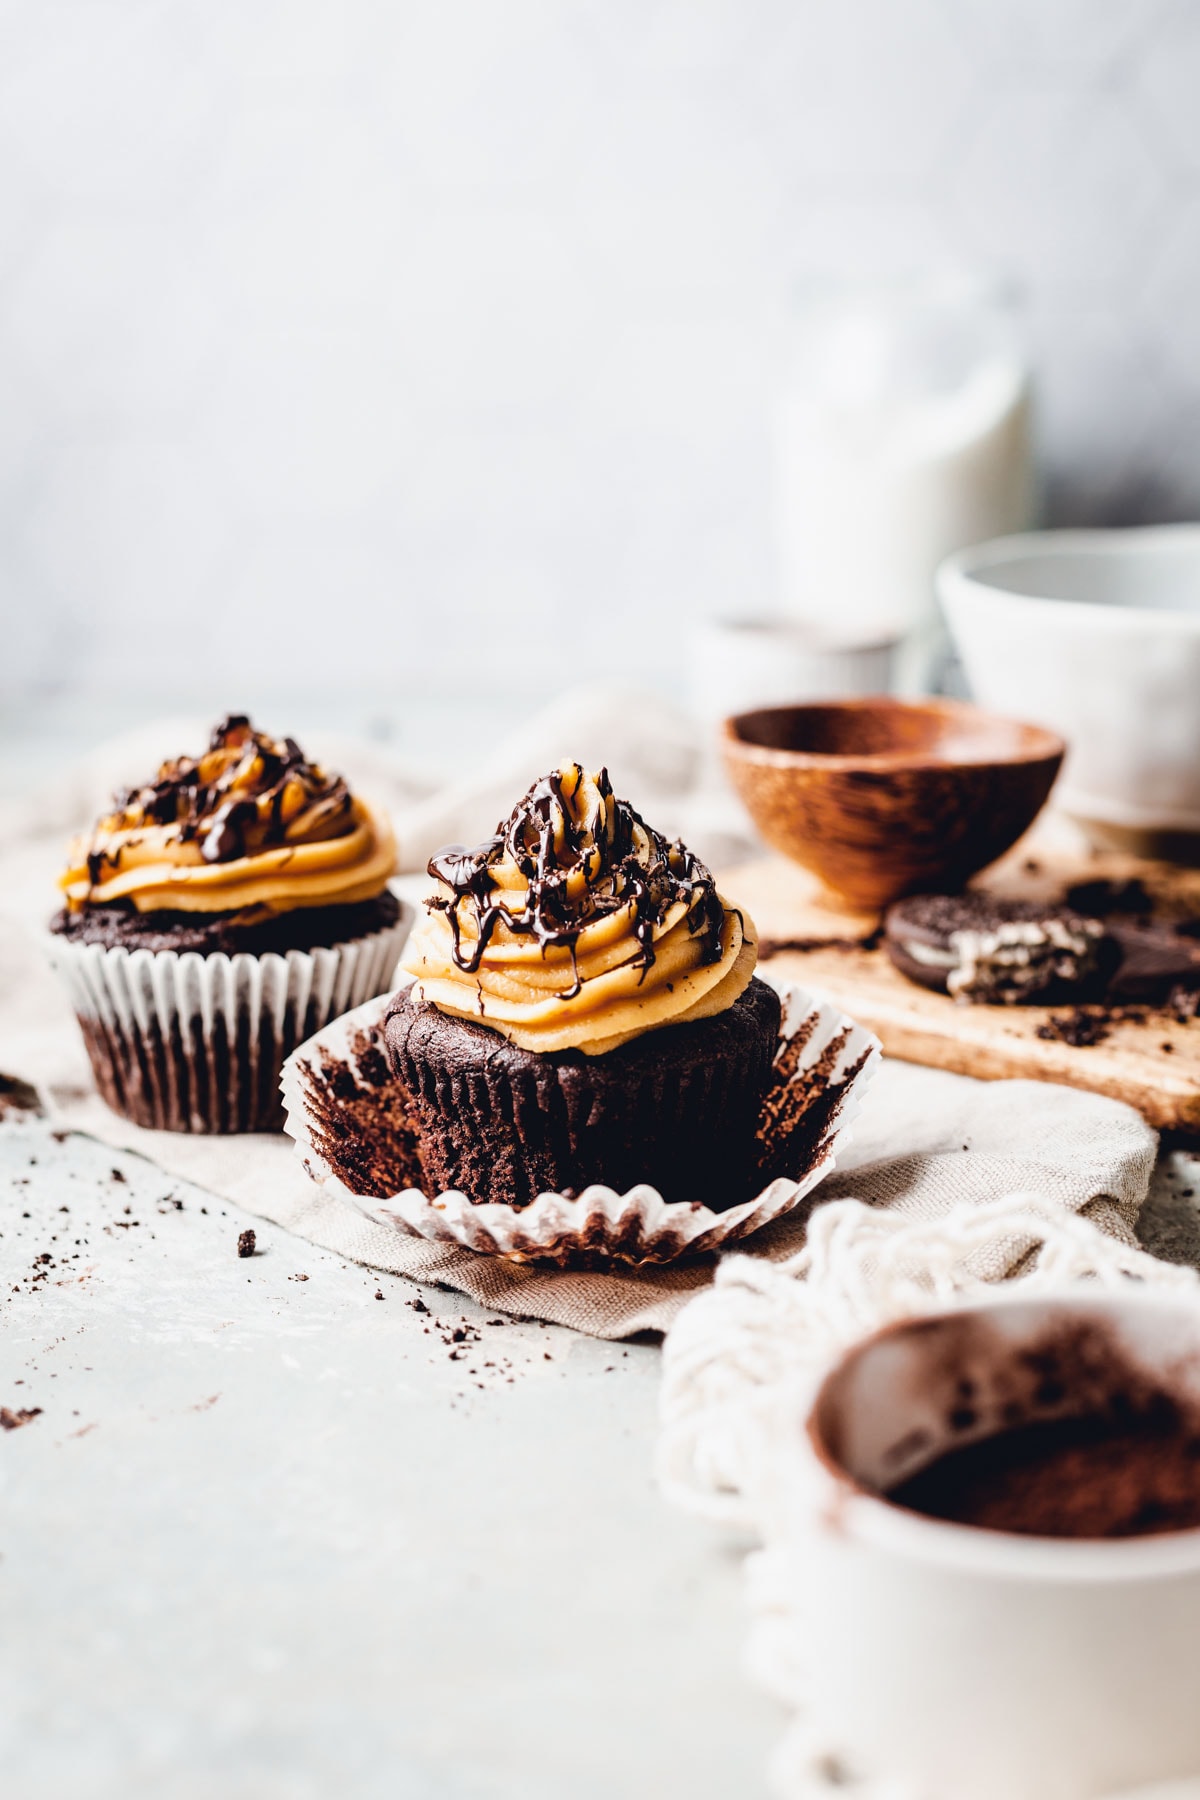
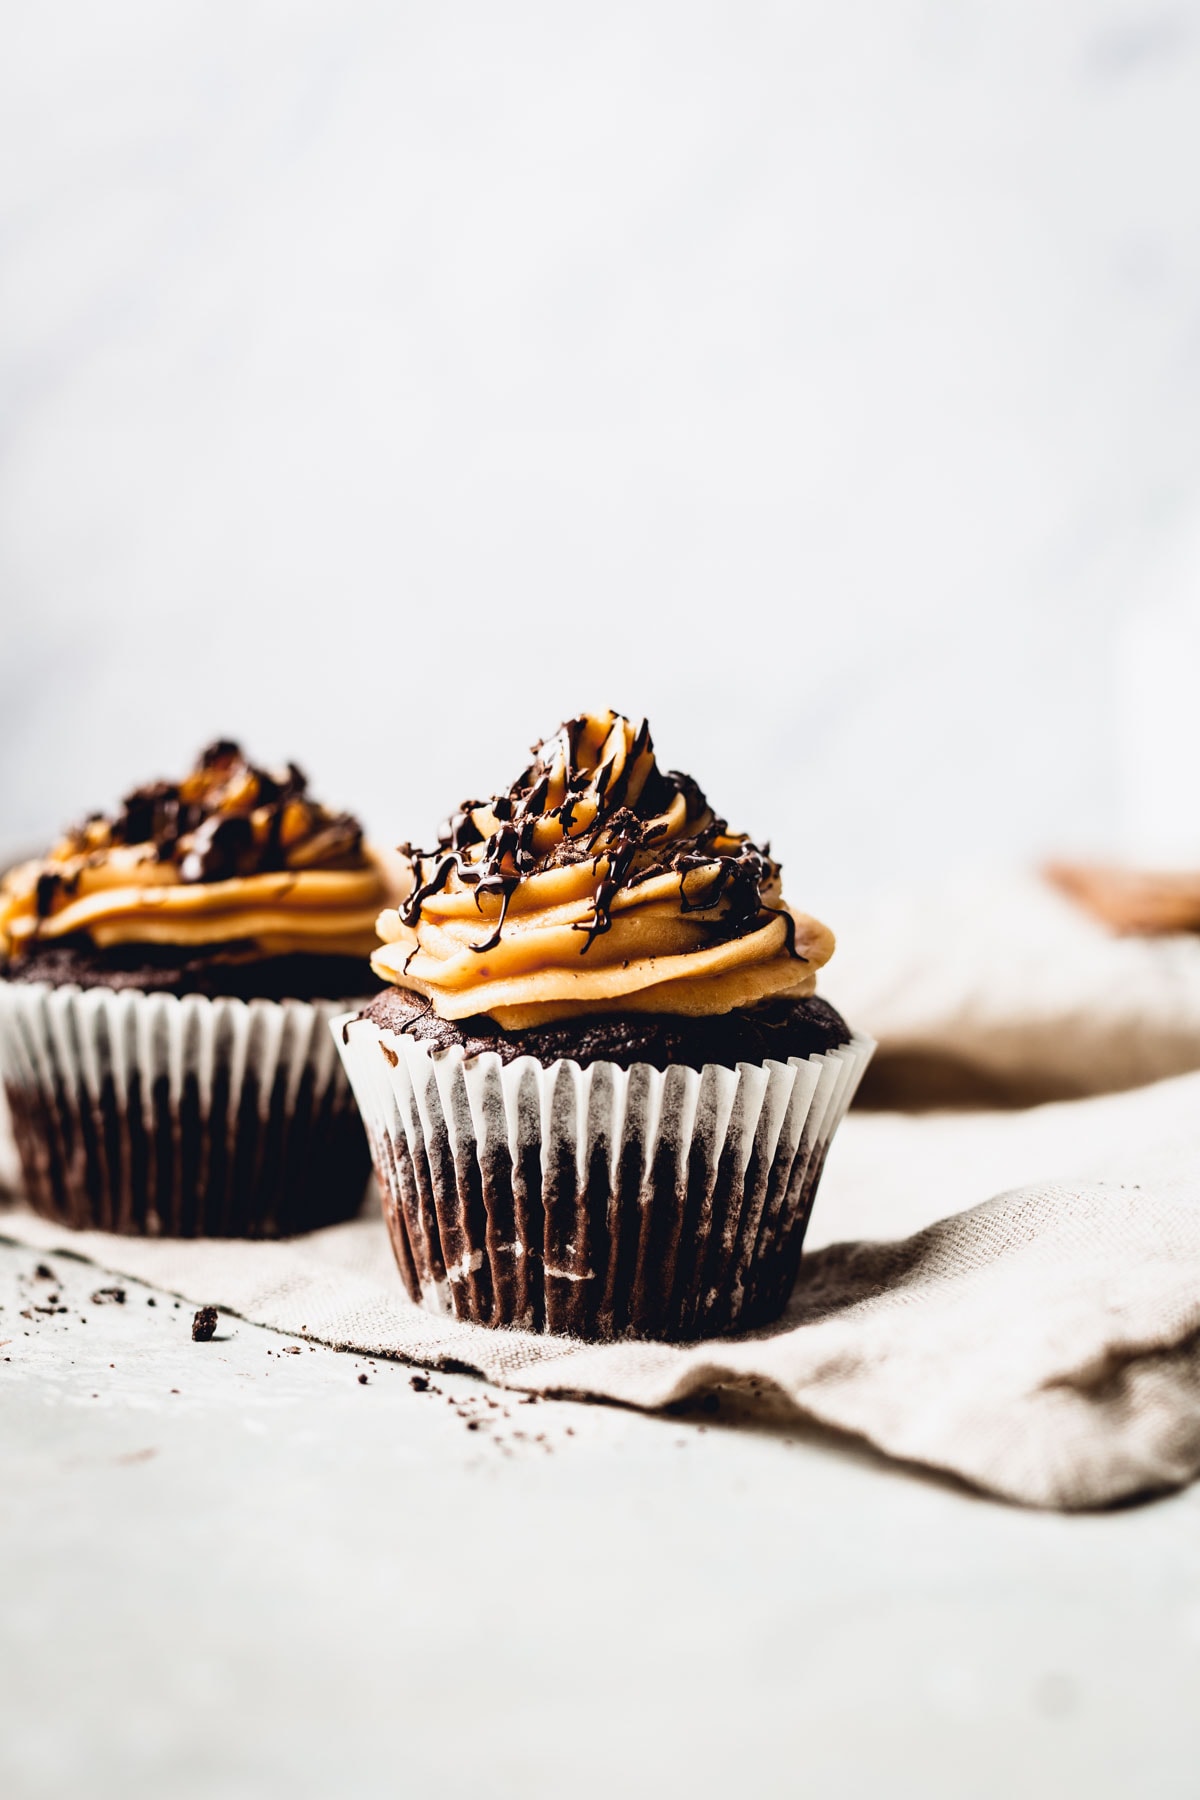
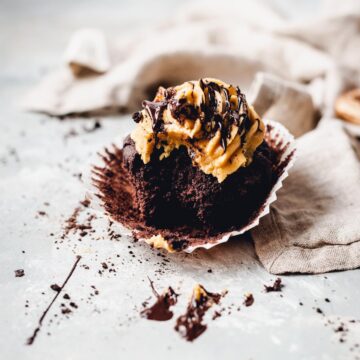
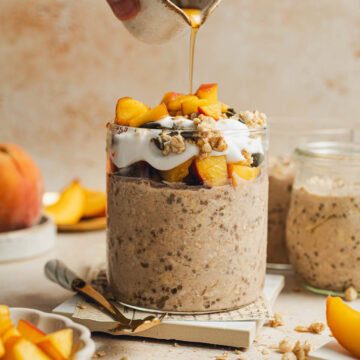
These super easy vegan peanut butter chocolate cupcakes are soft, airy and moist. With double the peanut goodness, they're rich in flavour and look gorgeous.
Why Choose This Recipe
- Completely beginner-friendly
- Includes clear step-by-step photos
- Can be made in large or small batches
- Peanut flavour is in the batter and in the icing
- Easy to customise
- FAQ + Troubleshooting below
The Ingredients
You'll mostly just need cupboard staples to make this recipe - nothing fancy or expensive.
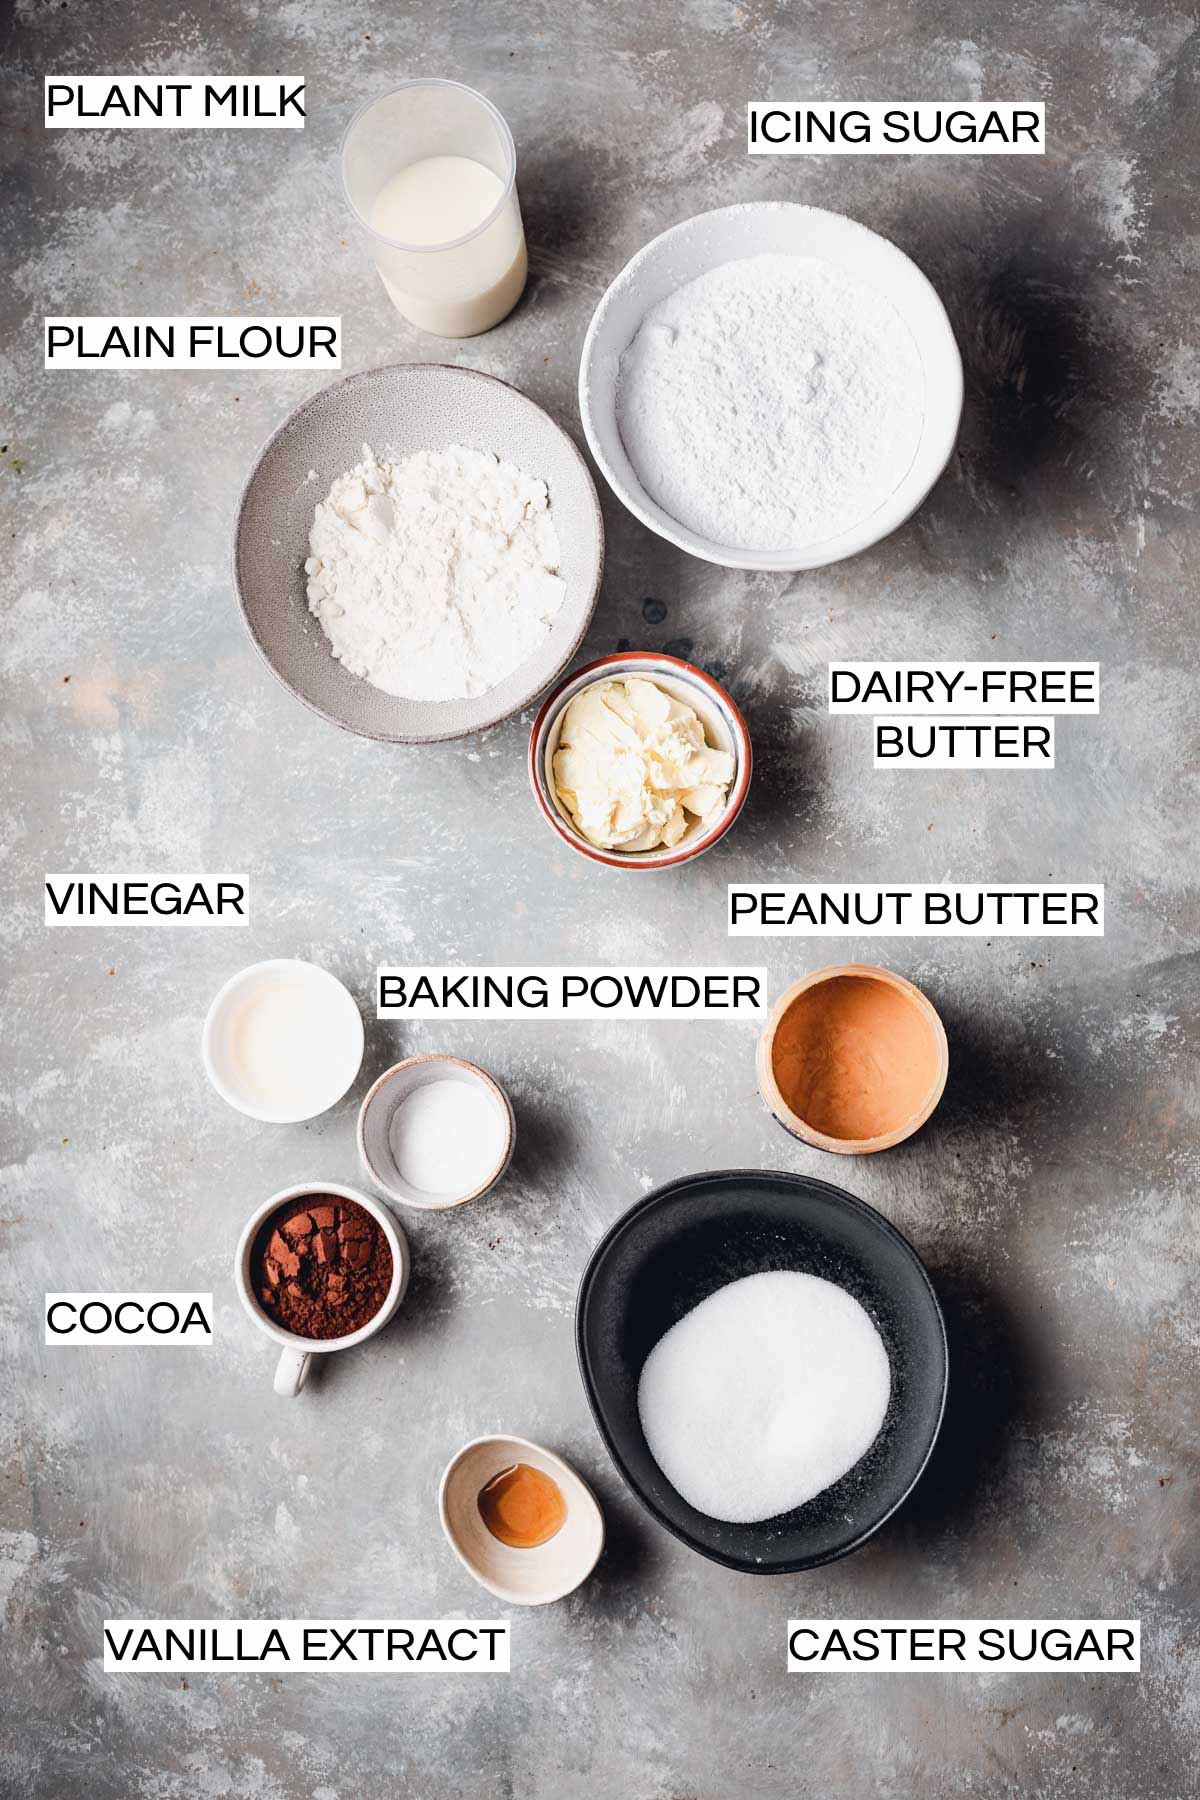
A couple of notes regarding the ingredients:
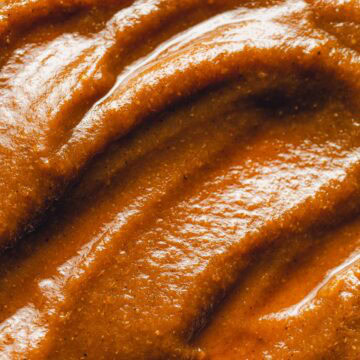
Peanut butter: You'll need to use smooth peanut butter. Crunchy peanut butter is likely to get stuck in your icing nozzle. This will create a real mess and lots of frustration (believe me, I've been there).
Plain flour: It's important that you use plain white flour and not strong white bread flour. Bread flour is not suitable for making cupcakes or any other cakes.
Plant milk: I used unsweetened oat milk. You can use any other unsweetened plant milk of your choice such as almond, soy, etc. Whatever your choice of plant milk, make sure you're using milk that contains no sugar. This means no sugar whatsoever and not just 'no added sugars'. If you're using sweetened plant milk, your cupcake might turn out much sweeter than intended.
Vinegar: I used white wine vinegar. Feel free to substitute with apple cider vinegar.
Step-by-step Photos
Here's a quick and handy visual guide to making this recipe. Find all the exact measurements and detailed description in the recipe card at the bottom of this page.

- Combine plant milk and vinegar to create vegan sour milk. Stir and set aside.
- Mix melted dairy-free butter and sugar using a fork/spoon.
- In a separate bowl, sift all your dry ingredients. Mix well.
- Add the butter mixture and vanilla to your sour milk. Mix, then slowly pour your wet ingredients over your dry ingredients whilst stirring the mixture. Mix until no more flour specks can be seen but do not overmix.
- Add your peanut butter on top of the mixture and stir very gently.
- Pour your cupcake batter into your lined cupcake tin filling them almost all the way to the top (about ⅘ full).
- Bake at 180°C / 356°F (fan oven) for 20 minutes.
- In the meantime, prepare your icing by mixing dairy-free butter, sugar and peanut butter using a fork (or an electric mixer if preferred). Place in the fridge to set for about 10-15 minutes.
- Leave your cupcakes to cool on a cooling rack. Once cool, fill a piping bag with your icing and start icing. Drizzle with sauce if desired.
My Top Cupcake Tips
1. Pour slowly
When adding your wet ingredients to your dry mixture, make sure you're pouring slowly. In the meantime, use a fork or a whisk to evenly mix in all the liquids as you pour. Wondering why that's important?
If you pour your liquids fast and then try to stir you might get big clumps and won't be able to create a perfectly smooth batter without mixing it too much (which is another problem in itself - coming up next).
2. Do not overmix
If you want fluffy and airy cupcakes it's super important that you do not overmix your batter. Wondering why? The more you stir, the more gluten will develop in your mixture. This will make your bakes chewy and bread-like.
Keep the mixing to the absolute minimum - gently stir until combined and stop as soon as you see that everything's come together to form a smooth mixture.
3. Do not overfill
Fill your cupcake about ⅘ full. If you overfill it the batter might spread over the edges of the pan whilst baking. Additionally, they might not bake fully.
My Best Icing Tips
1. Smooth peanut butter
I can't stress the importance of this enough. If you're using crunchy peanut butter, it might get stuck into the icing nozzle. This will be super frustrating and result in you having to make a whole new icing.
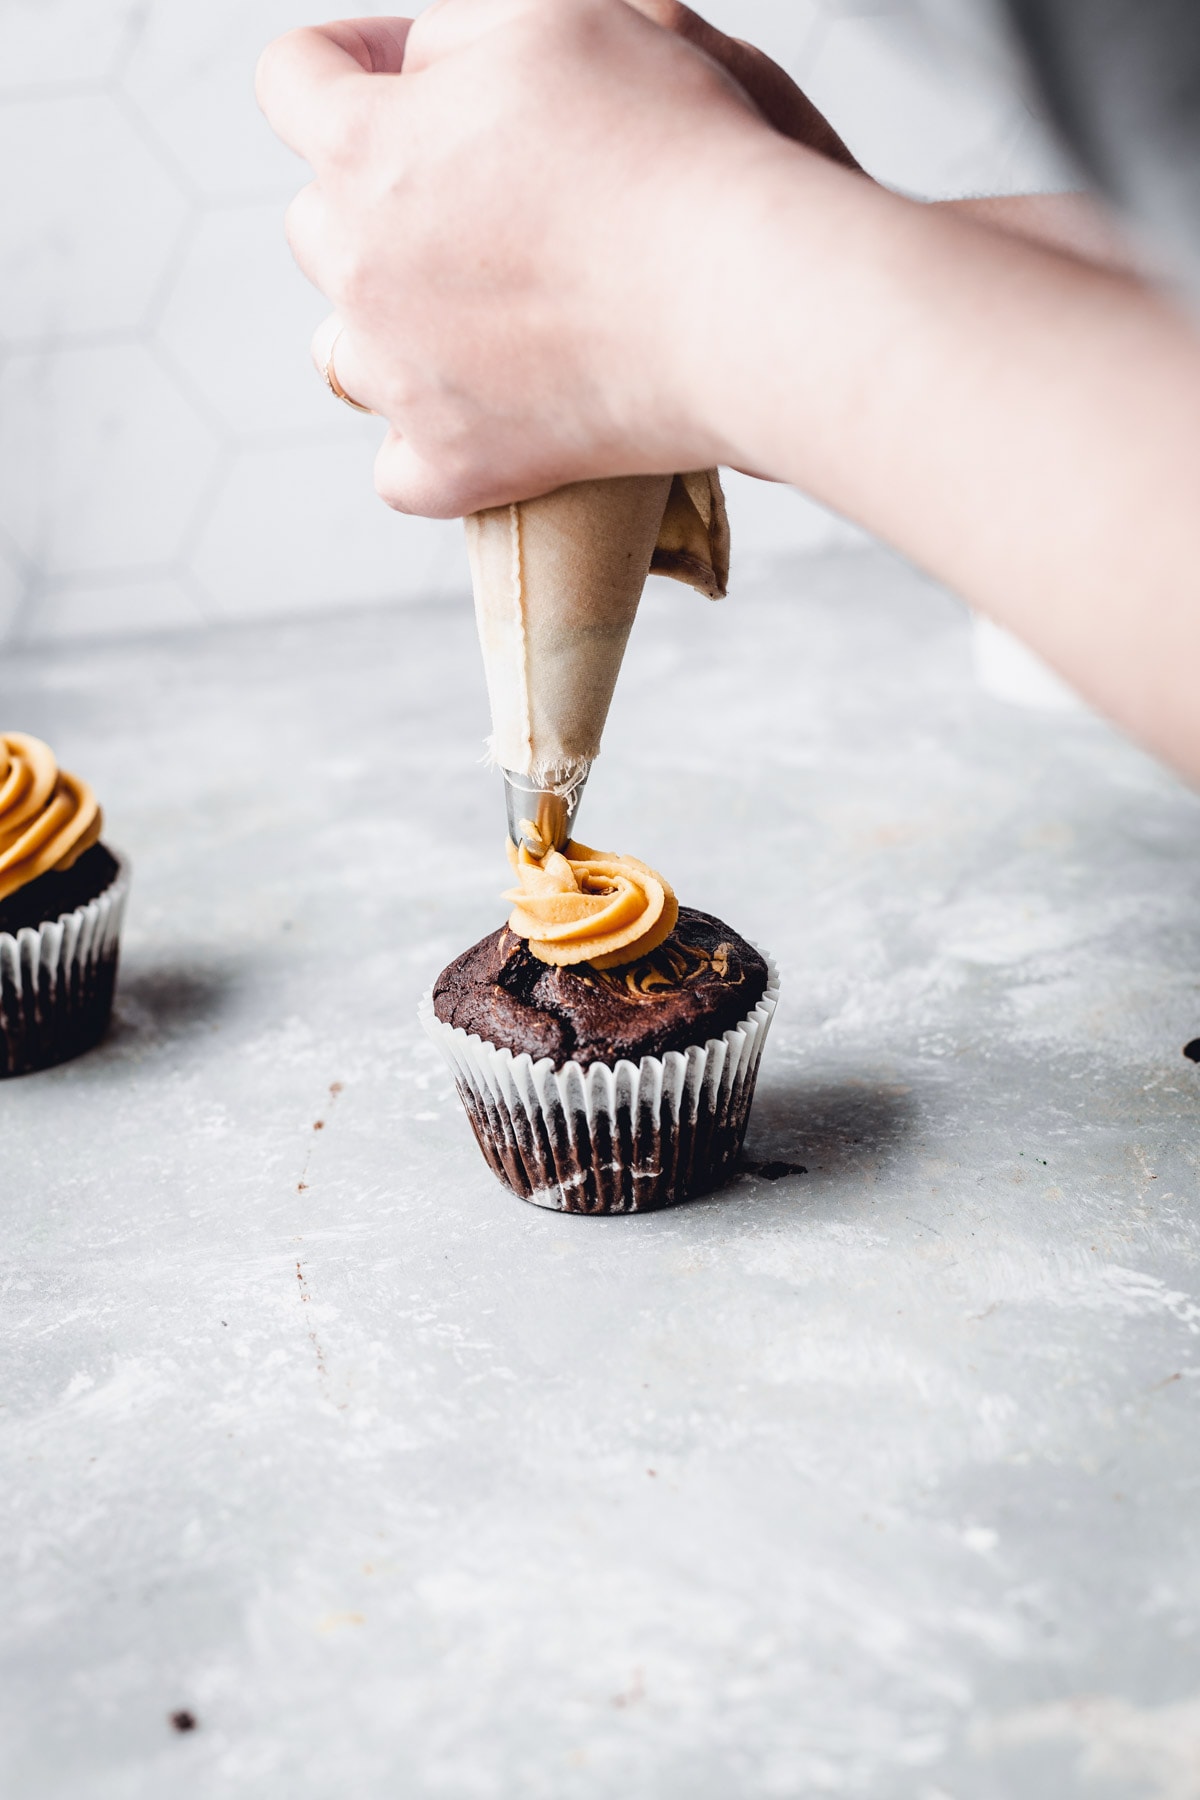
2. Chill it
Once you've made your icing, pop it in an airtight container and chill in the refrigerator. This way you'll get stiff icing that creates the most beautiful swirls.
3. Wait to cool
You should never ice cupcakes when they're still warm. Instead, wait until they've cooled down completely and then ice.
4. Apply pressure
When you're ready to start icing your cupcake, make sure you're applying even pressure to the icing bag. Be firm, not too slow and not too fast when creating your swirl.
If you're worried about it, I recommend practising a couple of small icing swirl on a plate or a cookie. This way you'll be able to get the hang of it and perfect your technique before icing the cupcakes.
5. Dust and drizzle
To make these cupcakes look and taste even better, I recommend topping your icing with some finely chopped dark chocolate or peanuts.
Additionally, finish it off with a dark chocolate drizzle as seen on the photos.
For more piping techniques, check out this video.
FAQ + Troubleshooting
Stuck making your vegan peanut butter chocolate cupcakes? Let me help you!
Uneven cupcakes are usually a result of bigger clumps of baking powder/flour/sugar left in one place. It means that your ingredients aren't distributed evenly. Sadly there's not much you can do to fix it once the cupcakes are already made.
However, you can prevent this from happening again in the future.
First, make sure you sift all your dry ingredients to get rid of any big clumps.
Second, take enough time to mix all your dry ingredients very well.
I've mentioned above that your final batter shouldn't be overmixed. However, you can and should mix your dry ingredients very well to ensure even distribution.
Dry cupcakes are a sign of overbaking. Make sure you stick to the 20-minute baking time.
If you've already overbaked the cupcakes, there are still a couple of tricks that could help ease the dryness.
First, add the icing and drizzle with extra sauce such as chocolate sauce, caramel, syrup, etc.
Second, it might help to pop these in the microwave for about 20-30 seconds. This will help release some moisture and make your cupcakes feel softer and moister.
First, let them cool completely, then pop them into an airtight container and store at room temperature for about 2-3 days.
As is always the case with baked goods, the cupcakes will gradually lose their quality as time goes by. This is why I recommend eating them on the first or second day.
If your icing is too wet, you can add more icing sugar (1 teaspoon at a time).
If your icing is too dry, you can add more butter (1 teaspoon at a time).
Did you enjoy my vegan peanut butter chocolate cupcakes recipe? I've got more vegan desserts in store for you. Check out my double chocolate cupcakes, peanut butter brownie, lemon curd rolls and oat milk pancakes.
If you have any more questions or you're feeling stuck, feel free to ask any questions in the comments section below. As always, if you liked this recipe I would really appreciate it if you could leave a review .
Thank you!

🍴Recipe
Vegan Peanut Butter Chocolate Cupcakes
EQUIPMENT
- Cupcake tin
- Icing bag and nozzle
- Sieve
INGREDIENTS
FOR THE CUPCAKE
- 150 ml (5.07 floz) plant milk I used unsweetened oat milk. 150ml equals ⅔ cup
- 2 teaspoon white wine vinegar or other vinegar
- 75 g (2.65 oz) dairy-free butter 75g equals ¼ cup and 1 tbsp
- 45 g (1.59 oz) caster sugar 45g equals just under ¼ cup
- 1 teaspoon vanilla extract
- 3 tablespoon cocoa powder
- 85 g (3 oz) plain white flour 85g equals ½ cup plus 1 tbsp
- 2 teaspoon baking powder
- 1 tablespoon peanut butter for in your main butter
- 6 teaspoon peanut butter 1 teaspoon to go in each separate cupcake
FOR THE ICING
- 120 g (4.23 oz) dairy-free butter 120g equals ½ cup
- 200 g (7.05 oz) icing sugar 200 g equals 2 cups
- 8 tablespoon peanut butter smooth
INSTRUCTIONS
FOR THE CUPCAKES
- Combine plant milk and vinegar to create vegan sour milk. Stir and set aside.
- Mix melted dairy-free butter and sugar until smooth using a fork/spoon.
- Add the butter mixture and vanilla to your sour milk. Mix well.
- Sift all your remaining dry ingredients (cocoa, flour, baking powder).
- Mix, then slowly pour your wet ingredients over your dry ingredients whilst stirring the mixture.
- Mix until no more flour specks can be seen but do not overmix.
- Add your peanut butter on top of the mixture and stir very briefly.
- Pour your cupcake batter into your lined cupcake tin filling them almost all the way to the top (about ⅘ full).
- Add a teaspoon of peanut butter to each cupcake. Create a swirl using a skewer, chopstick or a thin knife.
- Bake at 180°C / 356°F (fan oven) for 20 minutes,
- In the meantime, prepare your icing (instructions below).
- Once baked, leave your cupcakes to cool on a cooling rack.
- Once cool, fill a piping bag with your icing and start icing. Drizzle with sauce if desired.
FOR THE ICING
- Mix dairy-free butter, sugar and peanut butter using a fork (or an electric mixer if preferred - but not necessary).
- Place in the fridge to set for about 10-15 minutes.
Notes
- Important: Whilst I do provide cups measurements above, I do recommend using weights measurements. Both European and American measurements are found in the recipe card above (click on US Customary to switch from European to US measurements).
- This recipe has been tested using weights measurements and due to the fact that cups are considerably less accurate and vary in size, I cannot guarantee the recipe will turn out as intended if using cups measurements.
- Use the step-by-step photos above as your visual guide.
- Make sure to pour your wet ingredients slowly over your dry ingredients to prevent clumps.
- For soft and airy cupcakes, do not overmix your batter.
- Never attempt to ice cupcakes when they're still warm.
- If your icing is too dry, add more butter (1 teaspoon at a time).
- If your icing is too wet, add more icing sugar (1 teaspoon at a time).
Nutrition
Disclaimer: The nutritional information above is calculated automatically. The author of this post cannot guarantee 100% accuracy of this data.


Evia says
Thanks, they turned out great! Because I don't have an oven, I made them in the airfryer, in individual silicone cups, 160 for 18 minutes.
I would like to note the amount of frosting is slightly too much for 6 cupcakes even when piled on generously. Not that it's a problem to eat leftover frosting as is because it was delicious. I did end up using just 160 grams of powdered sugar because that's all I had and it made for the perfect frosting, sweet but not too sweet.
Tajda Ferko says
Hiya Evia, thank you so much for your lovely comment and review, really happy to hear you enjoyed these! And how cool you made them in an airfryer, wow! In terms of the frosting - noted! I'll be retesting this recipe soon and adjust accordingly. Thank you for letting me know! xx
Evia says
I loved this so much I've made it several times since. On a couple of these times, I ran into a bit of a problem when the vegan milk was straight from the fridge, so when I added the melted vegan butter+sugar, it all coagulated into unsightly yellow clumps. If this happens to anyone else, don't despair, just heat the milk mixture up a bit until the yellow butter clumps melt. It will still work! Thanks again for a great recipe Tajda.
Zoe says
These are soooo soo yummy, highly recommend. If you cant be bothered with making frosting I bought vegan butter cream frosting and then combined it lightly heated up peanut butter (helps mix it together). Thanks for the recipe! 🙂
Becky says
Can I clarify is it baking powder or soda?
Tajda Ferko says
Hi lovely, it's baking powder! 🙂