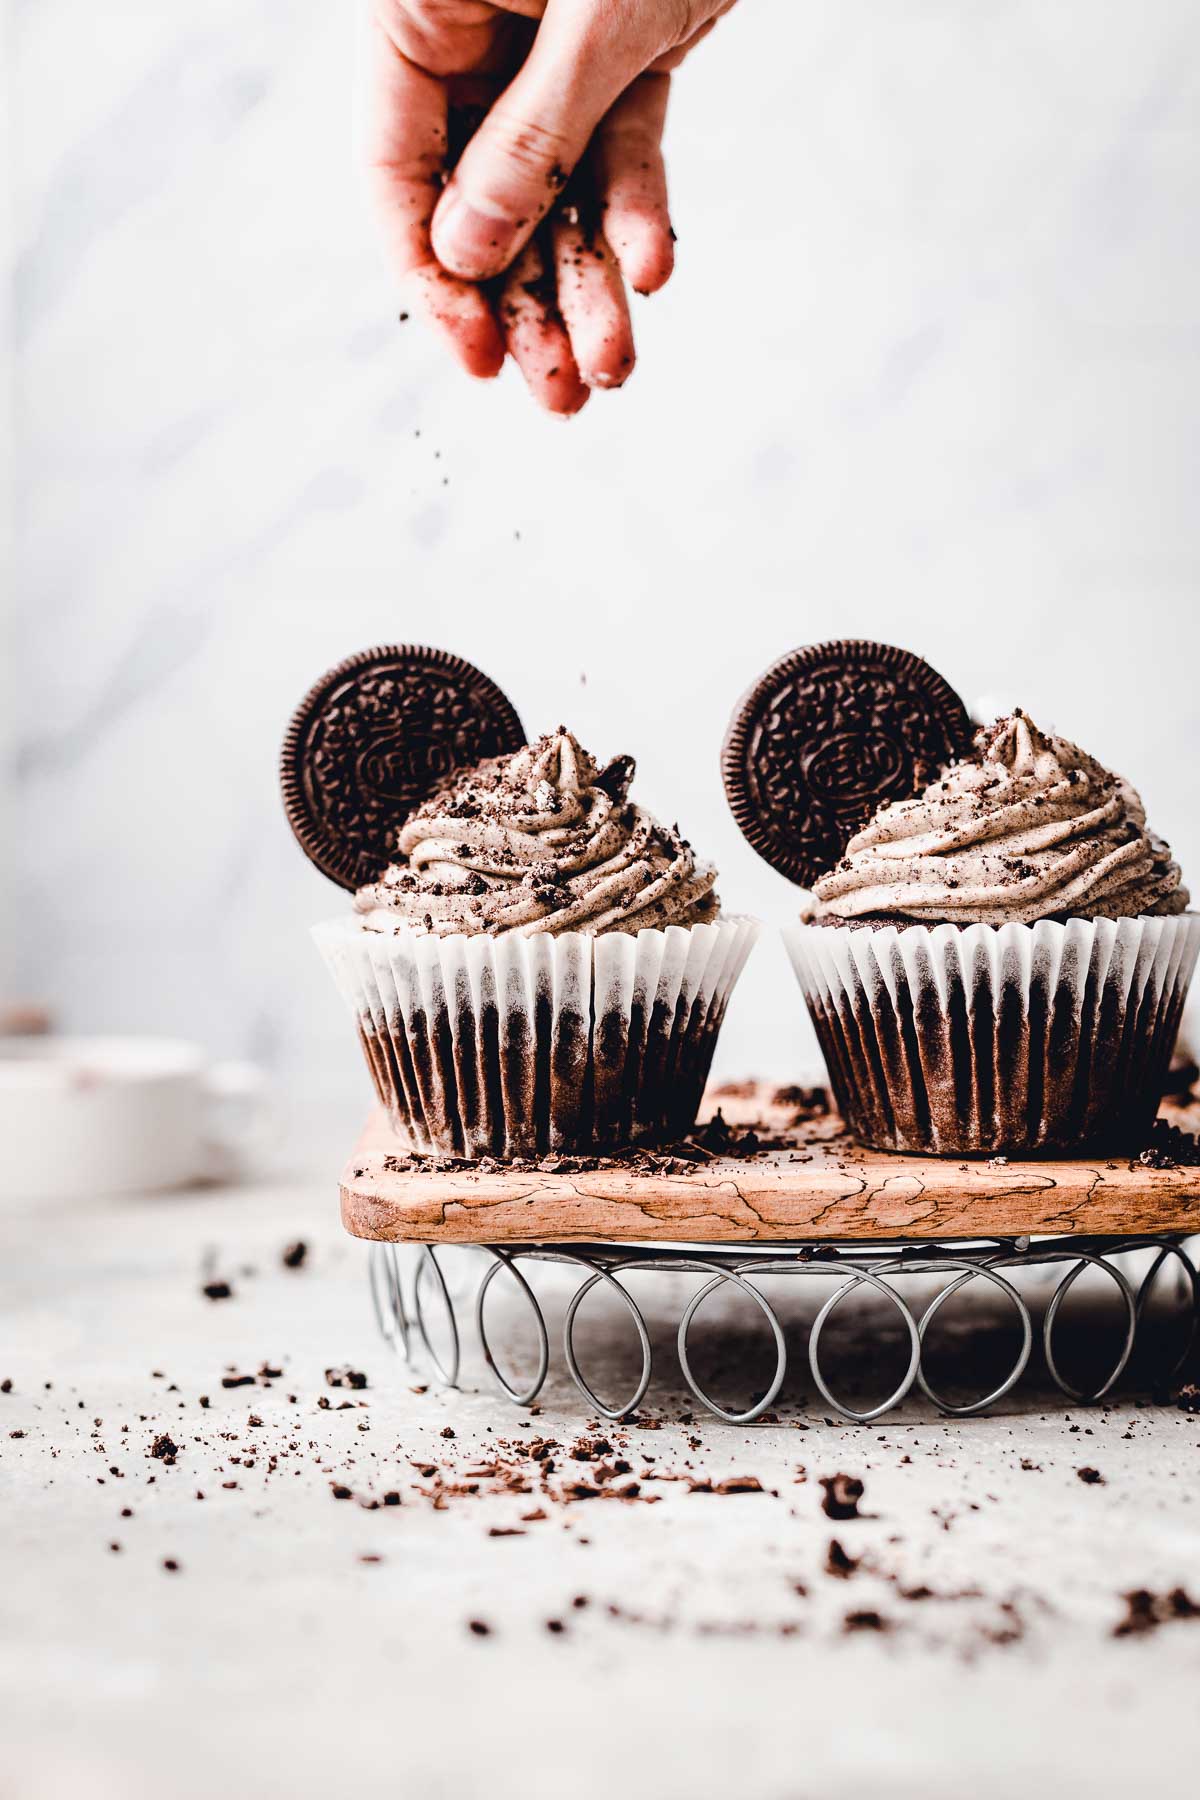
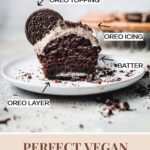
Easy, no-fuss, vegan Oreo cupcakes that bake within 30 minutes! Triple Oreo goodness and beginner-friendly recipe.
Jump to:
Why Choose These Cupcakes
- TRIPLE Oreo goodness
- Beginner friendly
- Super easy & no-fuss
- Easy to customize
- Bakes in less than 30 minutes
- FAQ + troubleshooting tips below
The Ingredients
Below are the ingredients you will need to make vegan Oreo cupcakes.
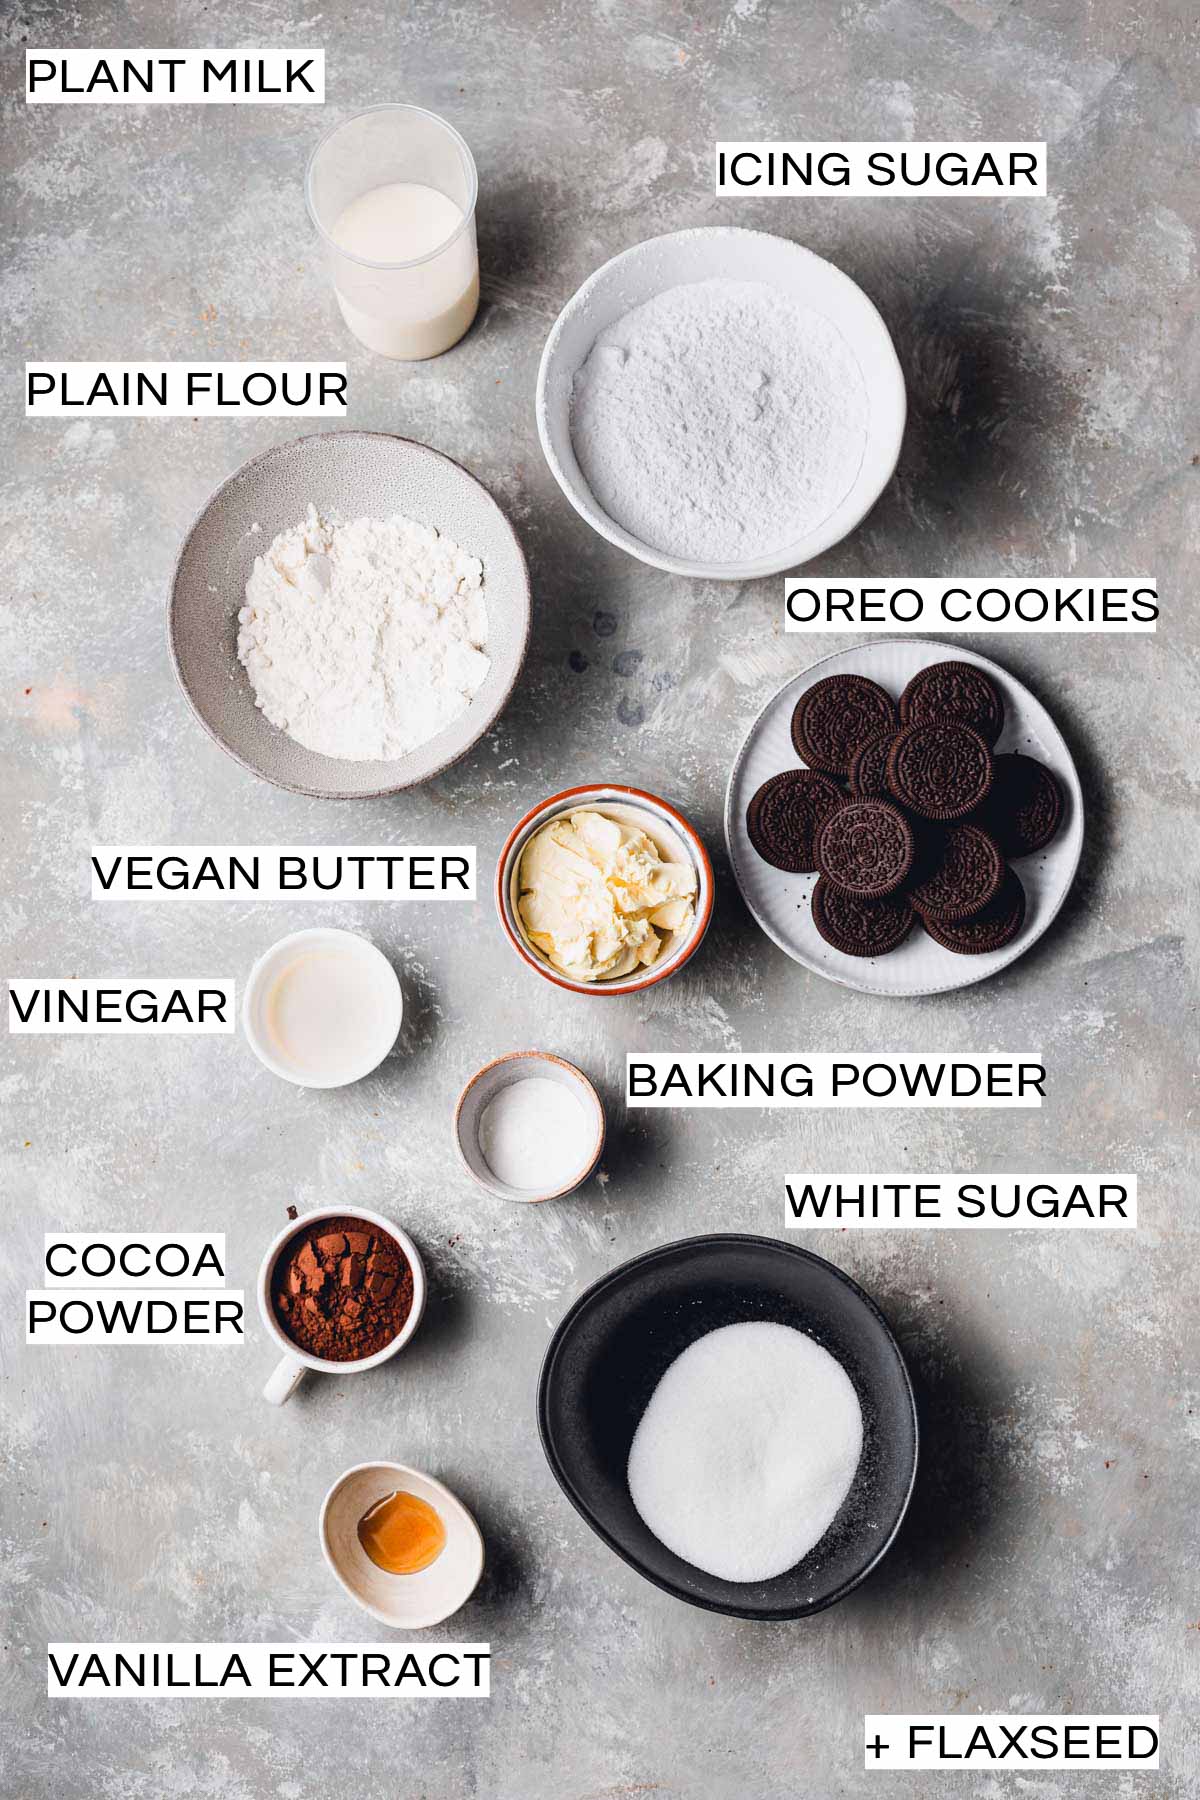
A few notes about the ingredients:
Oreos*: Choose the Classic oreo flavor.
All-purpose (plain) flour: plain white flour works best. Make sure not to get it confused with strong white bread flour which isn't suitable for making cakes or cupcakes.
Vinegar: you only need a small amount so any vinegar will do. I recommend white wine or apple cider vinegar.
Plant milk: choose any unsweetened plant milk such as soy, almond, oat, etc. I would avoid coconut milk due to its strong taste.
Ground flaxseed: sometimes referred to as linseed. This will serve as our vegan egg replacement. You can buy whole flaxseed and blend them yourself for 30-60 seconds.
Vegan butter: I used a spreadable vegan butter by Violife.
*Oreos don't contain any animal-derived ingredients in the UK. However, they are produced in a production facility that also handles dairy products (just like many others so-called 'accidentally' vegan products).
Step-by-step
Below is a quick visual guide to this recipe. You will see all the main steps and a short text overview.
Mind that the full recipe with ingredients and detailed instructions is waiting for you at the bottom of this page.
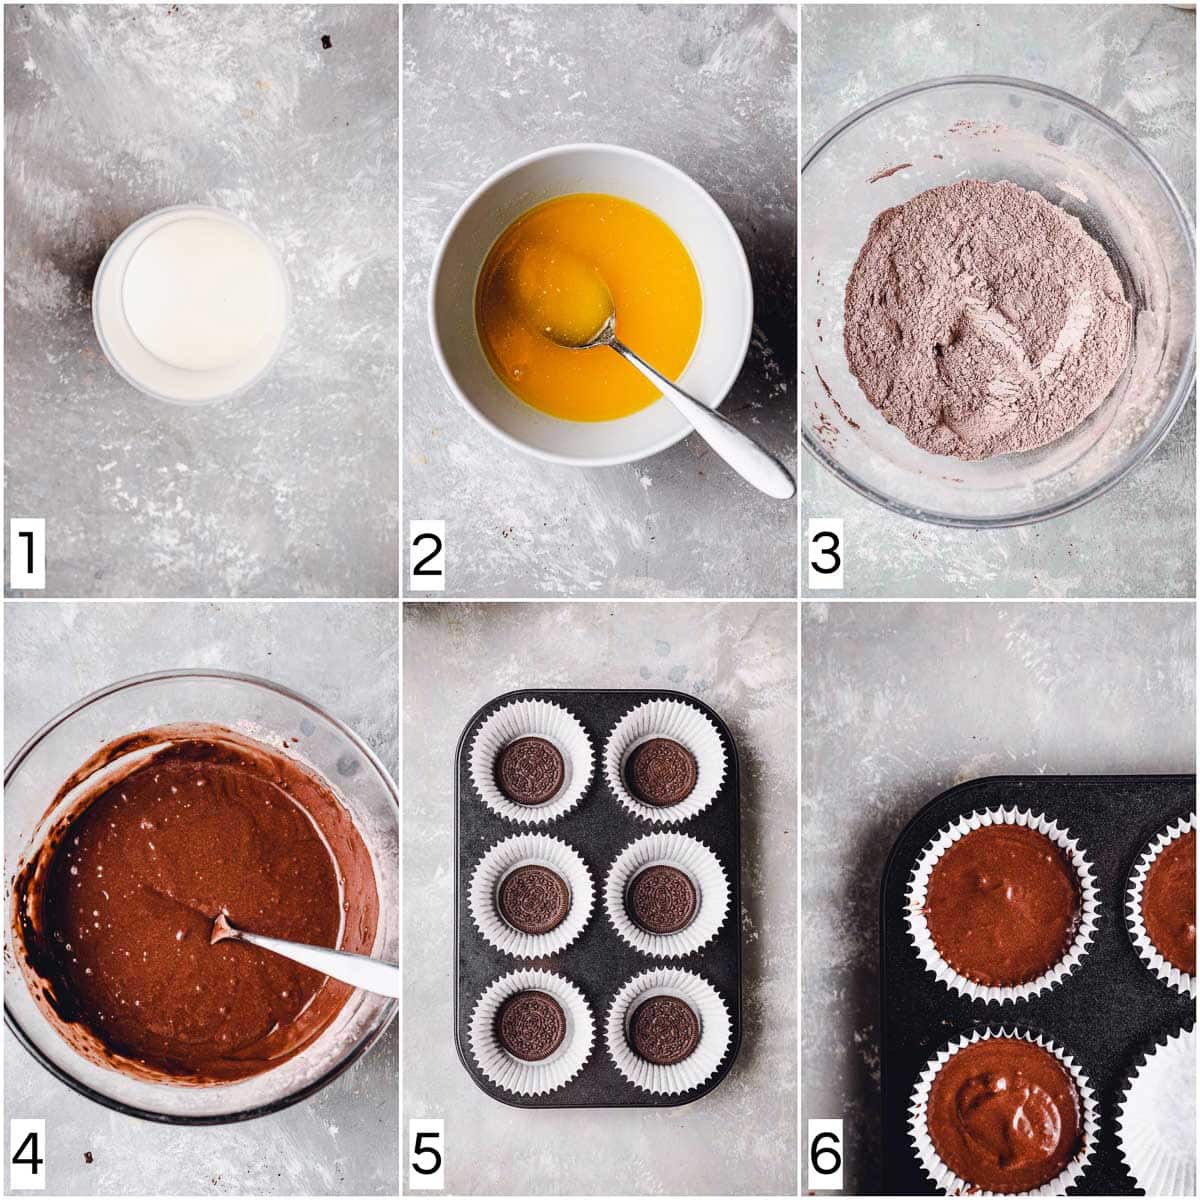
- Combine flaxseed and hot water to make your flax 'egg'. Stir and set aside. In a separate glass, make vegan sour milk by combining plant milk and vinegar. Stir and set aside.
- Mix melted dairy-free butter and sugar using a fork.
- In a separate bowl sift all your dry ingredients. Mix very well.
- Add the butter mixture and vanilla extract to your sour milk. Add flax egg. Mix, then pour your wet mixture over your dry mixture. Mix until no more flour specks can be seen, careful not to overmix.
- Place one Oreo cookie at the bottom of each lined cupcake mold.
- Pour your cupcake batter over each Oreo until the liners are about ¾ full. Bake at 180°C / 356°F (fan oven) for 20-25 minutes.
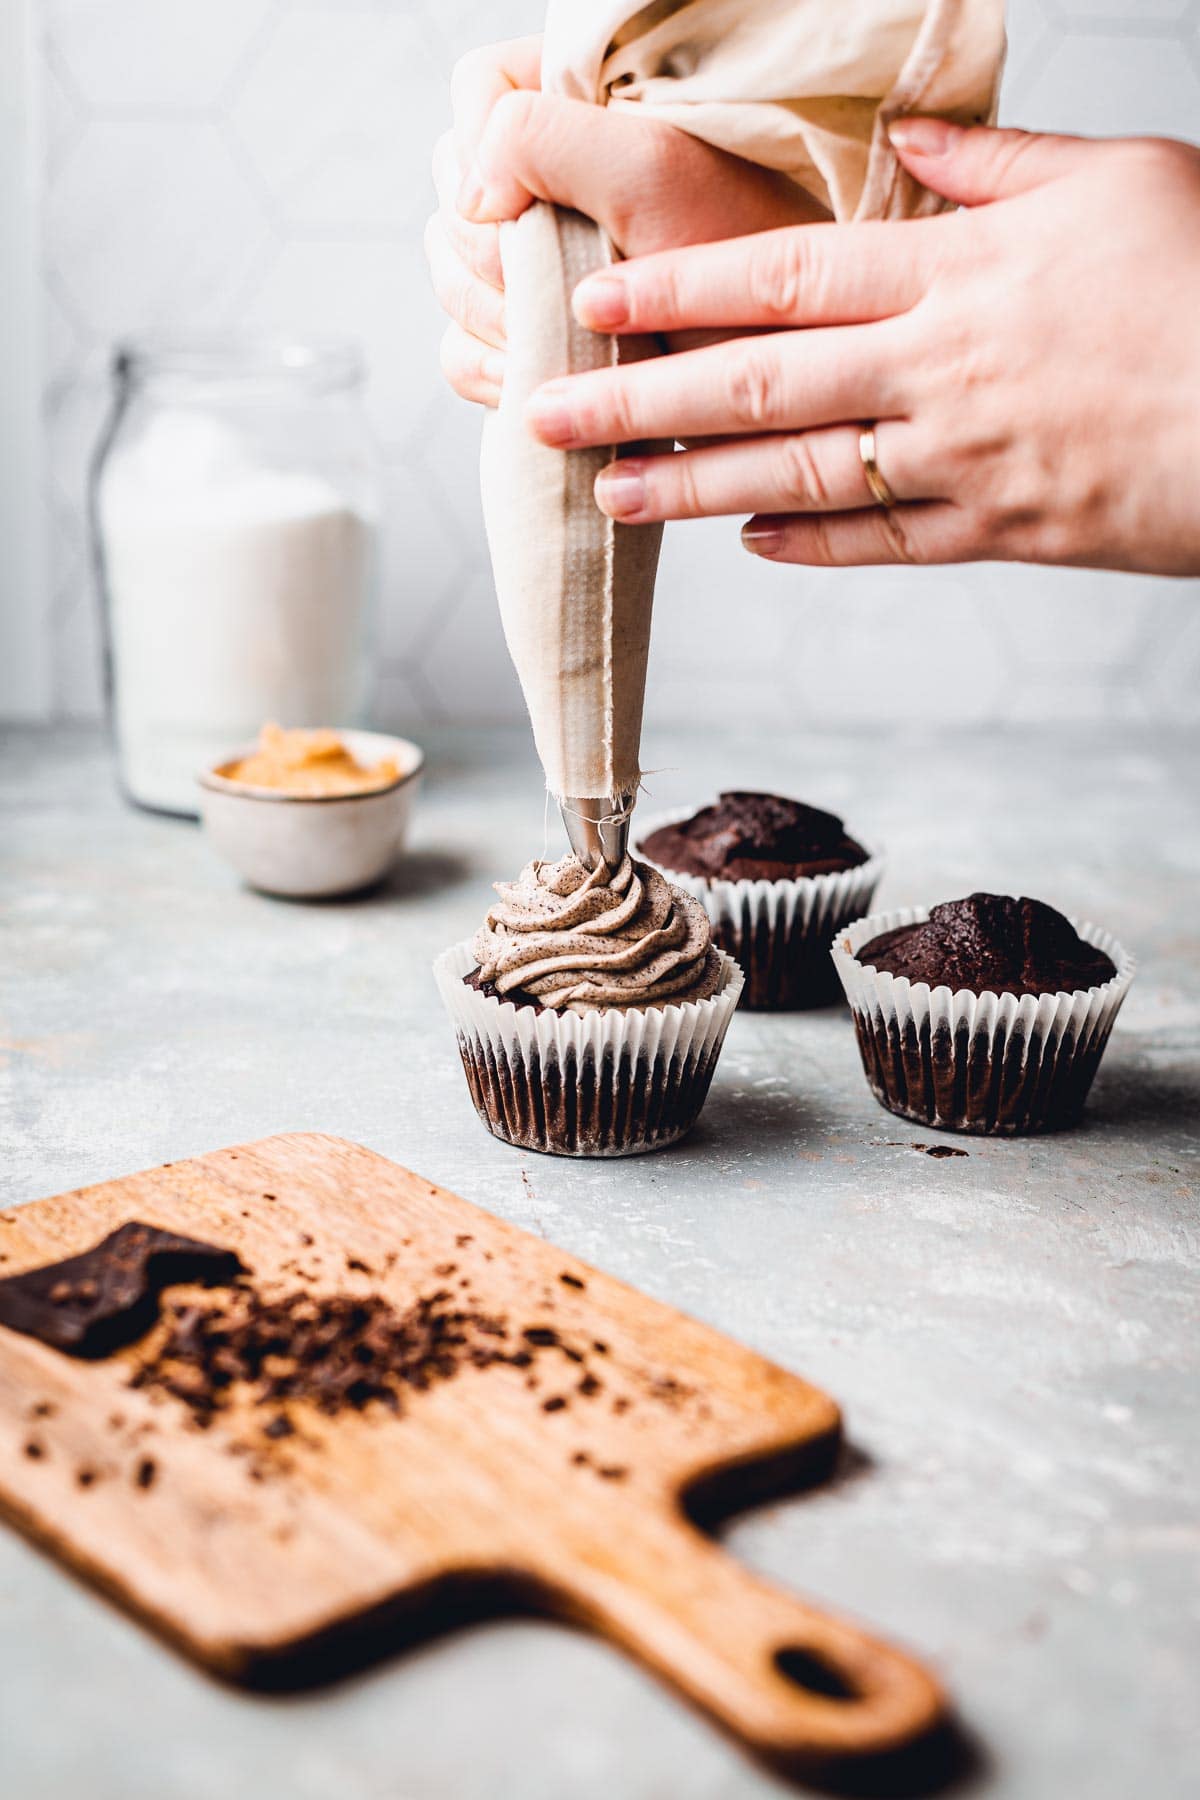
In the meantime, prepare your Oreo icing by mixing dairy-free butter, sugar, and finely blended Oreo cookies using a fork (or an electric mixer if preferred).
Place in the fridge to set for about 10-15 minutes.
Once baked, leave the cupcakes to cool.
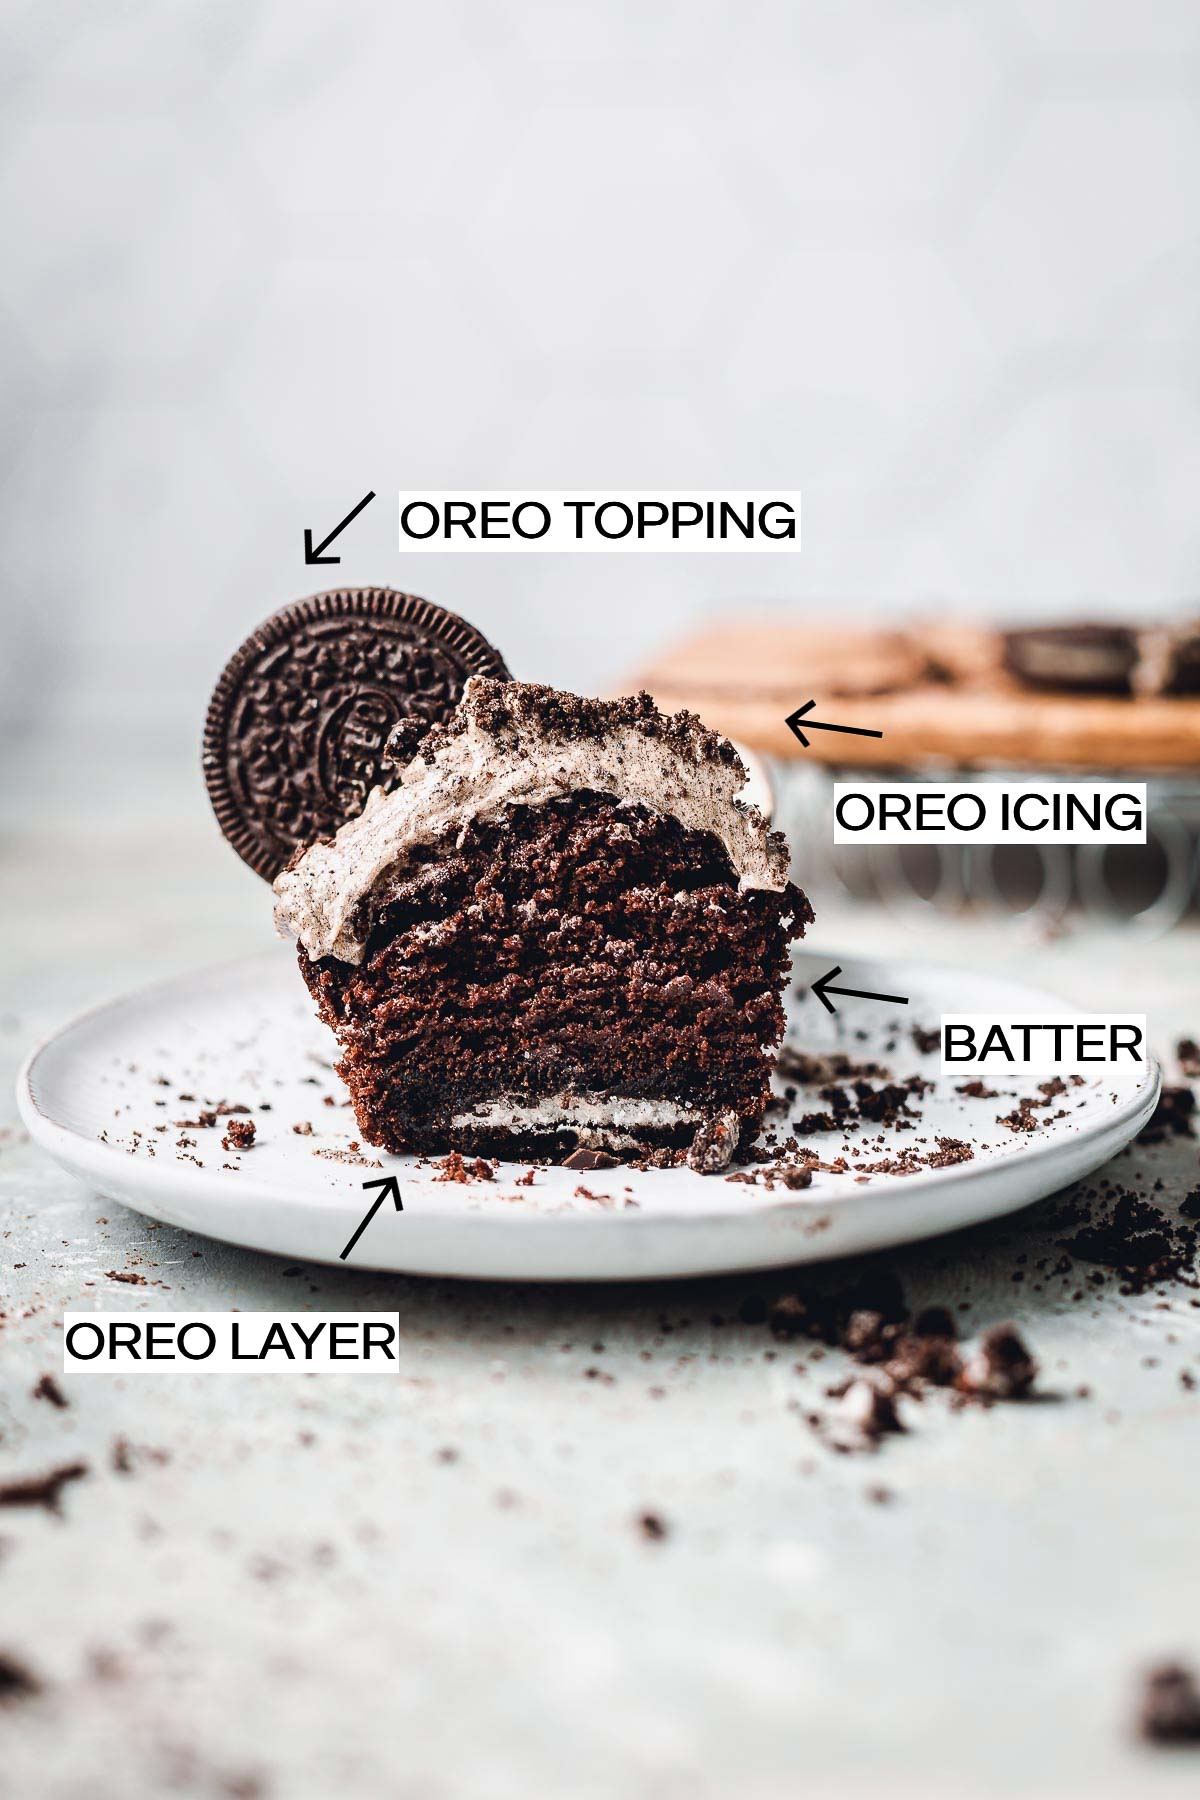
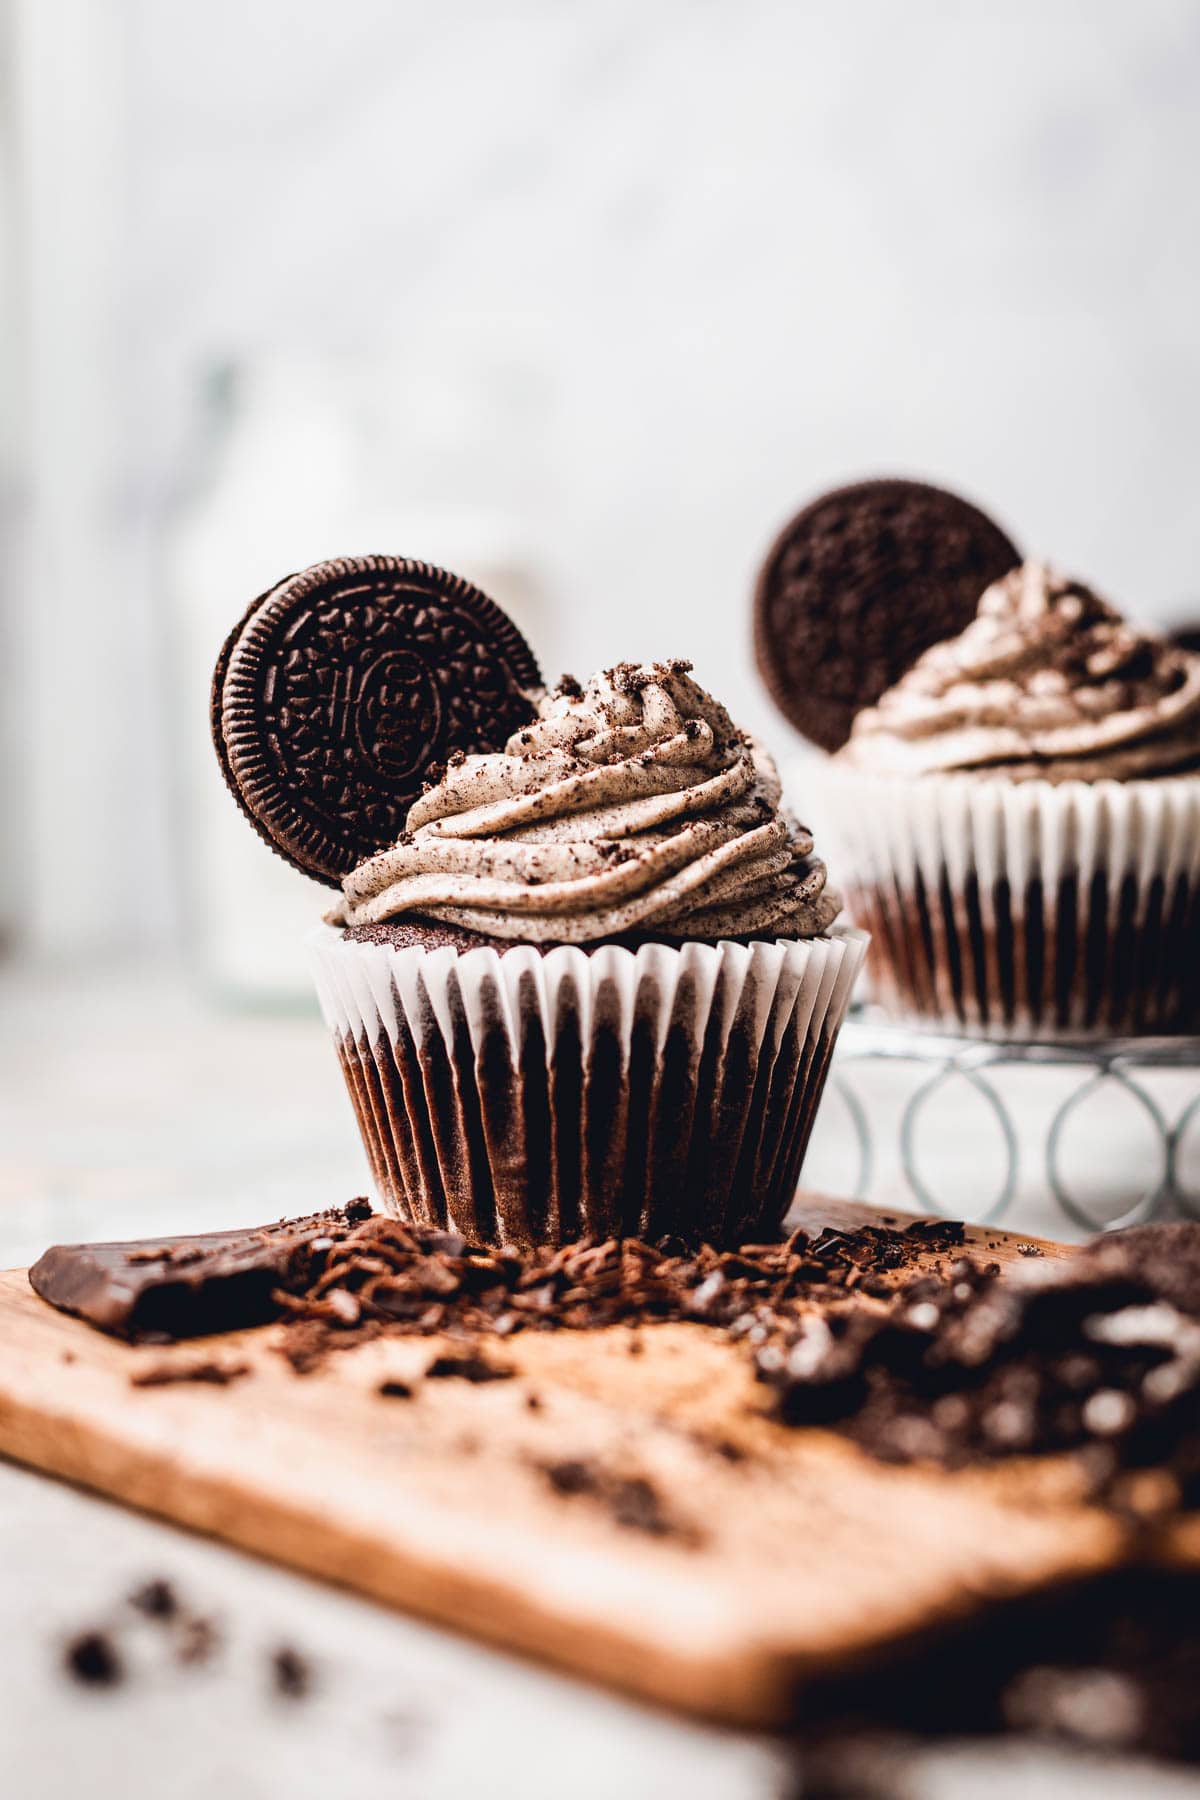
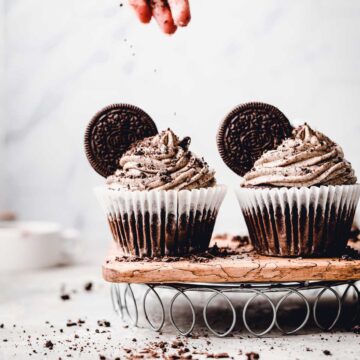
Then fill a piping bag with your icing and start icing. Decorate with an extra Oreo on top. Sprinkle with chopped-up Oreos or chocolate shavings if desired.
Expert Tips
1. Do not overmix
The more you mix and stir your batter, the more gluten will develop in your mixture.
In turn, your cupcakes will become chewy and more like bread rather than cake.
This is why it's important to mix your batter until all the ingredients are just combined and no further.
2. Do not overfill
If you fill your cupcakes all the way to the top of the mold, they will rise over the edges. Make sure to leave enough space for them to rise.
They should be about ¾ full at most.
3. Check if baked
Always check if your cupcakes are thoroughly baked.
You can do that by inserting a wooden or metal skewer and seeing if it comes out clean. If it's clean, your cupcakes are baked. If not, place them back in the oven for a few more minutes and test them again.
Remember, your oven is often NOT at the exact temperature you think it is.
This is why I recommend investing in an oven thermometer - they are cheap and a great investment if you bake more frequently.
My Top Icing Tips
1. Blend Oreos until smooth
This is a crucial step in making your icing. If you don't blend the Oreo cookies until completely smooth, they will get stuck in your icing nozzle.
2. Chill your icing
Make sure you chill your icing in the fridge before adding it to cupcakes. 10-15 minutes in the fridge should be plenty!
3. Wait to cool
Always wait for the cupcakes to cool down fully before icing them.
4. Practice first
If you're new to icing I can recommend a fun way to practice your skills.
Simply try your first icing swirls on a plate or on top of a cookie instead of straight on top of the cupcake. This way you can get some practice in without ruining your cupcakes.
If you're looking to experiment with piping techniques, I recommend this lovely cupcake decorating article.
FAQ + Troubleshooting
The main reason behind dry cupcakes is overbaking.
The best way to fix that is to add some extra heat - warm them up in a microwave for about 5-10 seconds. This should help soften them up and make them feel less dry.
However, remember that there is no quick fix for dry cupcakes once they're already overbaked.
My advice is to keep this in mind for when you're making your second batch!
These are best served at room temperature.
If you're making these ahead (such as for a birthday party) you can store them in an airtight container, preferably in the fridge.
Make sure you don't sprinkle the extra Oreos on top until you're ready to serve.
They will keep in the fridge for about 3-4 days.
Remember that they might lose their shape a little, but the flavor will be just as delicious as when you first baked them.
For more vegan cupcake recipes check out my:
If you liked my vegan oreo cupcakes recipe, let me know in the comments below or support me by leaving a review.
Every comment and review means a lot!
🍴Recipe
Vegan Oreo Cupcakes
EQUIPMENT
- Cupcake tin
- Icing bag and nozzle
- Sieve
- Blender or food processor
INGREDIENTS
FOR THE CUPCAKE
- ½ tablespoon flaxseed ground
- 150 ml (⅔ cup) plant milk I used unsweetened oat milk
- 2 teaspoon white wine vinegar or other vinegar
- 75 g (⅓ cup) dairy-free butter melted
- 45 g (¼ cup) caster sugar also called baker's or superfine sugar
- 1 teaspoon vanilla extract
- 3 tablespoon cocoa powder
- 85 g (⅔ cup) plain white flour also called all-purpose flour
- 2 teaspoon baking powder
- 6 Oreos
FOR THE ICING
- 120 g (½ cup) dairy-free butter
- 200 g (2 cups) icing sugar
- 8 Oreos finely blended
INSTRUCTIONS
CUPCAKES
- Combine ground flaxseed with 1,5 tablespoon boiling hot water (as written in the original recipe / adjust accordingly if you changed the portion size). Stir and set aside.
- In a separate cup, combine plant milk and vinegar to create vegan sour milk. Stir and set aside.
- Use a fork to mix melted dairy-free butter and sugar until smooth.
- Add the butter mixture, flax mixture and vanilla to your sour milk. Mix well.
- Sift all your remaining dry ingredients (cocoa, flour, baking powder).
- Mix, then slowly pour your wet ingredients over your dry ingredients whilst stirring the mixture.
- Mix until no more flour specks can be seen but do not overmix.
- Line your cupcake tin and place one Oreo cookie at the bottom of each cupcake mould.
- Pour your batter on top of the cookie to fill the mould about ¾ full.
- Bake at 180°C / 356°F (fan oven) for 20-25 minutes.
- In the meantime, prepare your icing (instructions below).
- Once baked, leave your cupcakes to cool on a cooling rack.
- Once cool, fill a piping bag with your icing and start icing. Decorate with an extra Oreo on top. Sprinkle more Oreo pieces on top if desired.
ICING
- Using a blender or food processor, blend Oreo cookies until completely smooth.
- Then, mix dairy-free butter, sugar and blended Oreos using a fork (or an electric mixer if preferred - but not necessary).
- Place in the fridge to set for about 10-15 minutes.
Notes
- Important: Whilst I do provide cup measurements above, I strongly recommend using weight measurements.
- This recipe has been tested using weights measurements and due to the fact that cups are considerably less accurate and can vary in size, I cannot guarantee the recipe will turn out as intended if using cup measurements.
- Click between METRIC & US Cups under the ingredients list to switch between both types of measurements.
- Use the step-by-step photos above as your visual guide.
- Make sure to pour your wet ingredients slowly over your dry ingredients to prevent clumps.
- For soft and airy cupcakes, do not overmix your batter.
- When preparing your icing, make sure you've blended your Oreos until smooth.
- Never attempt to ice cupcakes when they're still warm.
- If your icing is too dry, add more butter (1 teaspoon at a time).
- If your icing is too wet, add more icing sugar (1 teaspoon at a time).
Nutrition
Disclaimer: The nutritional information above is calculated automatically. The author of this post cannot guarantee 100% accuracy of this data.


Kara says
loved this recipe!! the cupcakes turned out great and were so lovely and rich 🙂
Tajda Ferko says
I'm so happy to hear this Kara, thank you so so much for taking the time to write your review! Glad you enjoyed the recipe - it's one of my fav cupcakes for sure! xx
Dawn says
Love, Love, Love these cupcakes. The only change I made was using aquafaba+cream of tarter instead of flaxseed. I was a little confused that the instructions say to add baking soda (step 5) but the ingredient list says baking powder (I used baking powder). As instructed I used weight measurements with great results. The frosting is a little too sweet for me but it is fair to say I'm not a frosting person in general. I might try to tweak it with my next batch, but the family all loved it! My oven doesn't allow for a temperature setting of 356 degree F, so I set it to convection bake 355 which then bakes at 330.
Tajda Ferko says
Dawn, thnak you so much for your lovely review, so happy you enjoyed this one and to hear it worked even with a few little tweaks! Thanks for noticing the typo in the instructions - just changed that in the recipe 😉 Glad to hear that your family it too - yay! x
Allison says
HI Tajda! Firstly - your recipes and images are incredibly beautiful.
I was wondering if you wouldn't mind sharing where your cake cooling rack is from?
And also, the one from this image: https://myveganminimalist.com/vegan-coffee-cake-eggless/
I saw your Props highlight on IG but didn't see them mentioned -hope it's ok to ask here.
many thanks 😀
Tajda Ferko says
Thank you so much lovely, really appreciate your words!
The silver cooling rack you can see in this recipe is a vintage one I was given by my mum 🙂
The black round cooling rack from the coffee cake recipe was bought in a shop called Søstrene Grene.
Hope this helps! Any other questions, don't hesitate to reach out.
Have a lovely day,
Allison says
thanks so much!
Gary says
I baked these to help my better half out as she were real busy. They were for taking into work on International Womans Day.
They turned out sooooo good. Apperantly some non vegan folk had two.
Thanks
Tajda Ferko says
Ahh that sounds so lovely, thank you so much for sharing that with me as it absolutely made my day!
Mariah says
These are fabulous! Extremely delicious and impressive. The batter tastes like brownie batter, so I knew they were going to be good.
Just a couple of notes about the recipe as a heads up: I tried to use the "US Cups" version but was alarmed that it called for 4 cups of butter (I upped the quantity to 24 cupcakes). I knew that was way too much so luckily found a scale and it was only 1.5 cups of butter. I didn't double check anything else and instead used the metrics version. I would warn against using the US Cups option.
Additionally, I set the servings to 24 cupcakes and was left with a ton of extra batter after making the initial 24.
Tajda Ferko says
Hi Mariah, you are absolutely right - there was a glitch in the cup conversion (I used an automatic conversion) which has now been fixed. Thank you for pointing it out and I'm sorry for the inconvenience. Happy to hear that you enjoyed the cupcakes & thank you for the lovely comment!
Cindy says
Are you blending the oreos with the cream for the frosting? Or do you scrape the cream out first
Tajda Ferko says
I blend the entire Oreo 🙂