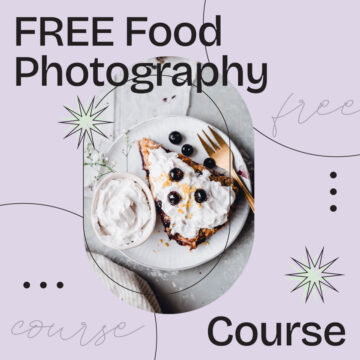
Wondering how to take light and airy food photos? Have you been scrolling down your Instagram feed desperate to recreate gorgeously bright photos from some of your favourite photographers? Or perhaps you've noticed that your brightest posts tend to outperform your other social media posts? You've come to the right place, my friend.
To give you a helping hand along the way I wanted to create a list of my top 5 tips. During my recent Instagram 'Ask Me Anything' I noticed that food photography questions were by far the most common. My photos have always been light and bright, so it doesn't surprise me I get asked about it a lot. I decided it would be a good time to extend my blog series beyond recipes and bring you more photography tips from now on.
Let's jump straight in.
-
Get Your White Balance Right
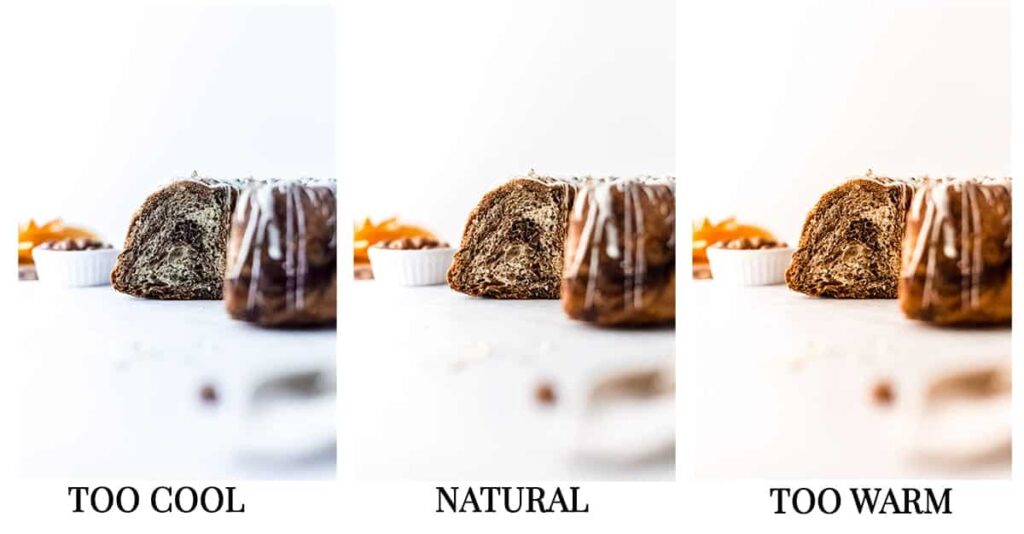
This is the single most important step when it comes to taking light and airy food images. White balance simply means "adjusting colors so that the image looks more natural" (Photography Life). Most sources of light will have some sort of light temperature - either cool or warm. You want your final photo to be neither cool or warm, as this will look unnatural. I could devote an entire post just to white balance (which I probably will sometime down the line), so I'm encouraging you to also check out other, lengthier pieces on getting the perfect white balance. The Bite Shot's video on white balance is a great place to start!
-
Avoid Using Strong Colour Filters
Apart from white balance itself, this is the most common mistake I see other food photographers make. Colour filters often distort the white balance and can make your images look anything but natural. Needless to say that's not what we're usually going for when it comes to food photography.
I completely understand - you want your photographs to be instantly recognisable and you want them all to have the same vibe. Adding filters and editing all photos in the same way is often quoted as the easiest way to get consistency. I strongly disagree. Want all your photos to look the same? Edit them all one by one. They are all separate photos and you should treat them like that. Just like every separate plant needs specific care, every photo needs specific editing tweaks.
-
Blur It Out
 The background of this double chocolate cupcake is dramatically blurred out, whereas the main cupcakes remains in sharp focus.
Don't worry, I'm not suggesting you blur out your main subject and create an unfocused mess of a photo. Instead, I'm talking about bokeh, one of the most powerful elements of photography. Bokeh is the out-of-focus area of your photo and you can read a great piece about it here. It refers to the blurry part of your image which will help create the airiest food photos you've ever taken. How much of a background blur you can create heavily depends on the camera and lenses you are using. Regardless of that, one way to create blur is to increase the distance between your main subject and your background. Bring your main closer to the lens and keep your background (any utensils, backdrops and props you are using) as far away as reasonably possible.
-
Avoid Harsh Shadows
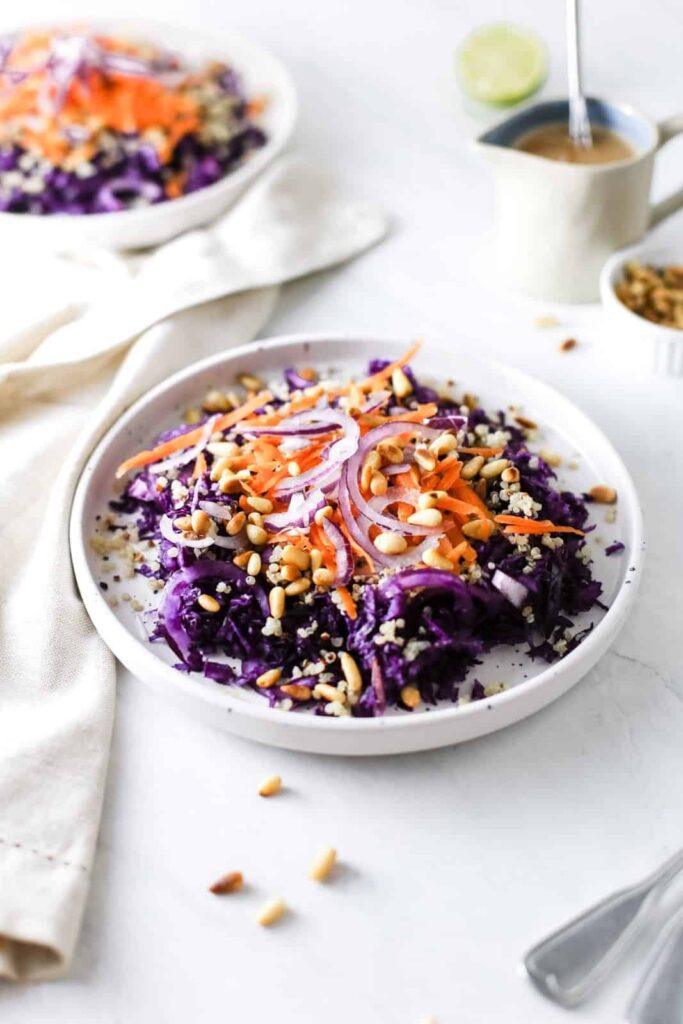
Shadows are kept super soft for this image of my rainbow quinoa salad.
The play of shadows and highlights is what often makes images stand out. However, the secret to light and airy food photos lies in subtle, soft shadows. If you're a beginner, the best way to do that is to avoid using flashlights and stick to strictly natural light. Using artificial lighting will require more equipment and knowledge on how to balance out harsh shadows. Instead, set your scene near a large window and make sure to avoid shooting on sunny days (which shouldn't be a problem here in the UK …) If you want to go a step further, use reflectors (any large white surface will do) to soften the shadows.
-
Create subtle movements
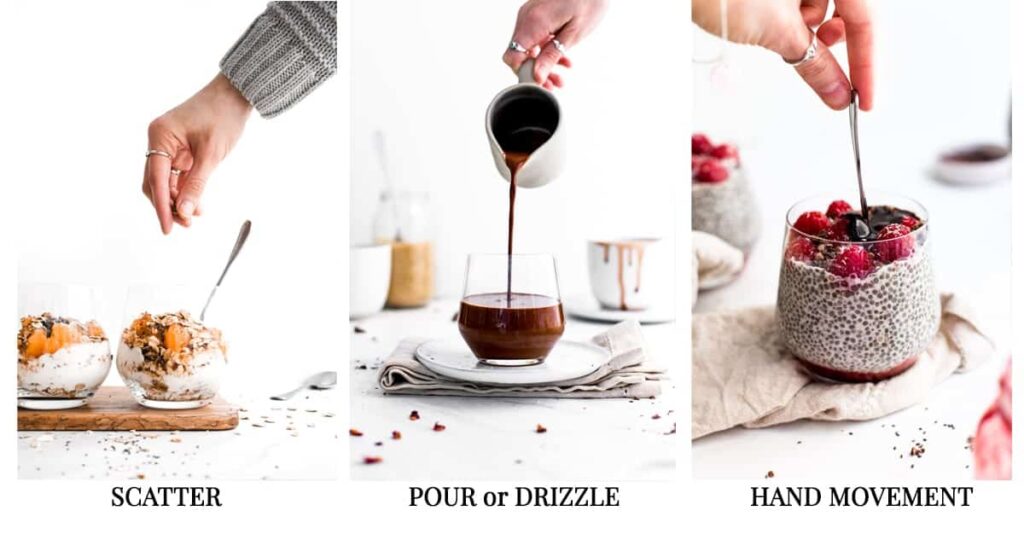 We've got the light sorted, now let's move on to the airy part. How to do that? Create movements. There are various ways to add movement to your food photos. Some of the lightest and airiest photos on my feed will have at least one of the following aspects of movement:
- SCATTER: You can start by scattering pieces of food or adding utensils that indicate someone is just about to dig into your dish.
- POUR OR DRIZZLE: Drizzles, drips and pours are another great way to create a flowy aspect.
- HAND MOVEMENT: If you're struggling with capturing any of the above, simply adding a hand that's reaching out to, holding, or picking up your dish is a great idea.
This wraps up my 5 tips on how to take light and airy food photos. There are tons of other ways you can spruce up your images and I'll be covering all of that in my new weekly photography tips series here on My Vegan Minimalist.
Got any questions, tips or suggestions? Let us know in the comments below!


Shivani Raja says
I loved reading this Tadja - you’re one of my favourite photographers 😉 can’t wait for the rest of the series!
My Vegan Minimalist says
Thank you so much, Shivani! I appreciate it! Hoping to bring some valuable and fun content your way! ?
Larissa says
Loved this! I’m excited for this new series! Thank you for sharing 🙂
My Vegan Minimalist says
Larissa ? Thank you so much! Really appreciate your support and hoping to make this as interesting and helpful as possible! ✨
Jasmin | Ve Eat Cook Bake says
Tajda what a helpful post. Thank you so much for these 5 tips. I will use them for my next photos. Thank you ??
My Vegan Minimalist says
Thank you so much, Jasmin, I appreciate you taking the time to comment ♡ I'm so happy to offer my little bit of insight, hopefully it can come in handy sometime! ♡ x
Daxton Butler says
Lighting is the most important part of photography. I think this is a big difference for any kind of photography, especially for food photography.
Tajda Ferko says
It's absolutely one of the huge factors yeah!