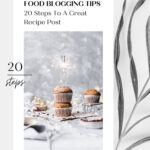
If you're looking for food blogging ideas and tips you've come to the right place. This in-depth post explores exactly what goes into making recipes for food blogs. I'll walk you through 20 steps that make up every good recipe post while giving you tons of tips on photography, SEO, and content optimization.
Before we begin, let's see what the goals of this post are:
- To give other food bloggers a thorough guide they can refer to when writing their posts.
- To offer the general public a basis for a better understanding of just how much effort goes into food blogging.
And no, the goal isn't to put you off food blogging altogether. Although after seeing the long to-do list I wouldn't blame you if you thought so! The good news is that it gets a lot easier over time.
A few things to keep in mind:
- Every blogger is different, which means not everyone will be following these exact steps.
- This is by no means an exhaustive list. It's simply some of the most crucial steps you need to take into account when writing a post.
Jump to:
- 1. Find a recipe idea using SEO tools
- 2. Purchase the ingredients
- 3. Develop the first recipe draft
- 4. Test the recipe to perfection
- 5. Convert the recipe for international measurements
- 6. Take photos or videos
- 7. Edit the images and videos using editing software
- 8. Scale down each image
- 9. Write out the recipe using a recipe card plugin
- 10. Write the full blog post
- 11. Write meta descriptions and Pinterest descriptions
- 12. Write ALT tags for every image in the recipe post for accessibility
- 13. Include internal and external links
- 14. Create pins
- 15. View the recipe on mobile
- 16. Publish and submit the recipe to food publishing sites
- 17. Test page speed
- 18. Test keyword density
- 19. Share on social media
- 20. Enjoy a well-deserved break and hope for the best!
Now that we've covered the basics, let's move on to our 20 steps!
1. Find a recipe idea using SEO tools
In an ideal world, you would blog about your absolute favourite recipes, family classics or new and exciting dishes you just found out about and want to share with the world.
While a small percentage of the recipes you see on popular food blogs might fall into that category, most of them don't.
The explanation is simple.
If you want visitors to find your recipe on Google, you need to take into consideration the following things:
- Is anyone actually searching for this recipe?
- How many other blogs already have this recipe?
- Is your blog able to compete with these blogs?
From time to time I'll share a recipe that I know isn't likely to do well on Google simply because I love it so much. But that's a rare exception rather than a rule.
SEO tools help you find the answer to the questions above.
I've been using KeySearch since early 2020 and love the difference it makes to my Google rankings. The tool came highly recommended by Casey Markee, one of the biggest experts in the food blog SEO optimisation in the world today.
There are also free tools that you can use such as Google Keyword Planner.
Another free tool I would recommend is Google Search Console (especially if you already have some posts that are ranking well on Google). This tool will help you identify your best posts and give you a better understanding of what works and what doesn't.
2. Purchase the ingredients
This is a very straightforward, but important step in the process of recipe development.
There are a few tips to keep in mind:
- It's always better to purchase more ingredients rather than just enough. In case you need to retest a recipe, you'll be glad you've stocked up.
- Another reason to get a few extra pieces of your main ingredients is the photos. When you're taking the photos of your final dish, you'll want to include what's called flavour cues in your scene. For example, a flavour cue for banana bread would be some ripe bananas in the corner of your image. For a blueberry lemon muffin, it would be a bowl of blueberries and some lemon wedges. If you only purchased just enough ingredients to make your recipe, you won't be able to use them as flavour cues in your images.
- If you're using a business bank account to purchase your ingredients, make sure you keep the receipt.
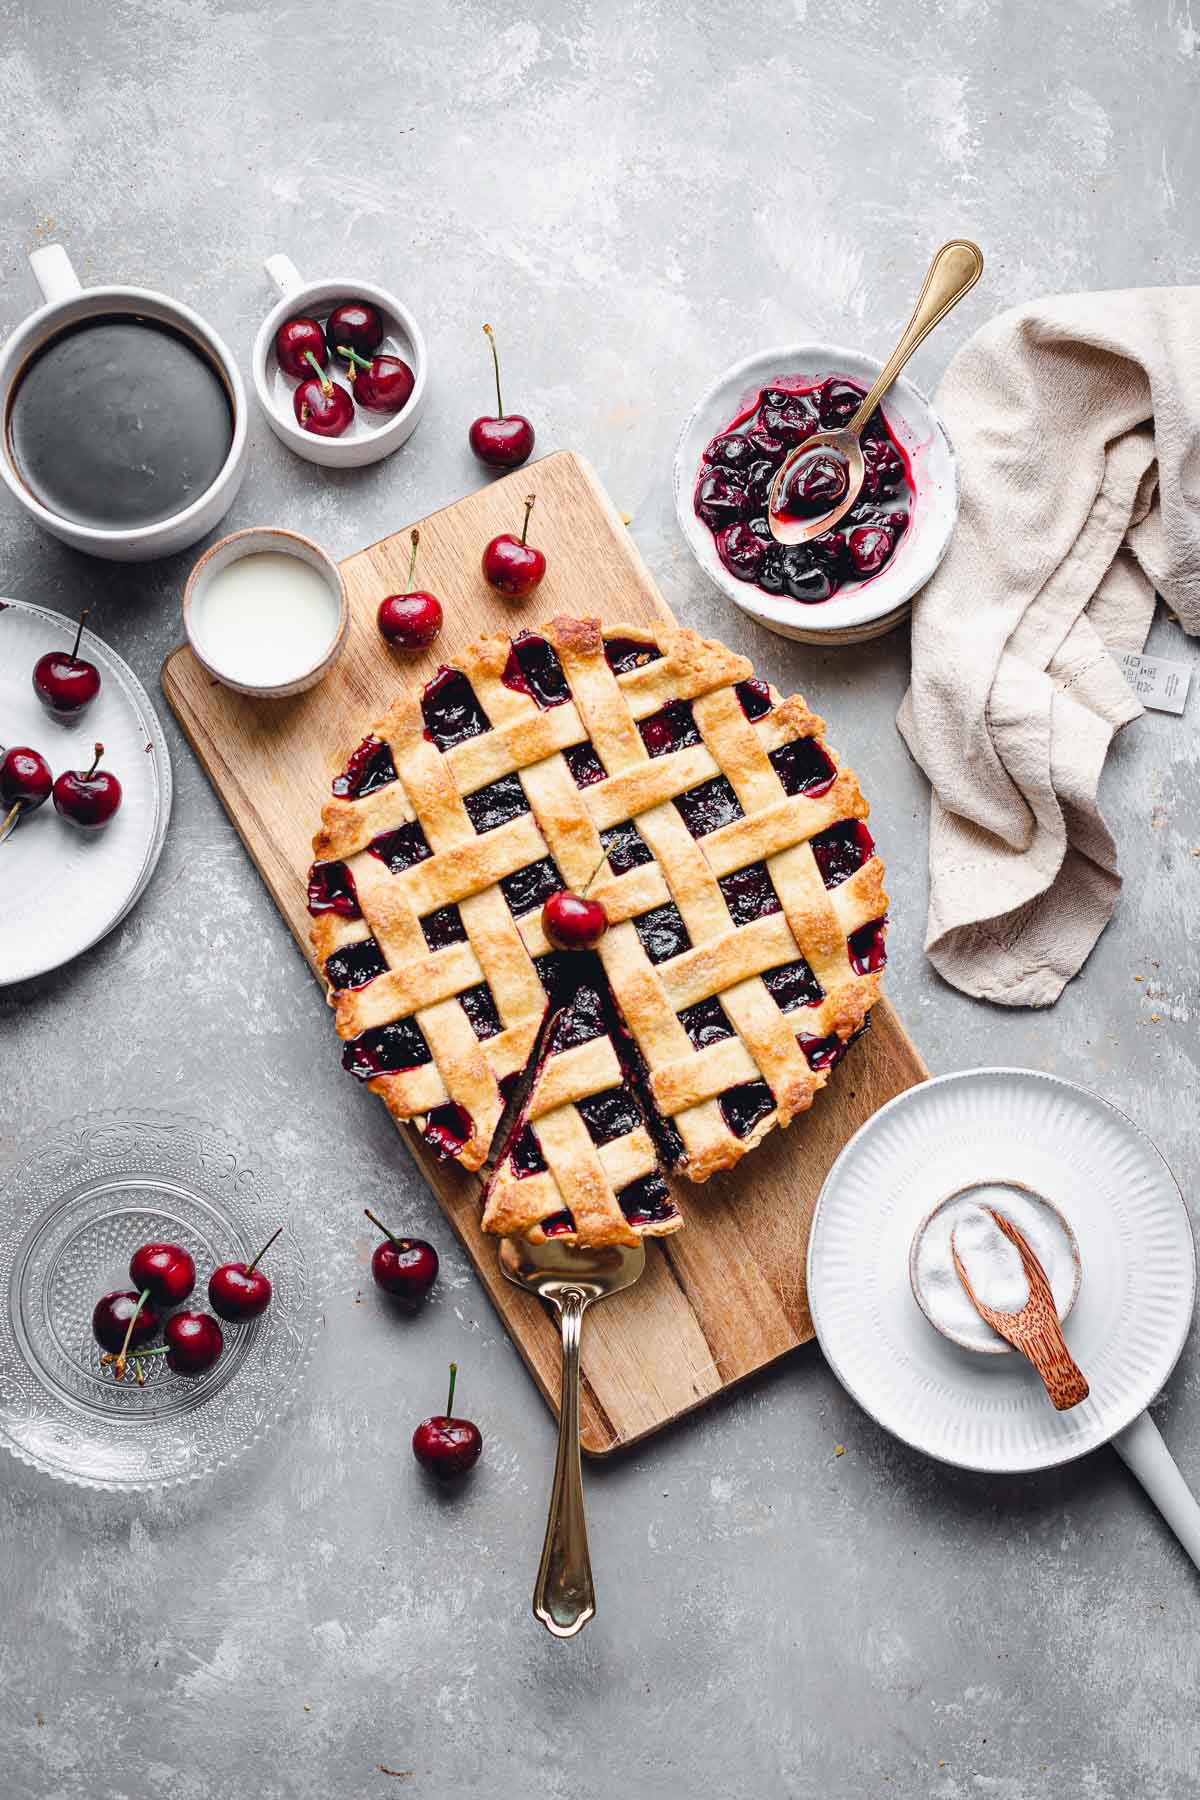
I've used a bowl of cherries as a flavour cue for this cherry pie.
3. Develop the first recipe draft
The first draft of your recipe will most likely be quite rough, vague and needing a few re-tests.
For example, when I'm developing a cookie recipe, I like to split it up into two batches to test which oven temperature or ingredient ratio works best.
Your first draft can be based on a previous recipe that you know works very well. For example, my lemon curd rolls were based on the same dough recipe I used for my orange cardamom buns.
Important reminder: if you're basing your draft on someone else's recipe, make sure to give them credit in your blog post (like I did here).
If you're basing it on your own recipe, make sure to link to the original recipe within your blog post to boost that internal linking (more about that below).
4. Test the recipe to perfection
If you're a recipe developer or blogger, you'll probably know that testing a recipe just once is simply not an option.
Even if you get it perfect in your first go (which, let's be honest, is very unlikely), it's still a good idea to test it again just to see that it really works well, and you haven't missed anything out.
Remember that many people that search for recipes are beginners and won't have the same skills as you do. Trying out your recipe a few times will give you a better idea of what could go wrong and how to solve it. You can include these valuable tips and troubleshooting instructions when you write your post.
The number of tests you'll need to perform depends on the type of recipe blogging you do.
Most of my recipes are desserts and because baking is an exact science, it requires several re-tests. If you're writing a salad recipe post or a simple soup, you might need to test it just once or twice.
Once you've tested your recipe to perfection, it's time to convert it!
5. Convert the recipe for international measurements
Because our blogs are visited by food lovers all over the world, we need to make sure everyone can easily remake the recipes. This includes providing the ingredients in different systems of measurements.
What does this mean in practice?
In the US, you would use cups for liquid measurements, whereas in Europe you would use millilitres.
This might sound like a small and insignificant step, but it's truly important. You will want everyone who visits your blog to feel included and eager to remake your recipe. If they see measurements that aren't used in their country, you can bet they'll be clicking that x button and leaving your blog very soon.

Gorgeous food photos are hugely important if you want your blog to be successful.
6. Take photos or videos
Once you've perfected your recipe, it's time to make it once again! This time, you'll be taking photos or a video (or both!)
As a photographer, I care deeply about how my dishes look on the final photos so this step can take several hours.
Some things that might make your job easier:
- Visualise or sketch how you want your final images to look
- Don't forget to take some good close-ups: those are super popular!
- Whatever you do, make sure to include ingredients and step-by-step photos. Nobody wants to see 6 similar images of the final dish with no reference to what the process of making them looks like.
I can't stress the importance of great food photography in blogging enough! Taking images that really stand out has been a crucial factor in growing my blog traffic.
If you're wondering how I improved my photography, click here.
7. Edit the images and videos using editing software
Once you've got your photos ready, it's time to edit them!
One of the best editing programmes out there is Adobe Lightroom. If you're new to blogging and photo editing, you can use their free mobile app.
One thing I'd like to address here is the misconception about editing. There is absolutely NO shame in editing your food images. There seems to be a misconception that this is misleading or might make your dishes look fake, 'too perfect', or impossible to recreate.
As a food photographer, my response to this is: don't think of it as making your food look fake, think of it as making it look better!
It's not about misleading your audience, but about highlighting the best aspects of your dish.
Food blogging is highly competitive, which means that average images just won't temp visitors. In turn, your post will be stuck at the bottom of search results.
Not only does editing make the colours pop and make your food look even more appetising, it also helps you scale down the images for easy loading. More about that below!
8. Scale down each image
Before you upload the images to your blog you will need to scale them down for easy loading. Scaling them down basically means making them take up as little space on your server as possible.
If your images aren't scaled down, your blog will load slower. In turn, you will receive less traffic as longer loading times are one of the top reasons for not ranking high in Google and giving your visitors a bad user experience.
I like to keep my images under 250kb, measuring 1200px in width.
Don't forget to name each file according to the recipe name.
In addition to that, I use ShortPixel to compress the images once they've been uploaded to WordPress.
9. Write out the recipe using a recipe card plugin
Gone are the days when bloggers would copy and paste their recipes from Word straight into our blog editor in just a few seconds.
Each recipe has to be inserted into a recipe plugin such as WP Recipe Maker or Tasty Recipes.
When entering the recipe into your plugin, several pieces of information should be filled out such as:
- Portion sizes
- Cuisine
- Prep time and cook time
- Recipe image + Pinterest pin
- Ingredients
- Method
- Nutritional information
Additionally, you will want to keep in mind the following
- Always try to include recipe notes at the bottom to give your users some extra tips and insights into your dish.
- Try to fill out as many fields as you possibly can, including equipment and video field.
For examples on how to fill out a recipe card correctly click here.

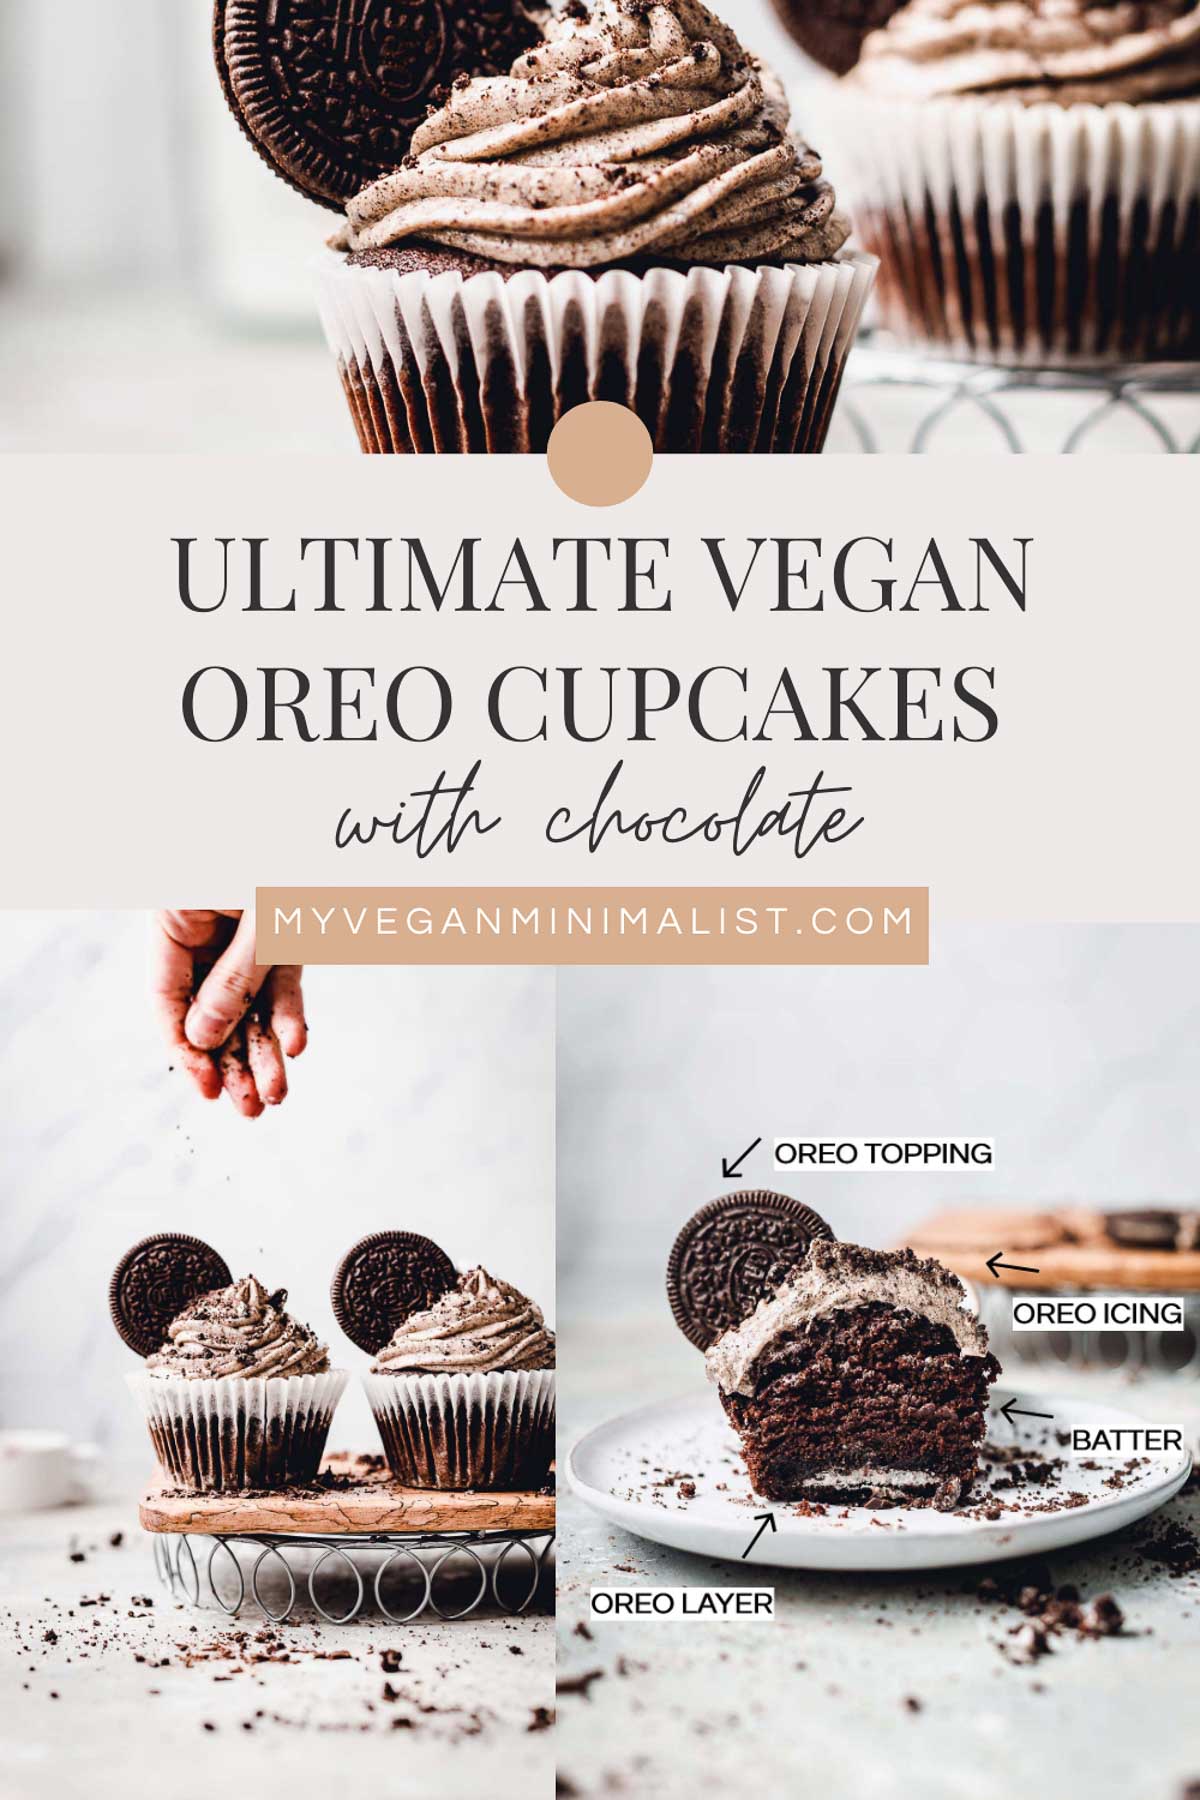
Process images are a great way to add more value to your recipe post.
10. Write the full blog post
Written your recipe? Now it's time to turn it into a full-length blog post.
A good quality recipe blog post will include sections such as a quick intro, ingredient notes, expert tips, and answers to the most frequently asked questions.
You will want to keep it focused on the recipe itself and not waffle on about any personal anecdotes about the recipe.
Try to keep the wording simple to understand. This means not using rare words and difficult sentences.
11. Write meta descriptions and Pinterest descriptions
Every blog post you put out should feature a meta description.
Additionally, if you're using Pinterest to promote your blog (which you should!), you will need to fill out the Pinterest description as well.
Both of these sections are very important. Think of them like a movie trailer. If the trailer manages to pique your interest, you'll probably want to watch the movie. Similarly, meta and Pinterest descriptions are usually the first things users will see before reading your post.
If the meta description is not tempting enough, you'll lose out on many potential visitors.
12. Write ALT tags for every image in the recipe post for accessibility
ALT tags are one of the most misunderstood aspects of SEO. Funnily enough, the explanation is actually very simple!
ALT text is used to describe the contents of the image to visually impaired visitors. Thus, the main function of ALT tags is to improve accessibility and make your blog accessible to everyone.
If you're looking for tips on how to write good ALT tags click here.
13. Include internal and external links
Your recipe post should always include both internal and external links.
Internal links are links to other content on your blog. This could be other similar recipes, categories or any guides you've written.
Make sure to keep these links closely related to the topic of your blog post. If you're linking out to recipes or other blog content that isn't relevant to the recipe, not a lot of viewers will be tempted to click through.
The same goes for external links. Keep them relevant to your recipe! If you're not sure what type of external links to include, here are some of ideas:
- In your cupcake recipe, link to a thorough guide on icing cupcakes.
- If you're writing a pasta recipe, link to a post that includes exp
- If you're part of an affiliate programme, link to the products you used.
14. Create pins
Pinterest is a hugely important part of your overall blog strategy. It can drive a significant amount of traffic to your site and help your reach your blogging goals.
Creating beautiful and memorable pins is a great way to lure in more visitors.
I use a combination of Photoshop and Canva to create my pins. Canva is a free tool and offers plenty of attractive pin templates.
Use Canva to make beautiful Pins.
15. View the recipe on mobile
Did you know that an average food blog will get roughly 80% of its views through mobile devices? Only about 20% of the views come from desktop browsers.
This is why it's crucial to always check how your final post looks like on mobile.
You can see the mobile preview within the WordPress editor. Simply click on Preview + Mobile. Ensure that the post doesn't include large chunks of texts with no breaks. Check if the fonts and images are clear.
16. Publish and submit the recipe to food publishing sites
It's time to hit publish! Yay!
Once your recipe is live, you can submit it to various recipe publishing sites such as FeedFeed, Foodgawker and Finding Vegan (if your recipe is vegan).
If your submission is accepted, these food sites might help drive some additional traffic to your website.
Additionally, FeedFeed includes some of their favourite recipes in a weekly newsletter, bringing in a chunk of extra traffic if your recipe is selected.
17. Test page speed
I've briefly mentioned the importance of your site speed earlier. Here, we're returning to it once again.
To test how fast your recipe page loads you can use a free tool called Google Pagespeed Insights.
Ideally, you would aim for a page speed of 80 or over.
If your site is significantly slower than that you might need to look into improving it. A slow site is a huge issue and one of the main reasons for not gaining traffic despite well-written content.
The best way to improve site speed is to move off a slow host. My website is hosted by BigScoots and I've noticed huge improvements since moving from my old host SiteGround.
If you're looking for a quick & cheap fix for your site speed, I also recommend WP Rocket. It's one of the best blogging investments I've made.
Don't worry if your mobile speed is lower than your desktop speed - this is completely normal.
18. Test keyword density
This is a quick, but important step. Our role as food bloggers is to create content for actual living and breathing human beings, rather than Google algorithms.
In an attempt to improve your Google rankings, you might be tempted to fill your post with lots of keywords. This is an old SEO practice that is very much frowned upon today.
Free keyword density tools such as SEOquake help you determine if you've overused a certain keyword. Ideally, you should keep keyword density under 2%.
19. Share on social media
Almost there! It's time to put your recipe out there for the world to enjoy and recreate!
Share your recipe on any social media sites you're using (I focus on Instagram and Pinterest). Return to the pins you created in step 14 and schedule them to go live on Pinterest*.
I find that focusing on just a couple of social media sites and doing them well works better than trying to be active everywhere.
*I do realise that Pinterest is a type of search engine rather than social media, but to make things easier, I've included it here.
20. Enjoy a well-deserved break and hope for the best!
You've worked hard, so don't forget to take a break before you jump into the next task on your to-do list.
With some luck, your post will soon start climbing up on Google search results. Remember that sometimes it just doesn't work out - SEO is not an exact science, so don't get discouraged if you don't see the results overnight or if some of your recipes just never take off.
Try to see what could be improved in the future, perhaps you could add a video recipe or make your photography stand out more? Good news, if you've followed all the tips from this post, there's a good chance Google will reward you for it.
Just remember to keep being patient as it can take months for your post to start climbing up that Google search result chart! Patience is key.
If you've enjoyed this post and found meaningful information in it, I would really appreciate it if you could share it with your blogging friends or even link to it from your website.
Looking for more food blogging ideas, recipes, and photography tips? Sign up for my mailing list!
If you have any questions, feel free to leave them in the comments section below - I would love to hear your thoughts.


Ioana says
Hi Tajda!
Thank you so much for the insights. I find this very useful and I have a lot of things to take away and apply to my blog and recipe posting strategy. I am also fellow Foodtography School student and I can see my photos improving each time. Hurray!! As I started my blog in February (on my own 🙁 ) I realise that there is so so much to learn and improve, especially regarding the site speed, structure, adding ALT to photos ... OMG so much info 🙂
I am trying to take it one step at the time and allow myself to grow, learn new things and implement as best as possible. I'm sure that with time it will become clearer and easier with time.
Have a great day,
Ioana xxx
Tajda Ferko says
Hi Ioana, thank you for stopping by and for leaving such a lovely comment. Food blogging can sound overwhelming and there's definitely a lot of work that goes into each recipe. I find that focusing on doing your best with what you've got and not obsessing over every little detail can help.
It also gets easier over time and some aspects that first sound like a lot of work become second nature to you 🙂 Plus, you feel so proud of yourself after each recipe knowing how much work went into it.
Good luck on your blogging journey! If you ever have any further questions feel free to reach out! x
Cristina says
I'm so glad I stumbled across this post! The amount of detail and in-depth step by step information is so very appreciated as I've never seen anyone really lay it out like this, and you touched on so many things I never even thought to consider. Thank you for this!
Tajda Ferko says
Ahh Christina, thank you so much for your lovely review! So happy to hear you found my post useful, it truly makes me happy to know you found some new tips that will hopefully help you out when writing posts in the future 🙂
Maria says
I loved this post, Tajda! You're amazing! Thank you for all the great information! 🙂
Tajda Ferko says
Thanks so much Maria, glad to hear!
Kay says
Such a helpful list for beginners, thank you!!