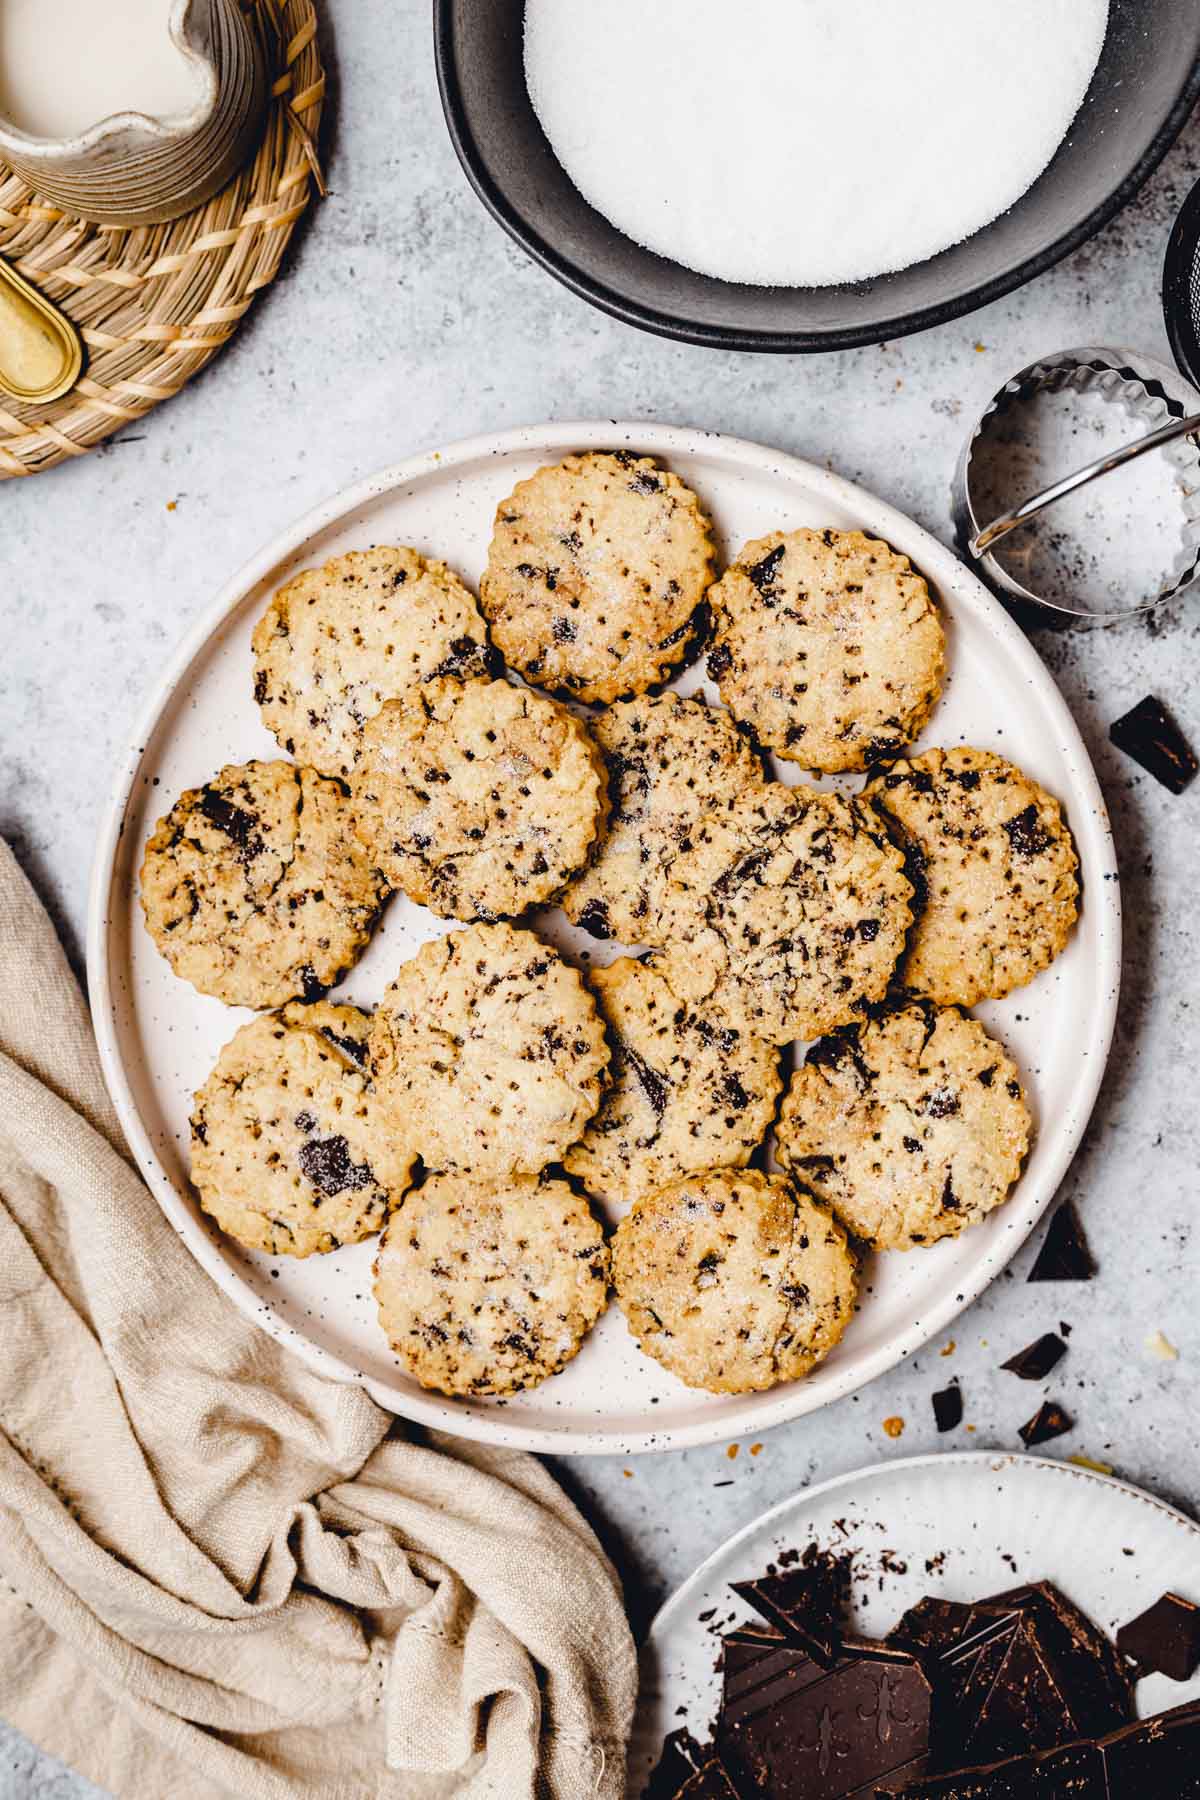
Simple vegan shortbread cookies with chocolate chunks and dusted sugar. These quick and simple cookies will instantly satisfy all your sweet cravings.
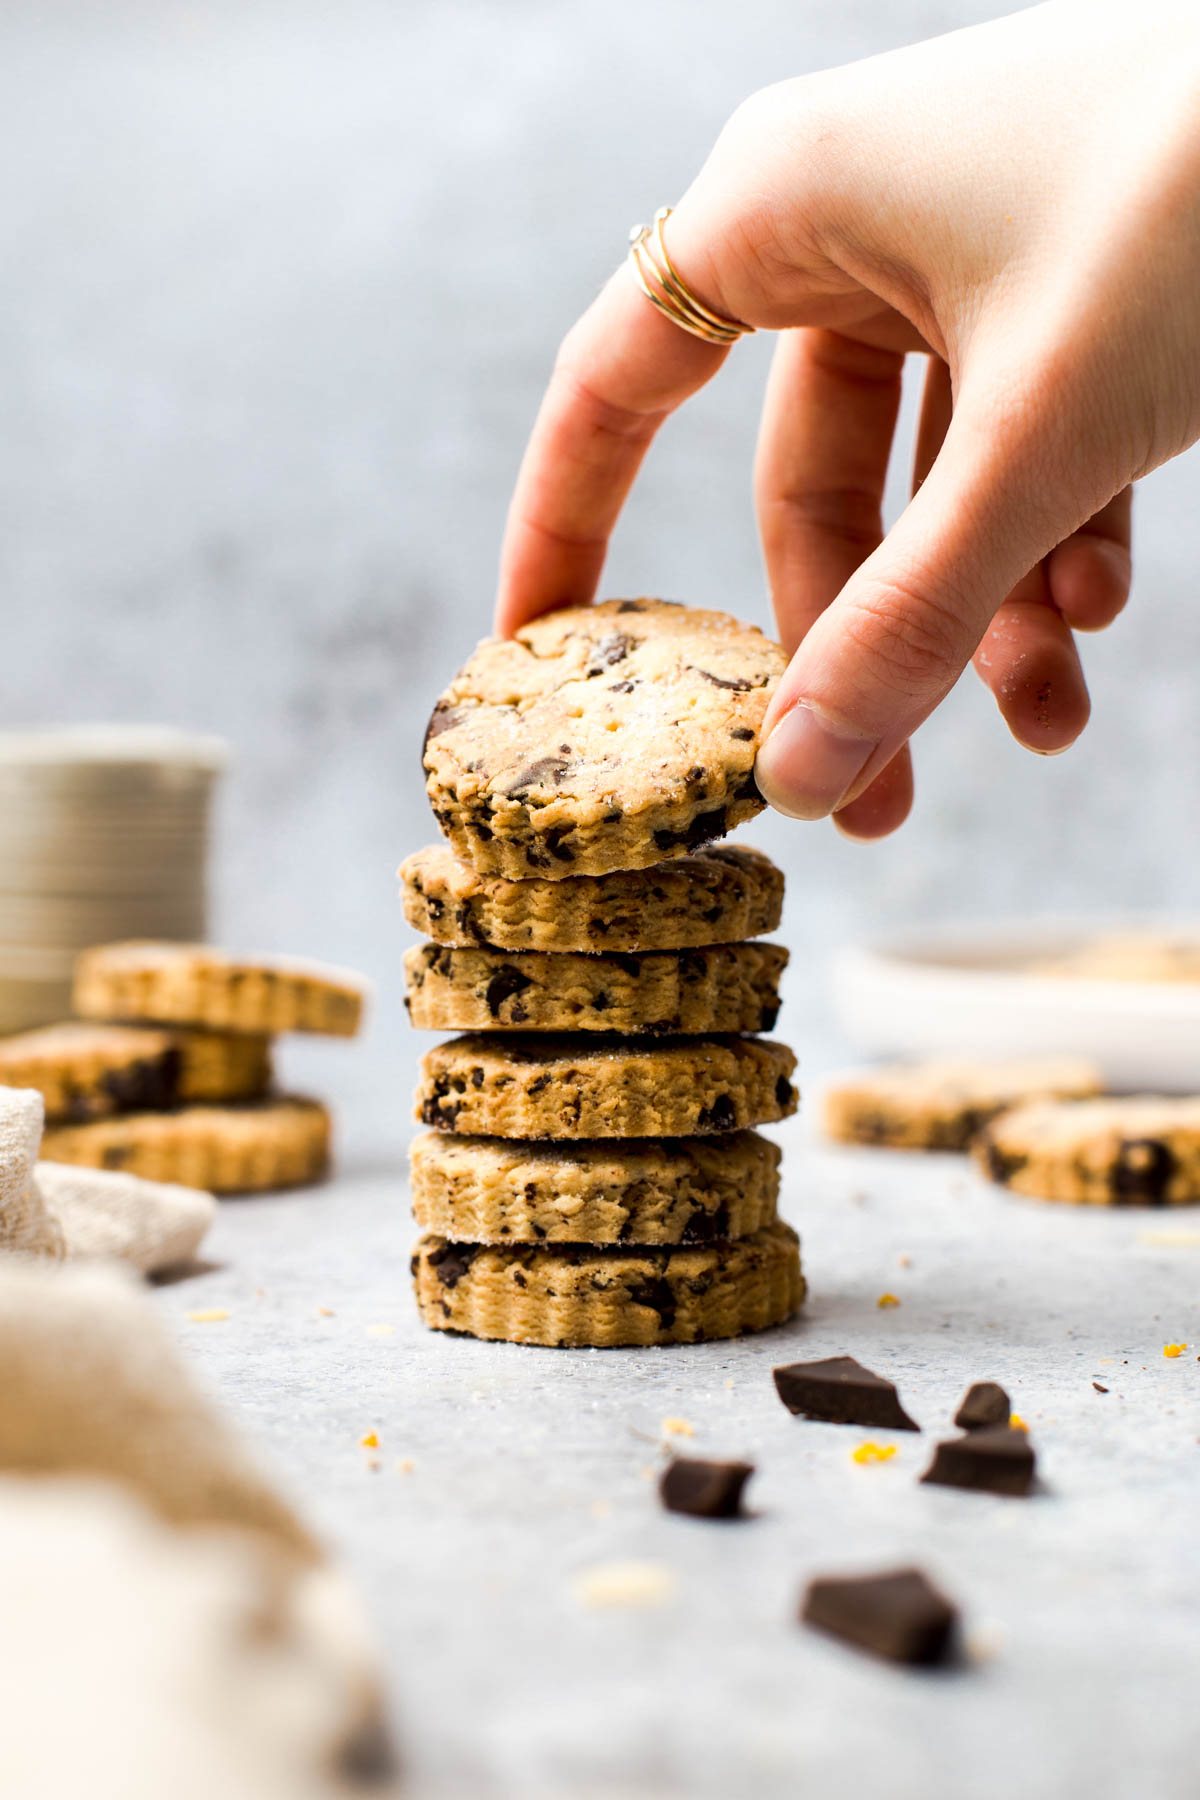
What makes these cookies so great?
- So easy to bake! Not all of us are star bakers. If you’re on the lookout for a quick and easy vegan cookie, look no further. Plus, you need no fancy ingredients or kitchen accessories.
- The crunchiest texture. Shortbread is all about texture. These are snappy, crunchy, buttery and oh so tender.
- That rich chocolate kick. You know the feeling when you bite into something and you just need to close your eyes to savour that moment to the max? That is exactly what happens when you bite into these badass treats.
- The perfect base recipe. These are the ideal base for many shortbread varieties. You can dip them in melted chocolate, add peanut butter or caramel swirls, or sprinkle with your favourite toasted nuts. Possibilities are endless!
Now that it’s decided you simply need to make these choco treats, let’s have a look at some tips. You will thank me later!
The Ingredients
These 6 vegan staples will transform into a buttery perfection in no time. Nothing fancy, nothing expensive and nothing difficult.
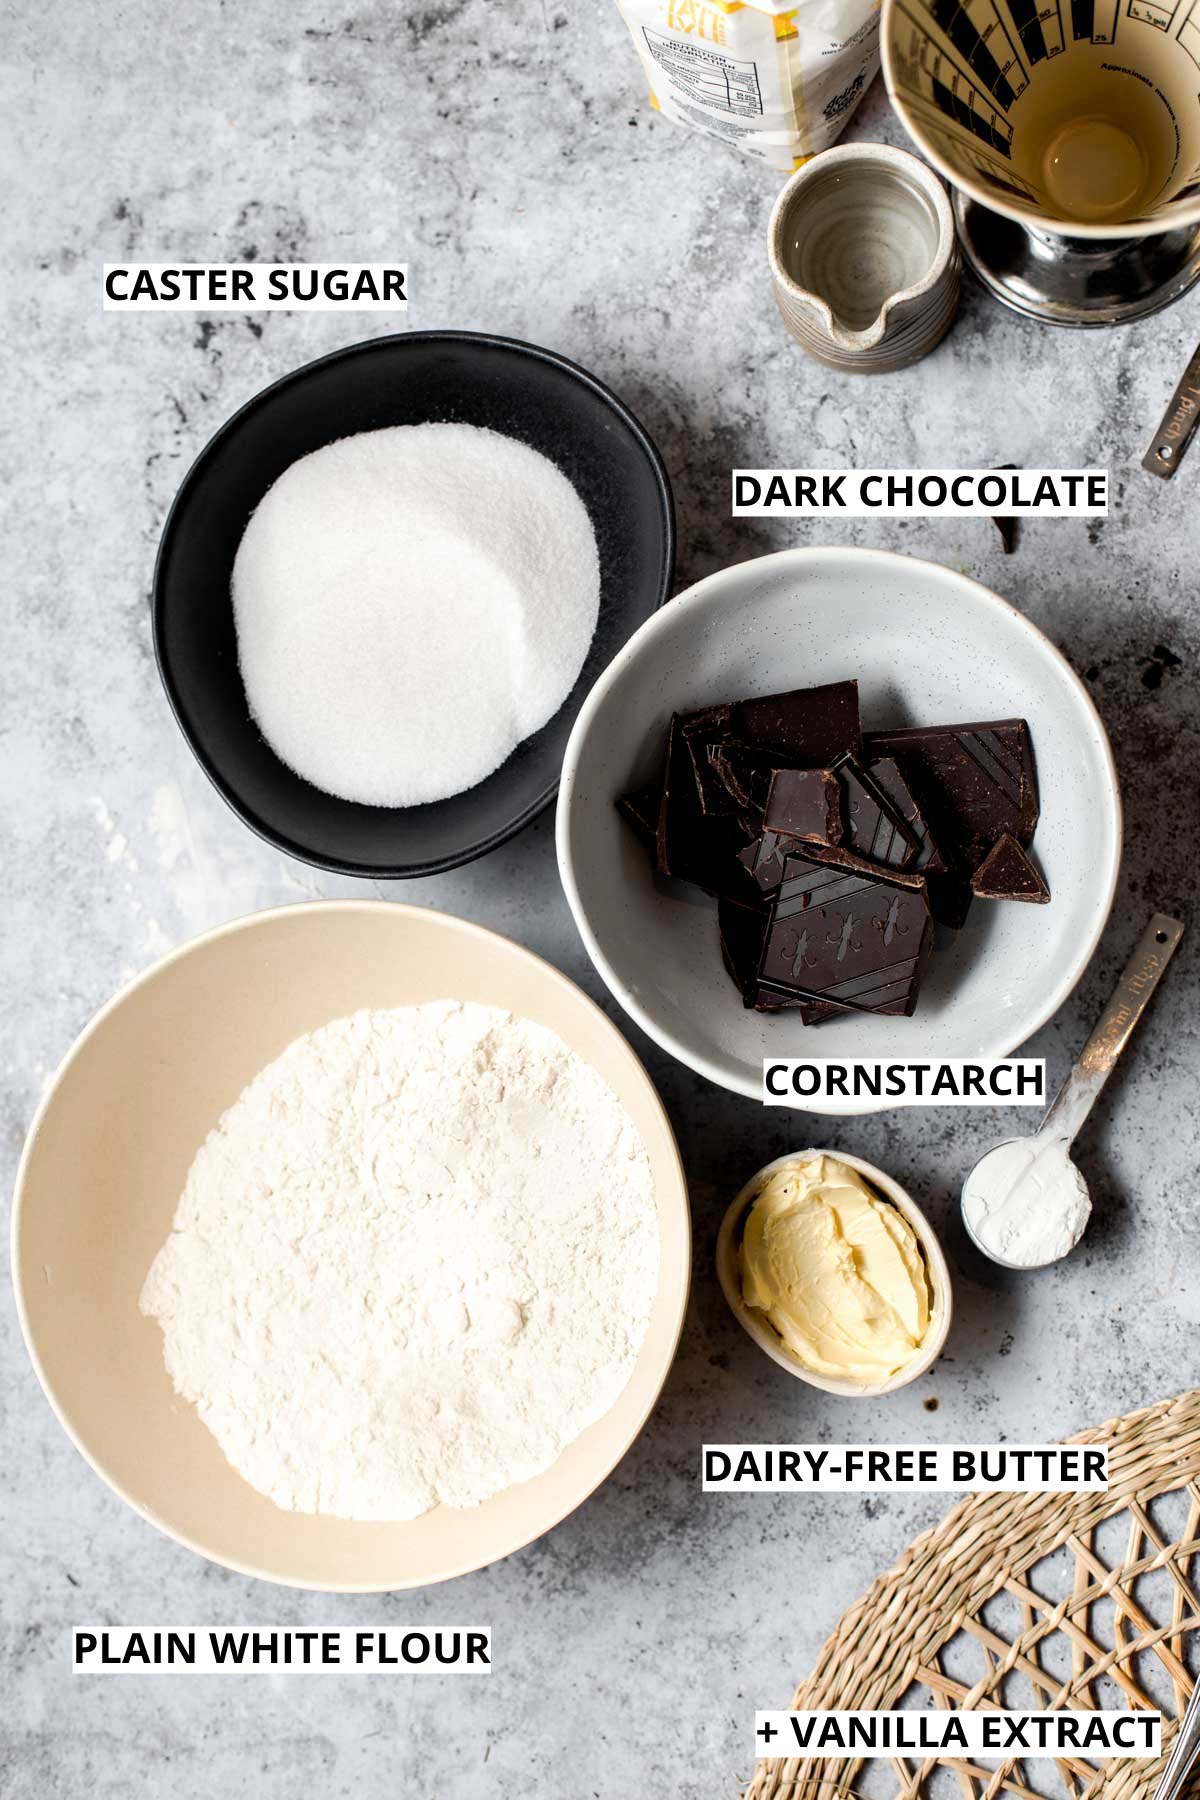
A Few Notes About These Ingredients
Plain white flour: make sure you don't use strong flour which is meant for breadmaking. I haven't tried a wholemeal version of these yet so not sure if it would work.
Dairy-free butter: Use any vegan butter that's available to you. For those based in the UK, I used Vitalite.
Caster sugar: instead of caster, you can also use granulated sugar.
Vanilla extract: I used liquid vanilla extract (not powder or paste).
Not pictured here is also a pinch of salt you will need for the batter.
Step-by-step Photos
Let me take you through making these. These step-by-step instructions will be your virtual guide through the process of baking.
*A detailed (including measurements) recipe card that you can print is waiting for you at the bottom of this post.
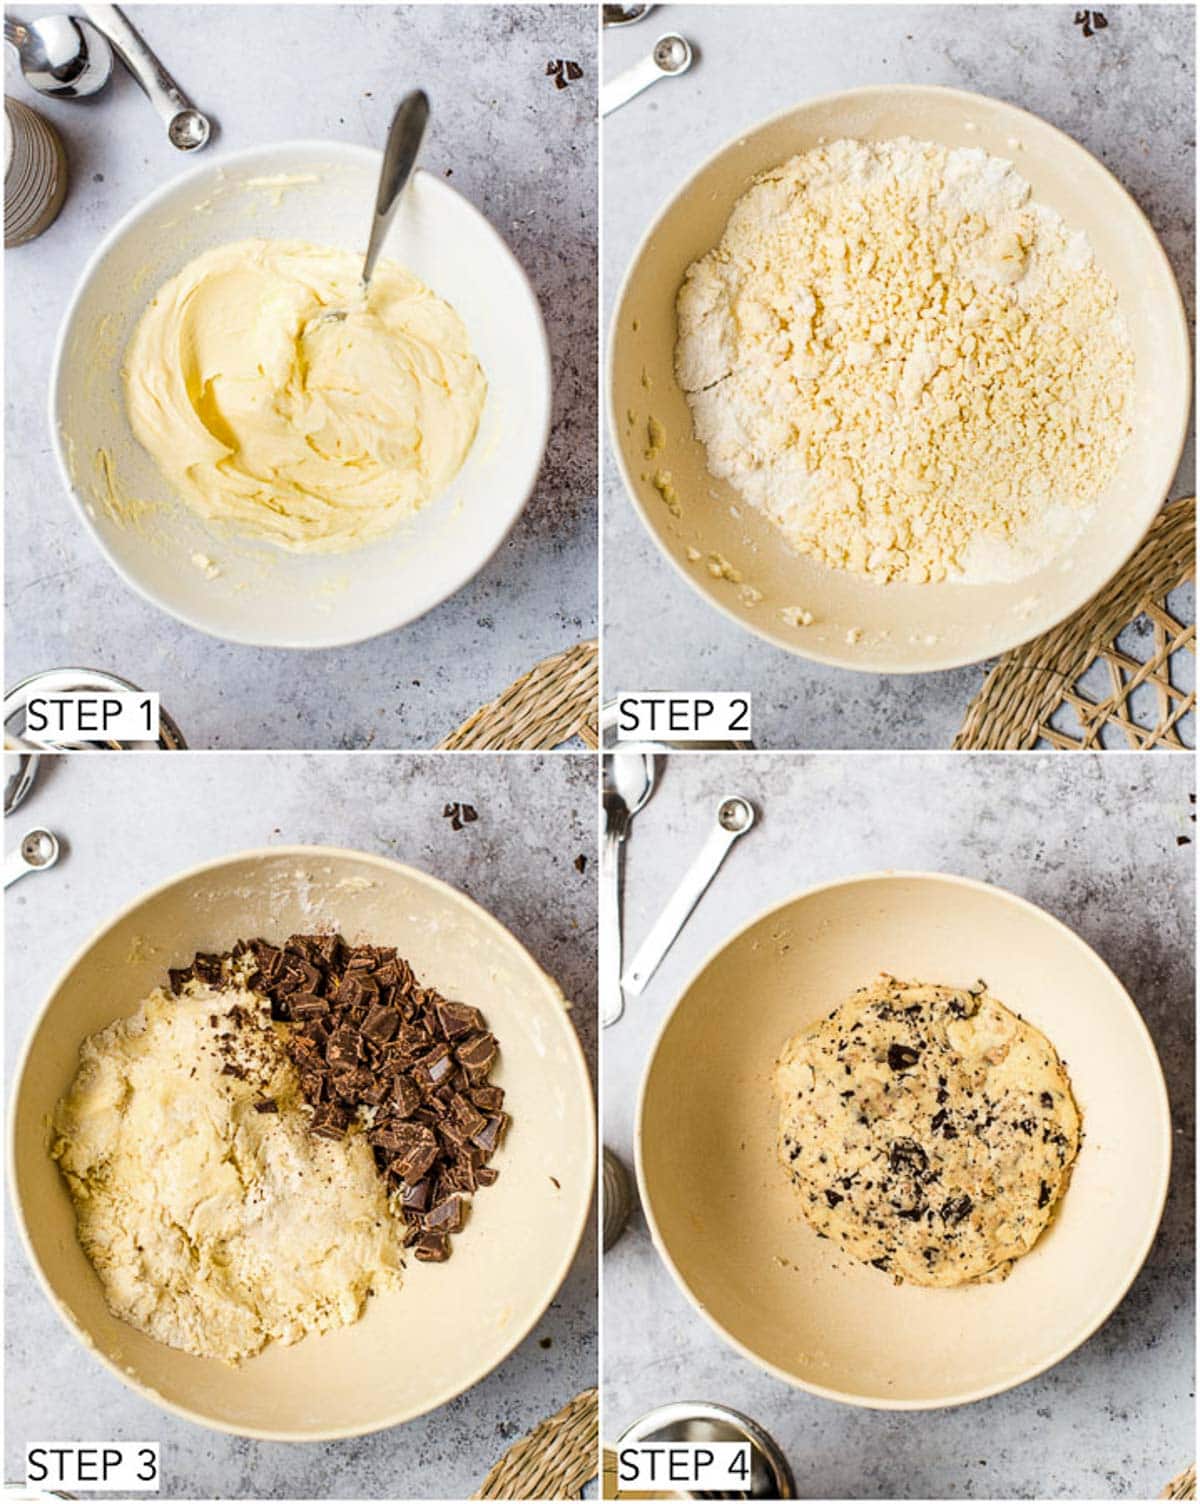
1.First, use a fork to cream the dairy-free butter, sugar and vanilla essence.
2. Secondly, add flour, cornstarch and salt. Then mix with a mixer (or by hand) until crumbly consistency as shown on photo 2. Do not overwork/over mix your batter.
3. Time to chop up chocolate and add to mixture.
4. Gently fold in the chocolate chunks, making sure you don't over-knead the mixture.
After you've completed the first 4 steps, it's time to cover your dough in cling film, set aside in fridge for at least 30 minutes.
This will relax the gluten, preventing it from becoming chewy and tough. In the meantime, I encourage you to relax as well and make a lovely cuppa!
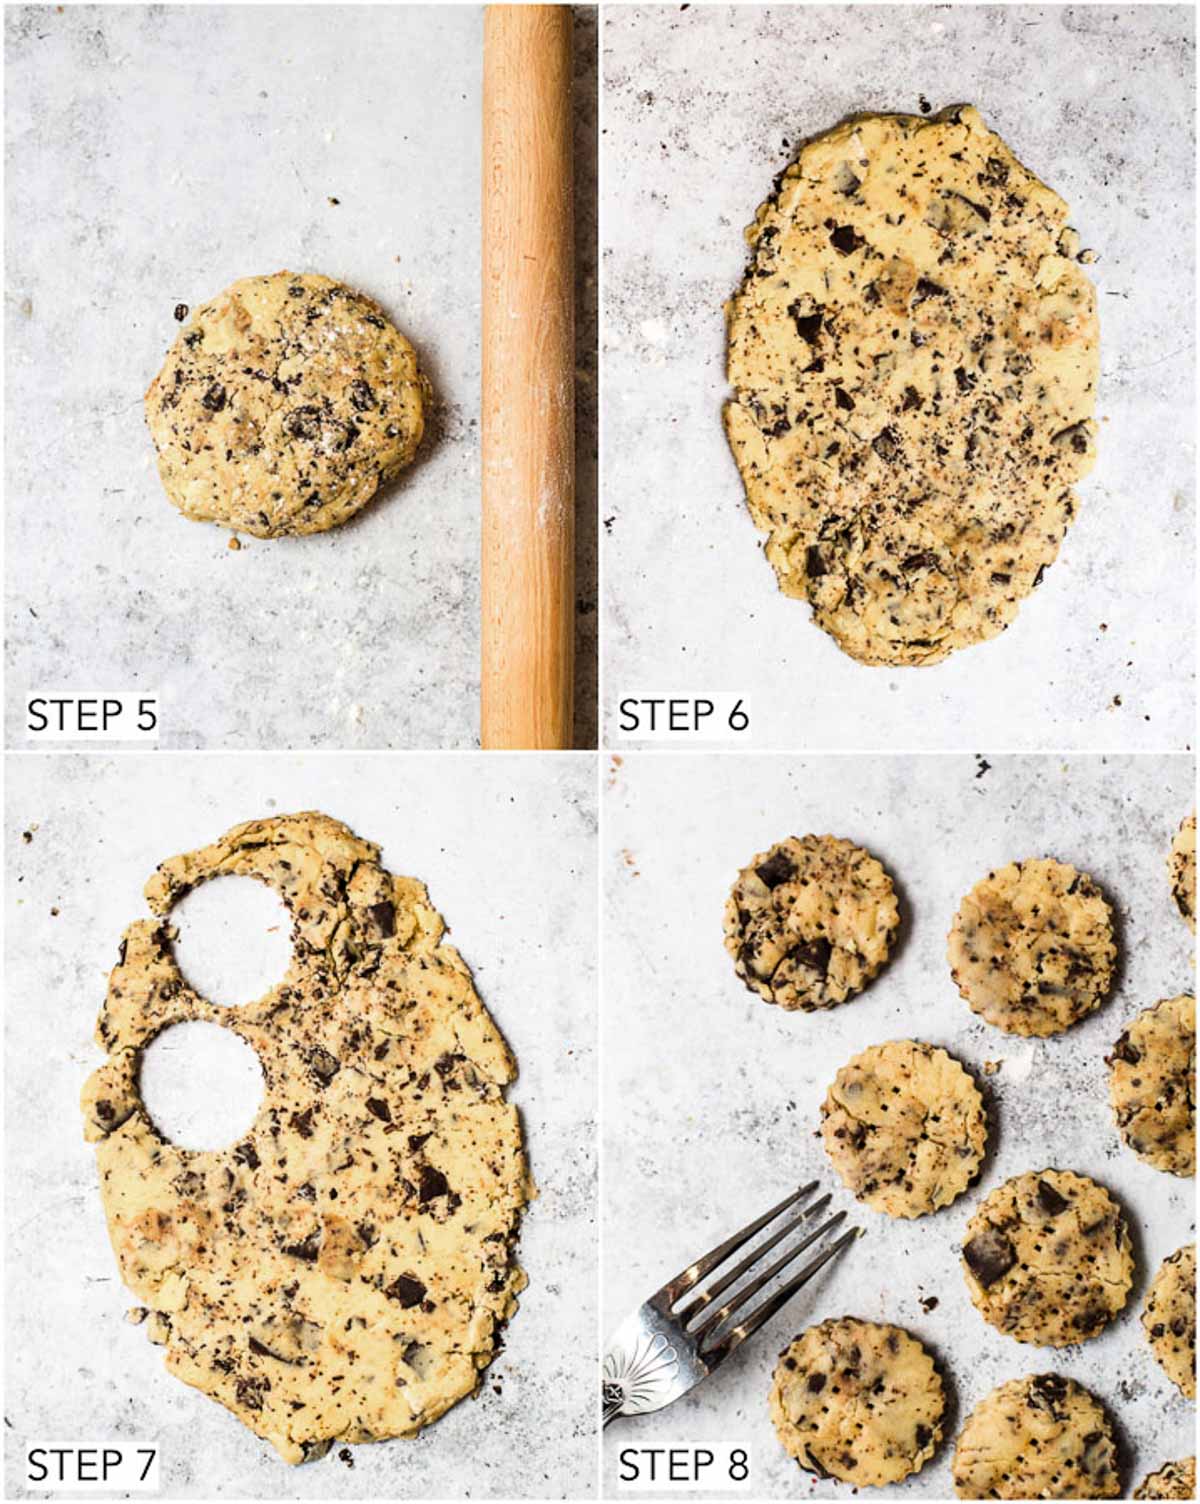
5. Remove the dough from the fridge and dust with a little bit of white flour (not too much). This will make the rolling process easier.
6. Roll out the dough until it measures approx. 1 cm in thickness.
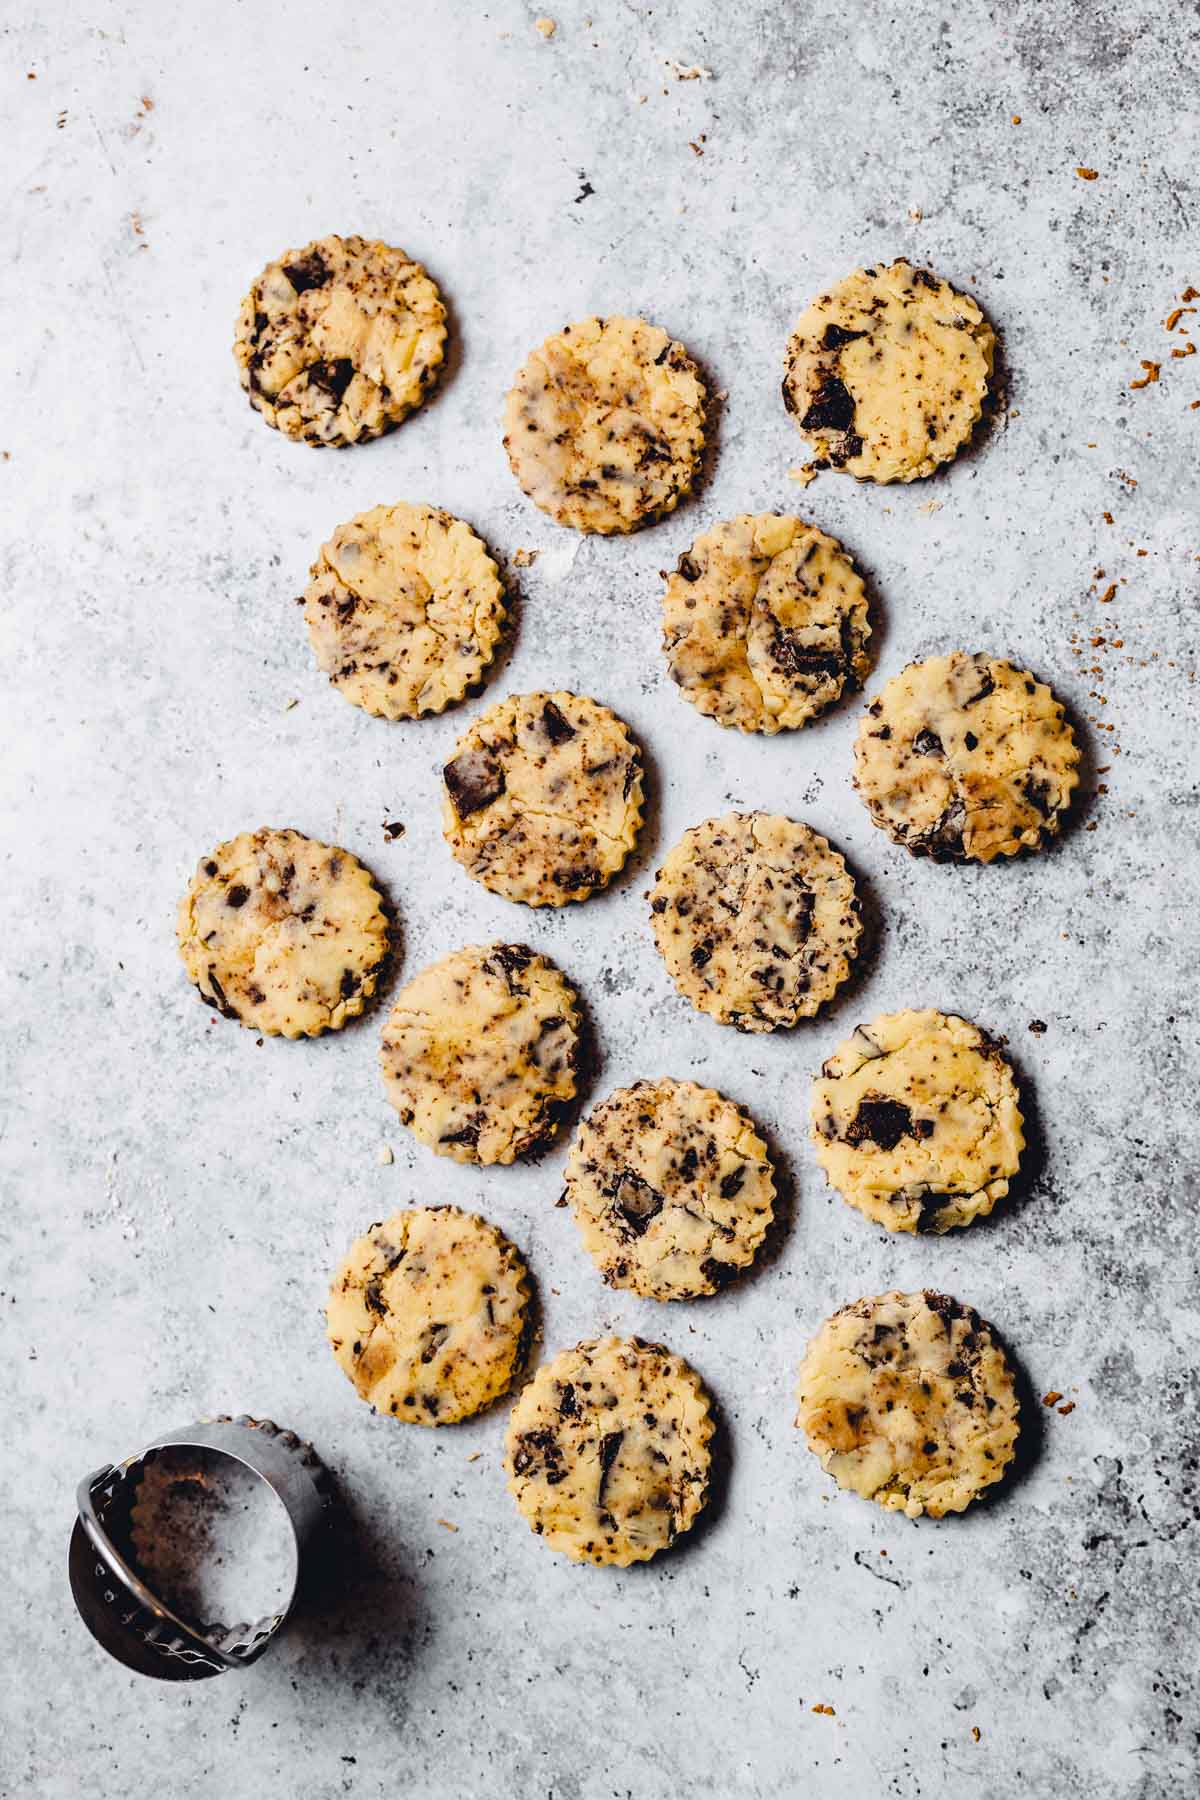
7. Use a cookie cutter to cut your biscuit shapes.
8. Use a fork to make small holes into your cookies as shown on photo 8.
AND we're almost there! Preheat the oven to 160°C/320°F fan setting (or 180°C/356°F for regular setting).
Place biscuits on parchment paper, sprinkle with caster sugar and bake for 35 minutes.
Expert Tips
Just like I mentioned above, this is a really easy recipe. However, this doesn’t mean some tips wouldn’t come in handy. Here are my top tips:
- Do not knead too much. This is one of the most common mistakes. If you knead your dough for too long, you will be left with a tough cookie, not a buttery, crumby shortbread.
- Pick a good-quality dark chocolate for the best flavour. If you’re going to splurge on one ingredient, let it be dark chocolate. In fact, I encourage you to do that. It will pay off for sure and before you ask, yes, you can absolutely taste the difference. That being said, you don’t need to break the bank with a £10 bar. Simply just pick something decent.
- Precision is everything. There’s only 1 part of this recipe that really requires precision. It’s the baking time. Be aware that just a few minutes too long or too short can make a difference. Stick to the baking temperature and time given below and you should be fine.
Shortbread vs sugar cookies
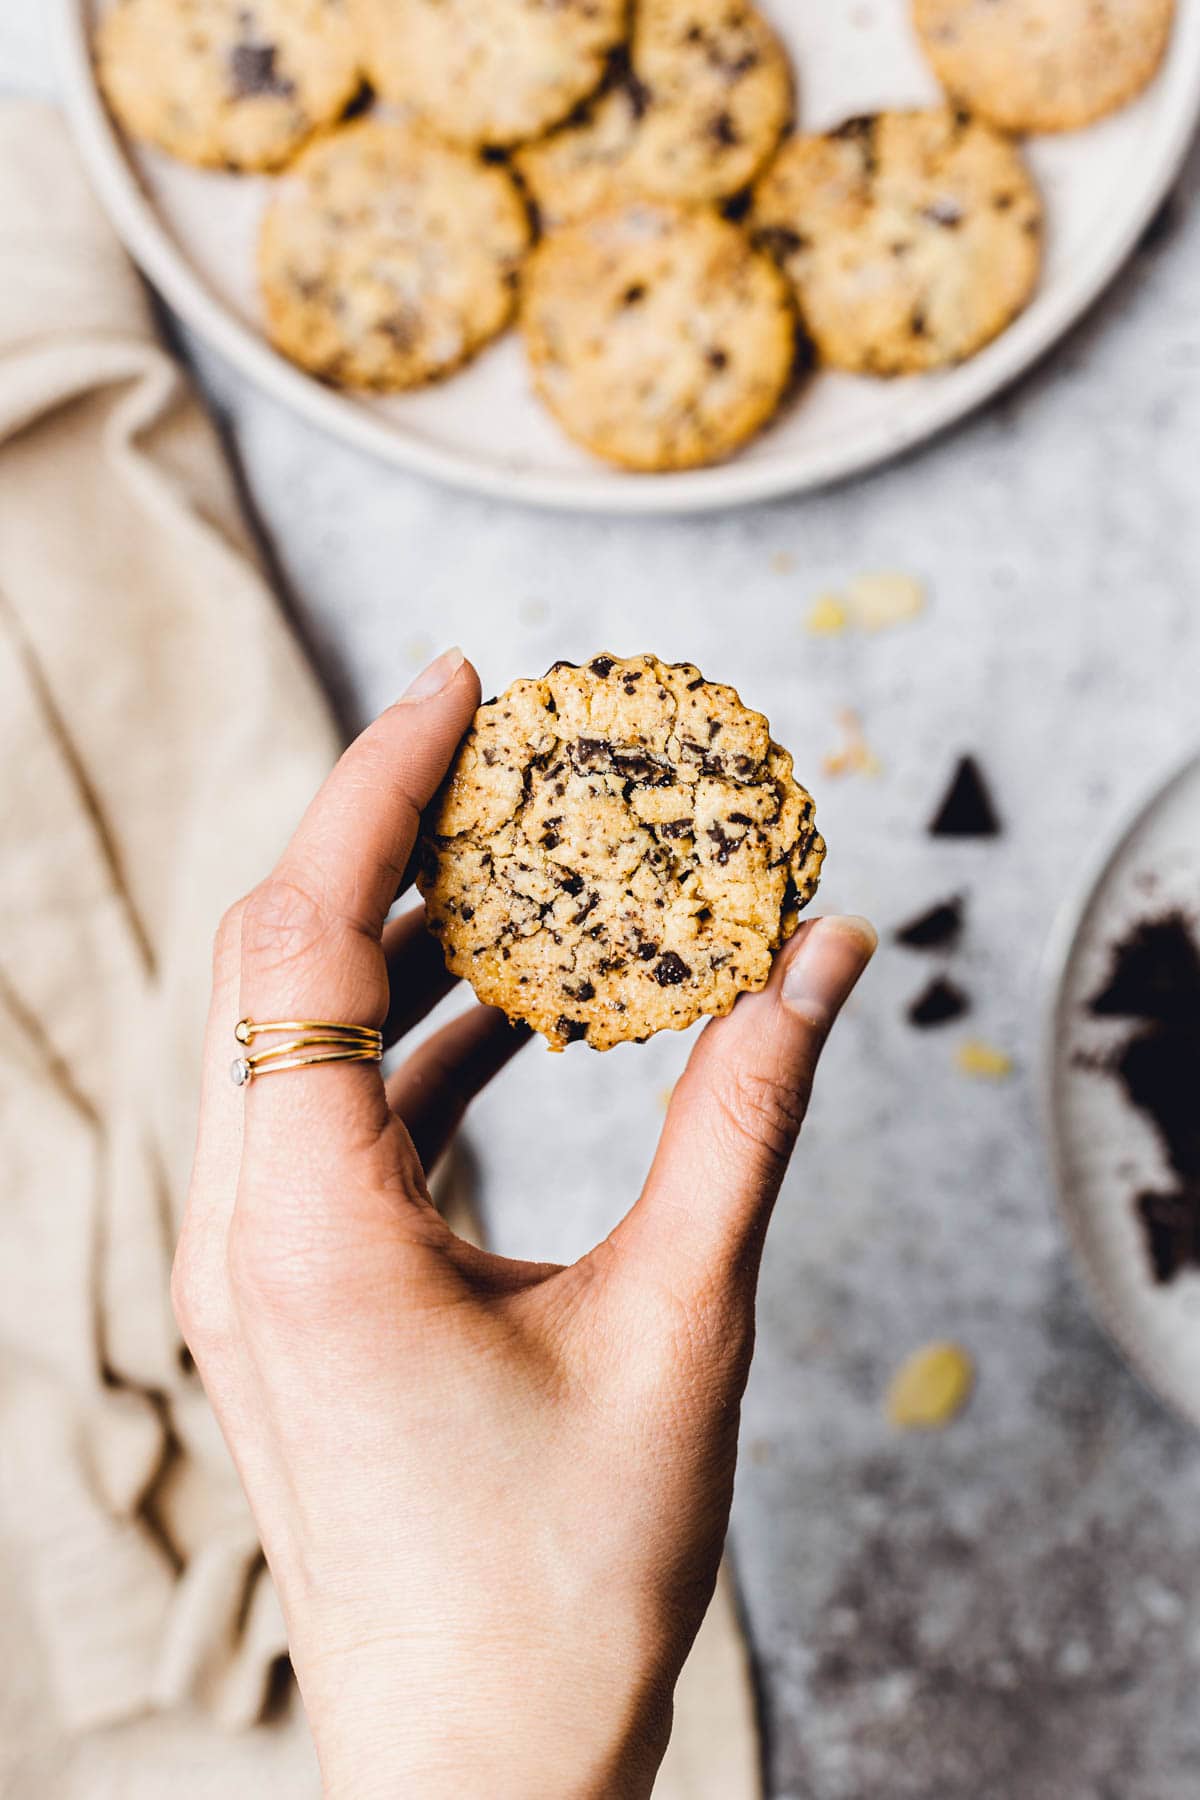
Not familiar with shortbread biscuits? In comparison with sugar cookies, shortbread is dense, crumbly and has a non-chewy inside. It normally bakes at a lower temperature and has the highest ratio of butter-to-flour.
One of the best things about shortbread is its crumbly, tender and crispy texture.
Wondering how to achieve that? When mixing your ingredients, you want to combine them just enough to bind everything into a dough. Be careful NOT to knead or overwork it! If you knead the dough, you will be left with a tough cookie and not a crumbly shortbread.
However, if you are still on the lookout for a chewy, gooey alternative, why not try out my BestofVegan-featured Chocolate Chip Cookies!
Additionally, you can find out all about different types of cookies here.
F.A.Q. and Troubleshooting
If your dough simply just crumbles between your fingers. you will need to add more dairy-free butter to the mixture. Be careful to only add a tablespoon or so at a time.
Yes, that's not a problem at all. Simply roll out the dough as instructed. Then use a sharp knife to cut out simple rectangle shapes (like this).
For more delicious vegan desserts like this, make sure to check out my:
This just about wraps it all up! As always, if you have any trouble making my vegan shortbread cookies, simply comment down below or message me directly on Instagram. I’ll be sure to help you out in case you get stuck!
🍴Recipe
Vegan Shortbread Cookies with Chocolate
Equipment
- Measuring cups or scales
- Baking tray and baking paper
Ingredients
- 195 g (6.88 oz) dairy-free butter I used Vitalite
- 65 g (2.29 oz) caster sugar
- ½ teaspoon vanilla essence
- 200 g (7.05 oz) plain white flour do not use strong flour
- 85 g (3 oz) cornstarch
- A pinch of salt
- 100 g (3.53 oz) dark chocolate I used 70% cocoa dark chocolate
- caster sugar to sprinkle on top
Instructions
- Use a fork to cream dairy-free butter, sugar and vanilla essence.
- Add flour, cornstarch and salt.
- Mix with a mixer (or simply using your hands) until crumbly consistency. Crucial to this recipe – do not overwork/overmix your batter.
- Chop up chocolate and add to mixture.
- Cover dough in cling film and set aside in fridge for 30 minutes. This will relax the gluten, preventing it from becoming chewy and tough.
- Pre-heat your oven to 160°C/320°F (fan oven. Set to 180°C/356°F if you don't have a fan oven setting)
- Roll out your dough until 1 cm thick and cut out your shortbread / cookie shapes with a cookie cutter.
- Place biscuits on parchment paper, sprinkle with caster sugar and bake for 30 minutes.
Notes
- Using the hand mixer is completely optional. You can do the job just as well by mixing the dough with your hands.
- Don't have cling film? Simply place the dough into a bowl and cover the bowl with a moist towel instead.
- Don't be tempted to roll out your dough too thin. This will make it more difficult to handle.
- Don't have a cookie-cutter? Use a sharp knife to cut these into rectangle shapes instead. Alternatively, you could use the top of a small glass to cut out the round shapes.
- 30 minutes baking time might initially sound a little bit long for tiny biscuits, but this is needed because of the extra moisture present in dairy-free butter.
Nutrition
Disclaimer: The nutritional information above is calculated automatically. The author of this post cannot guarantee 100% accuracy of this data.



Sarah
Perfectly crunchy! Loved the addition of the little chocolate chips - really lifted up the flavours for me 🙂
Paloma
Hello Tajda,
I prepared the: -Vegan Shortbread Cookies with Chocolate- I'll tell you that they were delicious I thank you with all my heart for your great gastronomic work, your recipes are a treasure for humanity, soon I hope to prepare the recipe: -Vegan Lemon Loaf Cake-
I am Paloma and I send you a big hug
Tajda Ferko
Hi Paloma, thanks so much for your lovely review and for sharing a photo of your shortbread on Instagram, it looked amazing! Big hugs to Colombia. Tajda x
Vanessa
Hi,
Just about to try this lovely recipe. I’ve just noticed the two instruction lists are slightly different, is there a reason?
Tajda Ferko
Hi Vanessa, they are just a slightly re-worded version of the same instructions. Was there anything in particular that you struggled with? xx